Home » 2020 » March

Spring Cleaning 101: Make It Fast, Easy and Effective

Because you want to enjoy your space now without added fuss.
Spring is the perfect time to open up the windows in your house and clean every surface inch, but there’s no reason to spend more time on this task than necessary.
Use these tips to quickly get your home spic and span.
Have a plan
When it comes to spring cleaning, the best approach is an organized approach. “I recommend having a plan, which includes an outline of the areas you plan to clean, a schedule with time slotted to do that work (for you and any family members), as well as a list of products, tools and even cleaning techniques or tips pertaining to those areas,” says Melissa Maker, blogger and host of the popular YouTube show “Clean My Space.”
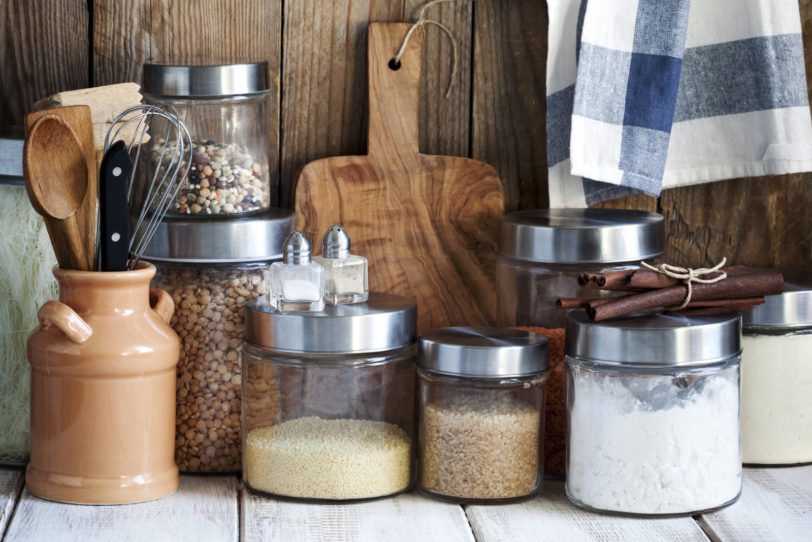
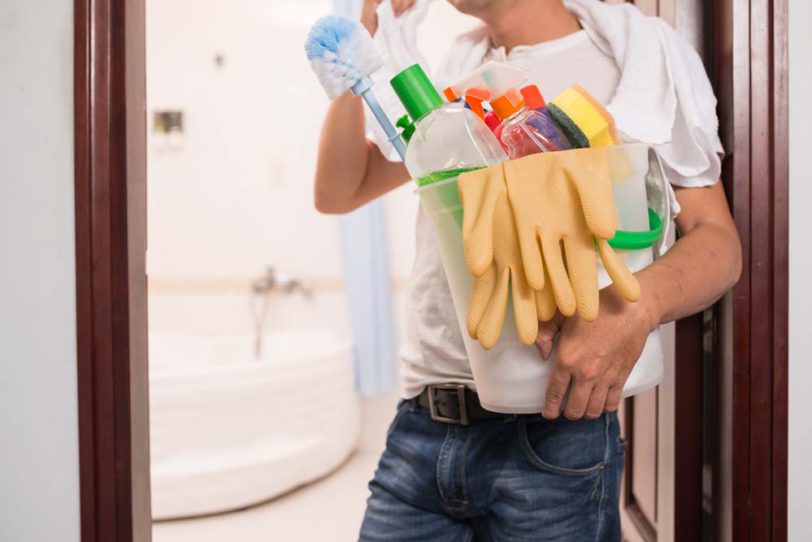
Choose the right supplies
When you’re making your spring cleaning plan, take inventory of what supplies you need to gather to begin cleaning. Once you figure out what you need, be sure to choose the most effective and powerful cleaning supplies so that the product is doing most of the work — not you.
Clean room by room
It’s easy to feel overwhelmed when you are going from room to room to complete various tasks. Choose to target one room at a time so you can see the results of your productivity quickly and not get discouraged.
Work smarter, not harder
Don’t scrub any more than necessary. Simple steps like soaking pots and pans before you scrub them, waiting for cleaning products to sit before you wipe down surfaces, and using the self-cleaning setting on your oven can save you tons of time.
Clean your cleaning supplies
Did you know your cleaning supplies, such as sponges or microfiber cloths, are most likely the dirtiest items in your home? It goes without saying that you can’t effectively clean your home with dirty supplies. So be sure to disinfect sponges or other cleaning supplies in a mixture of one part bleach and nine parts water for 30 seconds.
Don’t forget the …
There are several items in our homes that we often forget to clean on a regular basis. Among forgotten items, Maker recommends cleaning behind the oven, bathroom exhaust fans, refrigerator coils and window coverings.
Focus on the MIAs
Spring cleaning can be a huge undertaking (especially depending on the size of your home), so Maker suggests focusing on the MIAs, or the Most Important Areas. When deciding which area to choose, think about the most visible ones, like the living room or home office.
Get rid of the clutter
You can never truly have a clean and tidy home if you are buried in your own stuff. When cleaning out your things, remember the 80/20 rule: Only 20 percent of the items we own are truly important — so 80 percent of our belongings are just getting in the way.
Figure out ways to be more efficient in the future
While you are cleaning and organizing your home, take note of all the clutter that you most often find. For example, if you are finding that most of your clutter is paper, figure out the best ways to go paperless throughout the year.
Related:

Originally published March 24, 2016.… Read More

Organizing Your Pantry in 6 Easy Steps

When your pantry is tidy, every trip to grab a bag of chips or stash the week’s groceries will be a treat.
Food pantries can take just about any form. These versatile storage areas for canned goods, paper products and less frequently used small appliances may be housed in a walk-in room, a simple drawer, a wall cabinet or a closet. Hutches, armoires and even open shelving also work well.
Regardless of the setup, the key to a successful pantry is keeping it organized. Here are a few tips and tricks to get you started.
Clean it
Similar to a refrigerator, the first step to seeing what you have to work with is emptying it out and giving it a good overall cleaning. Start with the ceiling — look out for spider webs! — and work your way down to the floor.
Next, give shelves a thorough wipe-down with soap and water, capturing any dust and crumbs. If you’re feeling ambitious, repaint your shelves or even wallpaper the pantry. If not, simply line the shelves with contact paper and mop the floors.
Take inventory
While boxes and food items are strewn throughout your kitchen, grab a donation box and think about what you really need and use.
Were certain items out of reach that would be better relocated closer to the stove, like herbs and olive oil? Place those items where they may make more sense, and make a list of the items you need from the store to fill the culinary gaps.
Throw away expired products, and set aside any items you don’t think you’ll use — like the navy beans for that special recipe you never got around to making — for your local food bank
Solve problems
If the clean-out process revealed hard-to-reach items in the back of your pantry, relocate them. Put things you rarely need — like extra mixing bowls and seldom-used appliances — in the back, and label the front of the shelf to remind you of their new location.
If your pantry is deep enough, opt for installing roll-out shelving or wire bins for those hard-to-reach essentials.
Get a better view
If you have open shelving or glass-front cabinets, handling a mix of boxes, bags and random containers can be a challenge.
Invest in a large set of clear glass or plastic jars for storage. Their attractive uniformity will cut the visual chaos, and they’re perfect for storing baking supplies like flour and sugar.
Decide on storage solutions
Once you have a handle on what you want to store, it’s time to round up the items you need to put your pantry back together. Your list may include spice jars, Mason jars, contact paper, racks for aluminum foil and plastic wrap, and bins and baskets to wrangle small items.
Put it all back together
You’ve taken everything out and purged what you don’t need. Now it’s time to reload the pantry with everything you plan to store.
Group like items together — coffee and creamer with sweeteners; flour and sugar with baking soda; pastas and grains with oats; soups and olives with other canned items. Play around with your arrangement until it looks so organized that you feel proud enough to show it off.
Related:

Originally published January 2015… Read More

Add Heat Under Your Feet With a Radiant Flooring System

Installing an electric floor heating system can be a do-it-yourself project if you’re armed with the right skills and information.
It’s bad enough that you have to get up in the middle of the night to go to the bathroom, but that tile — it’s so cold!
The notion of warming floors for comfort is hardly new. Archeological digs reveal that, as early as 5,000 B.C., cave dwellers were drafting smoke through stone trenches in an effort to warm their subterranean floors.
These days, the two most common types of radiant floor heating systems are electric and hydronic, both of which are installed under your flooring.
Hydronic systems: A whole-home heating solution
Hydronic systems heat floors by using loops of plastic tubing to run hot water from a boiler or water heater under flooring. They have lower operating costs than electric systems but, because they generally require a boiler, pump and gas lines, they’re also far more complex. Hydronic heat might be a good option if you’re looking to add heat to your entire home or, at least, a large portion of it. Even if you have plumbing and electrical expertise, you’ll likely want to consult with a heating pro to ensure your system is well designed.
Electric systems: Good for small spaces
Electric systems come in a few options. The most popular of these systems relies on a continuous, pre-spaced heating element that’s woven into a plastic mesh mat and installed beneath your flooring. Electric radiant floor heating systems are easier and more affordable to install than hydronic systems, but they’re more expensive to operate, making them best suited for use in small spaces, such as kitchens or bathrooms. A DIYer with basic skills can install electric radiant heat, even if you need to hire an electrician to do the final hard-wire connection.
If installing an electric floor heating system is on your to-do list, here are some tips to keep in mind:
1. In addition to mesh mat, electric heat can be applied using a loose cable which you must position in a serpentine pattern, fasten with hot glue or staples and then “embed” with thinset or a self-leveling compound. Solid mats are the third and most expensive type of electric heat system. The cable is completely enclosed in synthetic fabric, plastic sheeting or foil. The real advantage to solid mats is that you don’t need to embed them. Do your research before deciding which type of electric in-floor heat is right for you.
2. When installing heat over a wood-framed floor, fiberglass insulation between the joists can make the system more efficient by driving heat upward. If you’re installing an electric system over a concrete floor, double-check the manufacturer’s recommendations; you may need to place a layer of foam insulation over the concrete before the heat cable is installed.
3. When calculating the square footage of a room, figure in only the areas where you can walk. There’s no need to spend money on heat that runs under the refrigerator or behind the toilet.
4. Because most electric heating must be installed under your tile, hardwood, stone, laminate or concrete floor, this is a project you’ll want to hold off on until you’re building or are ready to change the floors in an existing room. If you’re intent on adding heat without replacing your floor, you may be able to use solid mats that are sized to fit between joists, allowing you to heat the floor from below.
5. Many electric heating systems can be used under carpet but they’re often not as effective. If the carpet pad is thick, it will act as an insulator and won’t allow much heat through.
6. When you purchase your electric radiant system, pay special attention to the thermostat. Most models are programmable, allowing you to run the heat only during the hours when you’re home and awake. Others come with “smart” features that learn your routine and automatically adjust the temperature.
According to the U.S. Department of Energy, radiant heat is more efficient than baseboard or forced air systems. Rather than just blowing hot air around the room, radiant systems slowly and steadily charge the floor with heat, keeping it where you want it, longer. Additionally, the California Energy Commission reports the lack of moving air can be advantageous to those with severe allergies.
Originally published February 2014.… Read More