The internet and the people on it continue to blow my mind when it comes to design DIYs. Every time I attempt a DIY project I am overcome with admiration for the people that do the all of the time (I tend to bite off too much each time, ha)! But I also get it. The feeling you have when you are looking at your completed project is unbelievably satisfying. And honestly, we are all far more capable than we give ourselves credit for. So if you’ve been in the mood to DIY we have 17 awesome ideas for literally every level of DIYer, I pinky promise. I will say that most of these ideas are neutral-toned and trend forward. However, if white and beige aren’t your thing, you can mix it up! There’s no law that says you can’t pick the colors that work for your home, right? Okay, let’s dive in with one of my personal favorite DIYers, Luke Arthur Wells.
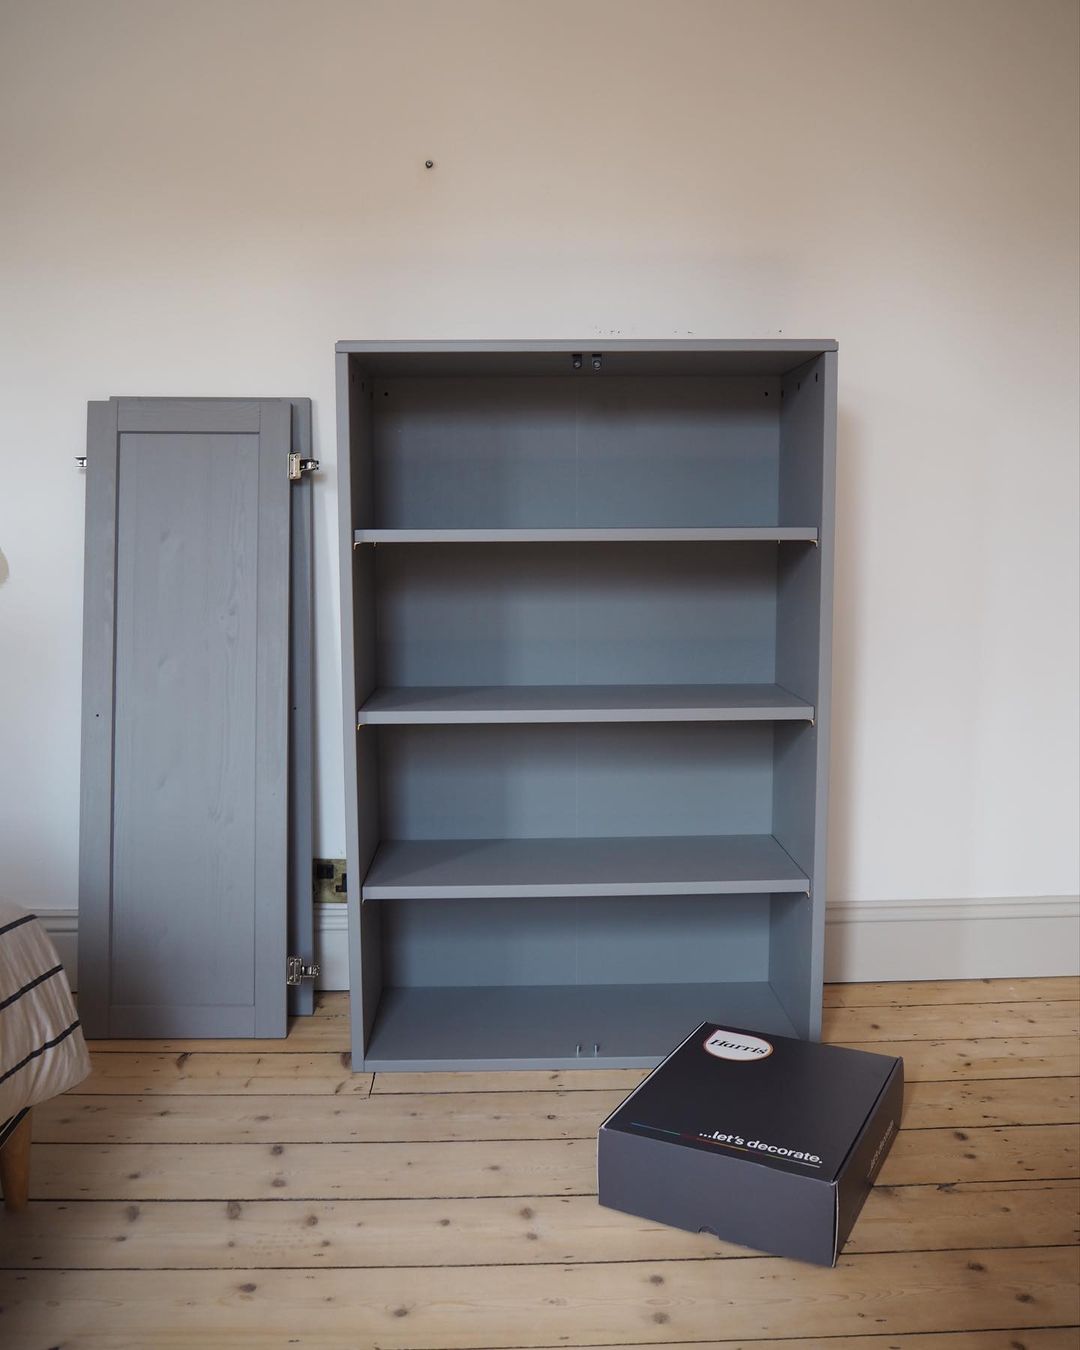
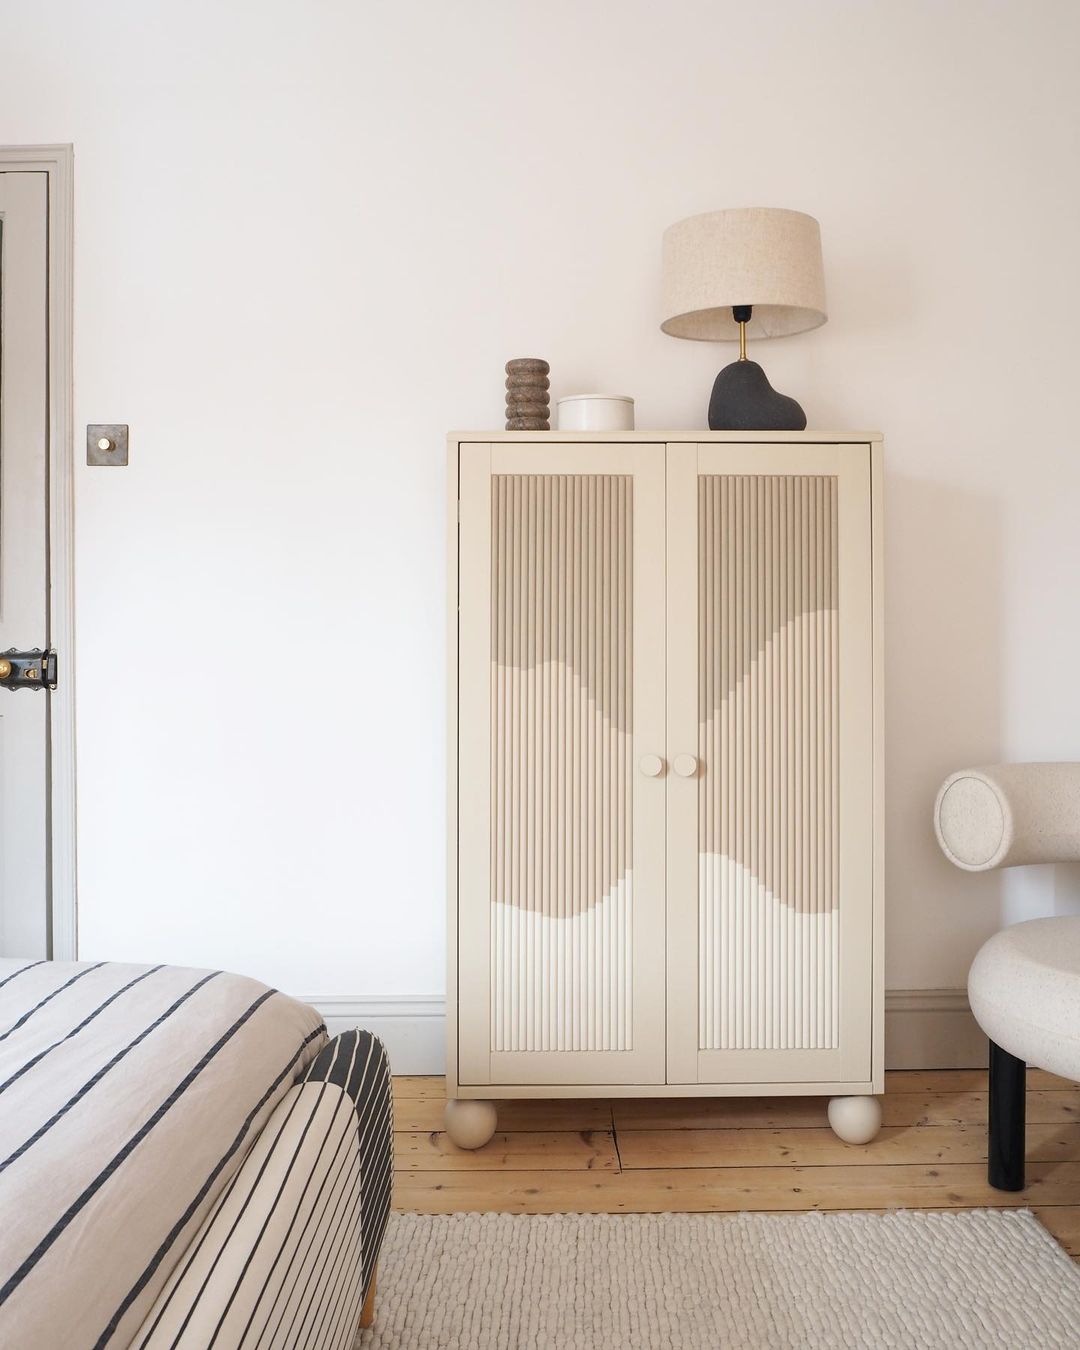
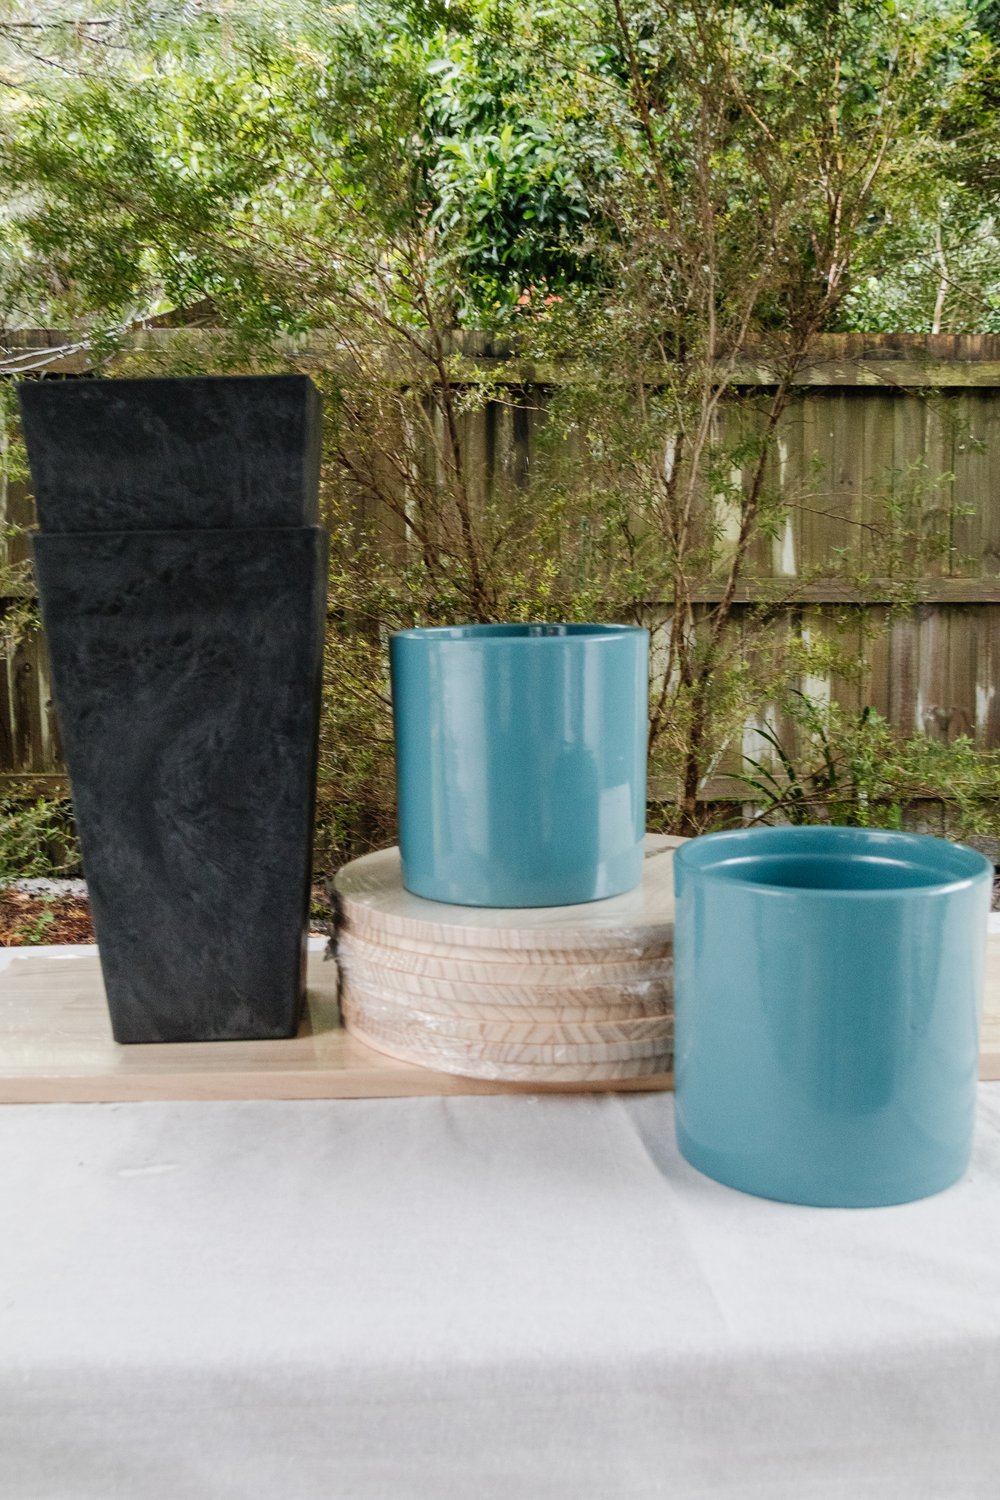
As I just said, Luke is one of my favorites. Every project is so freaking chic and beautiful and this IKEA vertical cabinet is yet another example. I love the beige tone, the ball feet, and the textured doors. Now if you love this idea but want a green cabinet, go for it! Maybe you prefer a different door pattern or no pattern at all? The world is your DIY oyster. So while this project may require a little time (especially if you want to paint a pattern:)), this is a super cute DIY IKEA hack. Here is his step-by-step process.
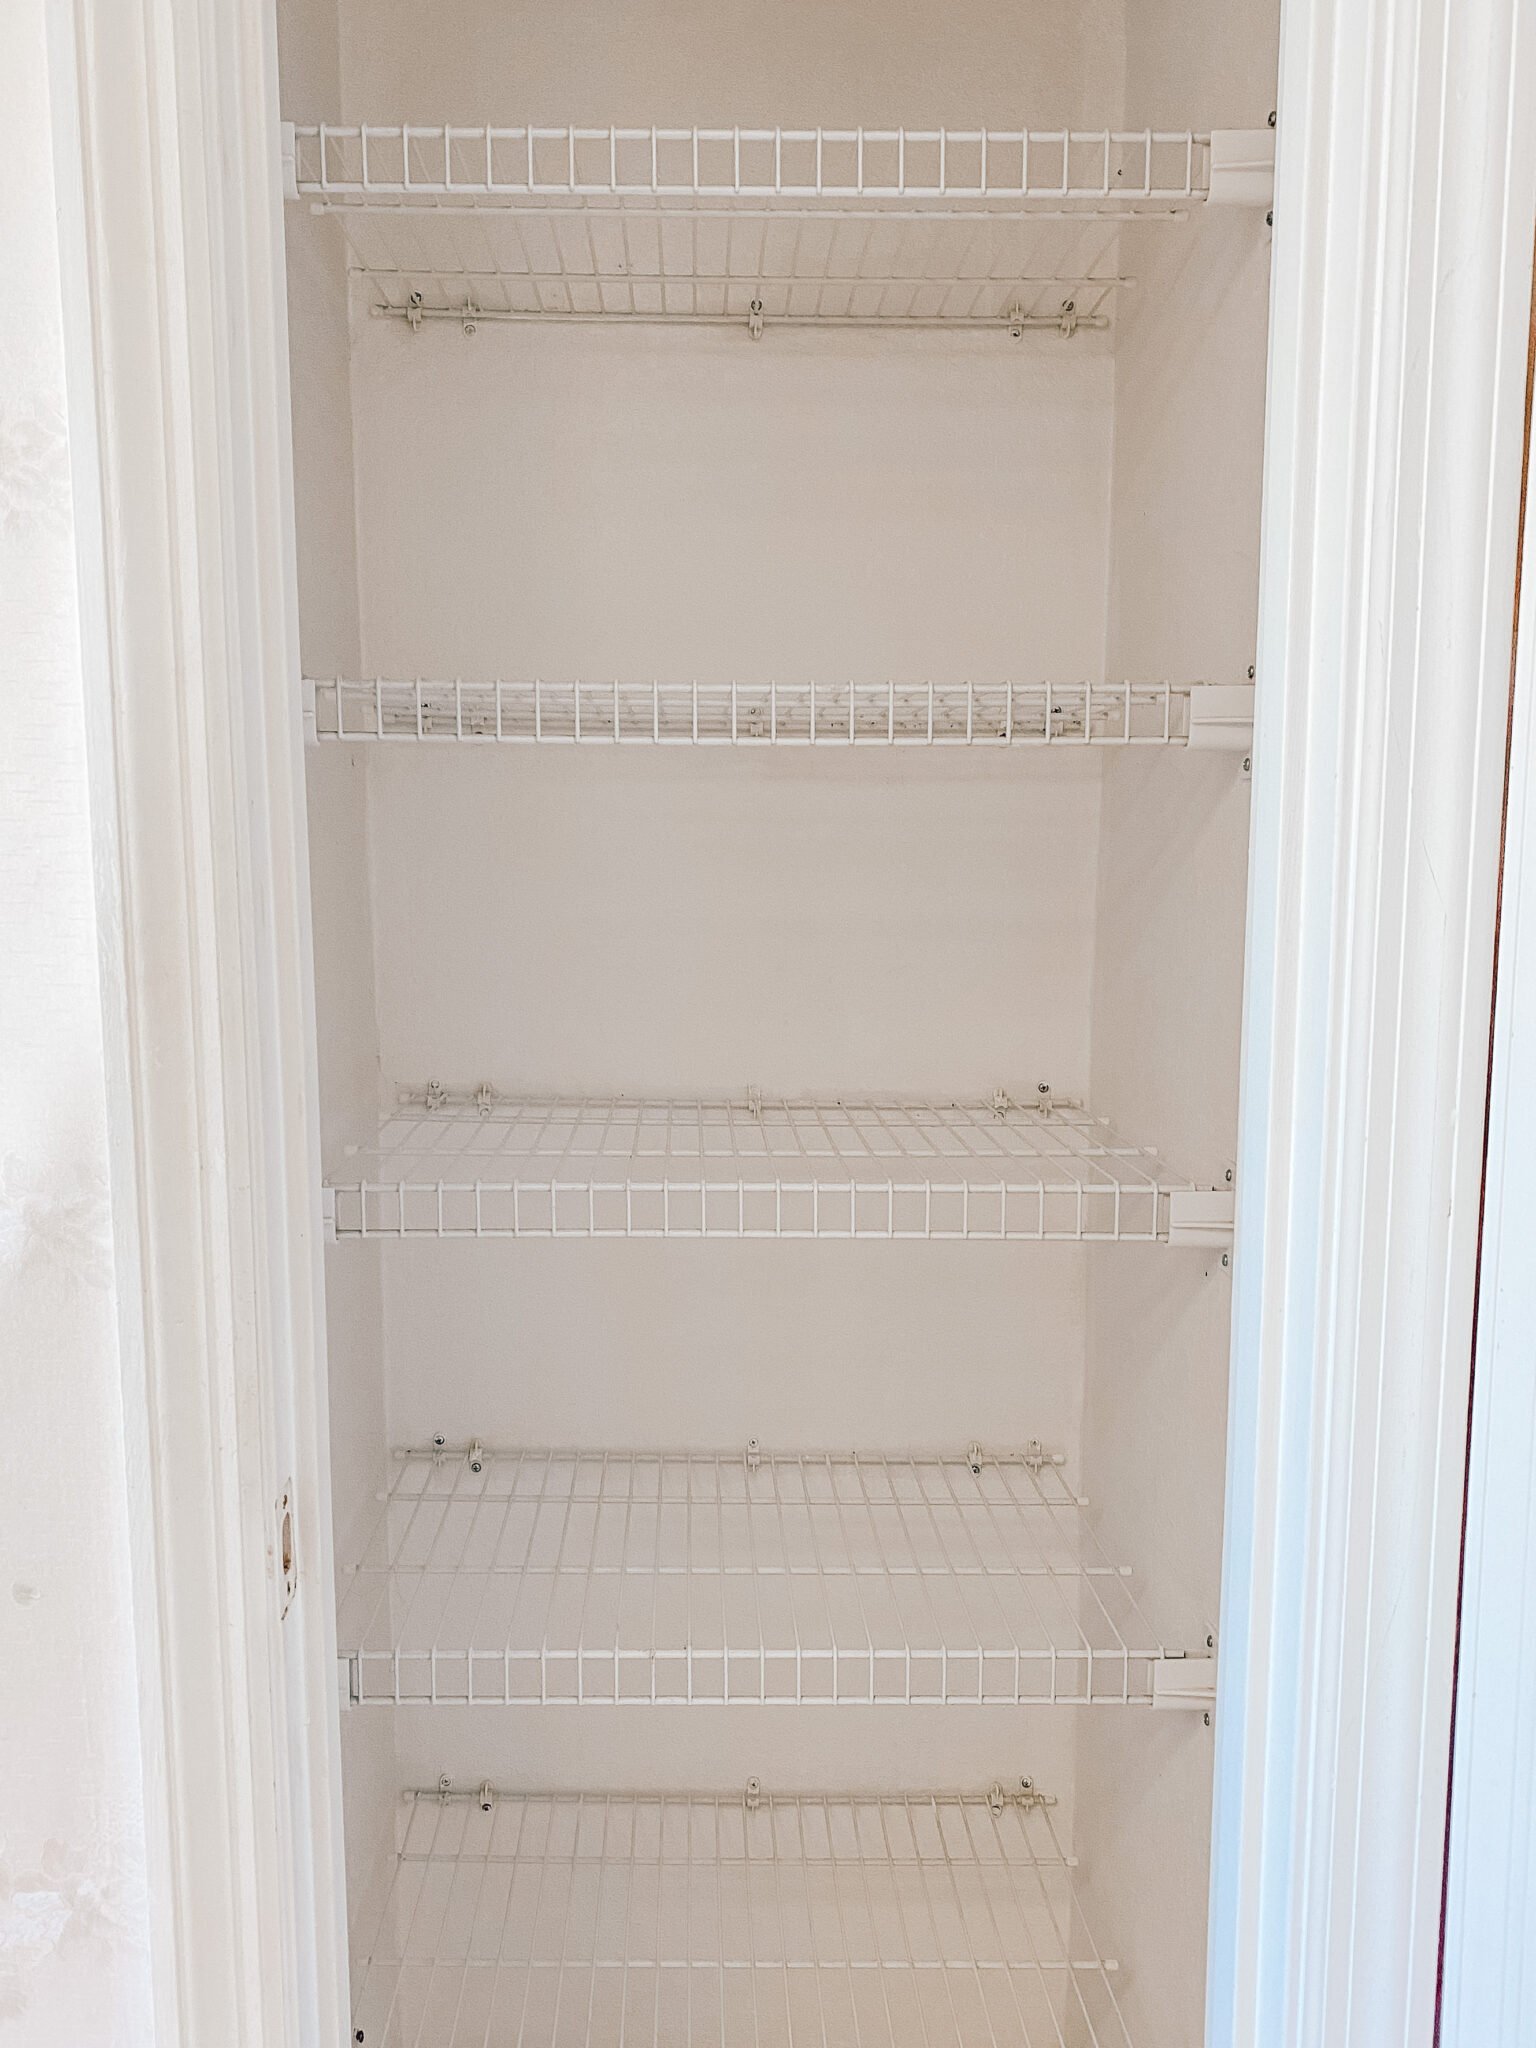
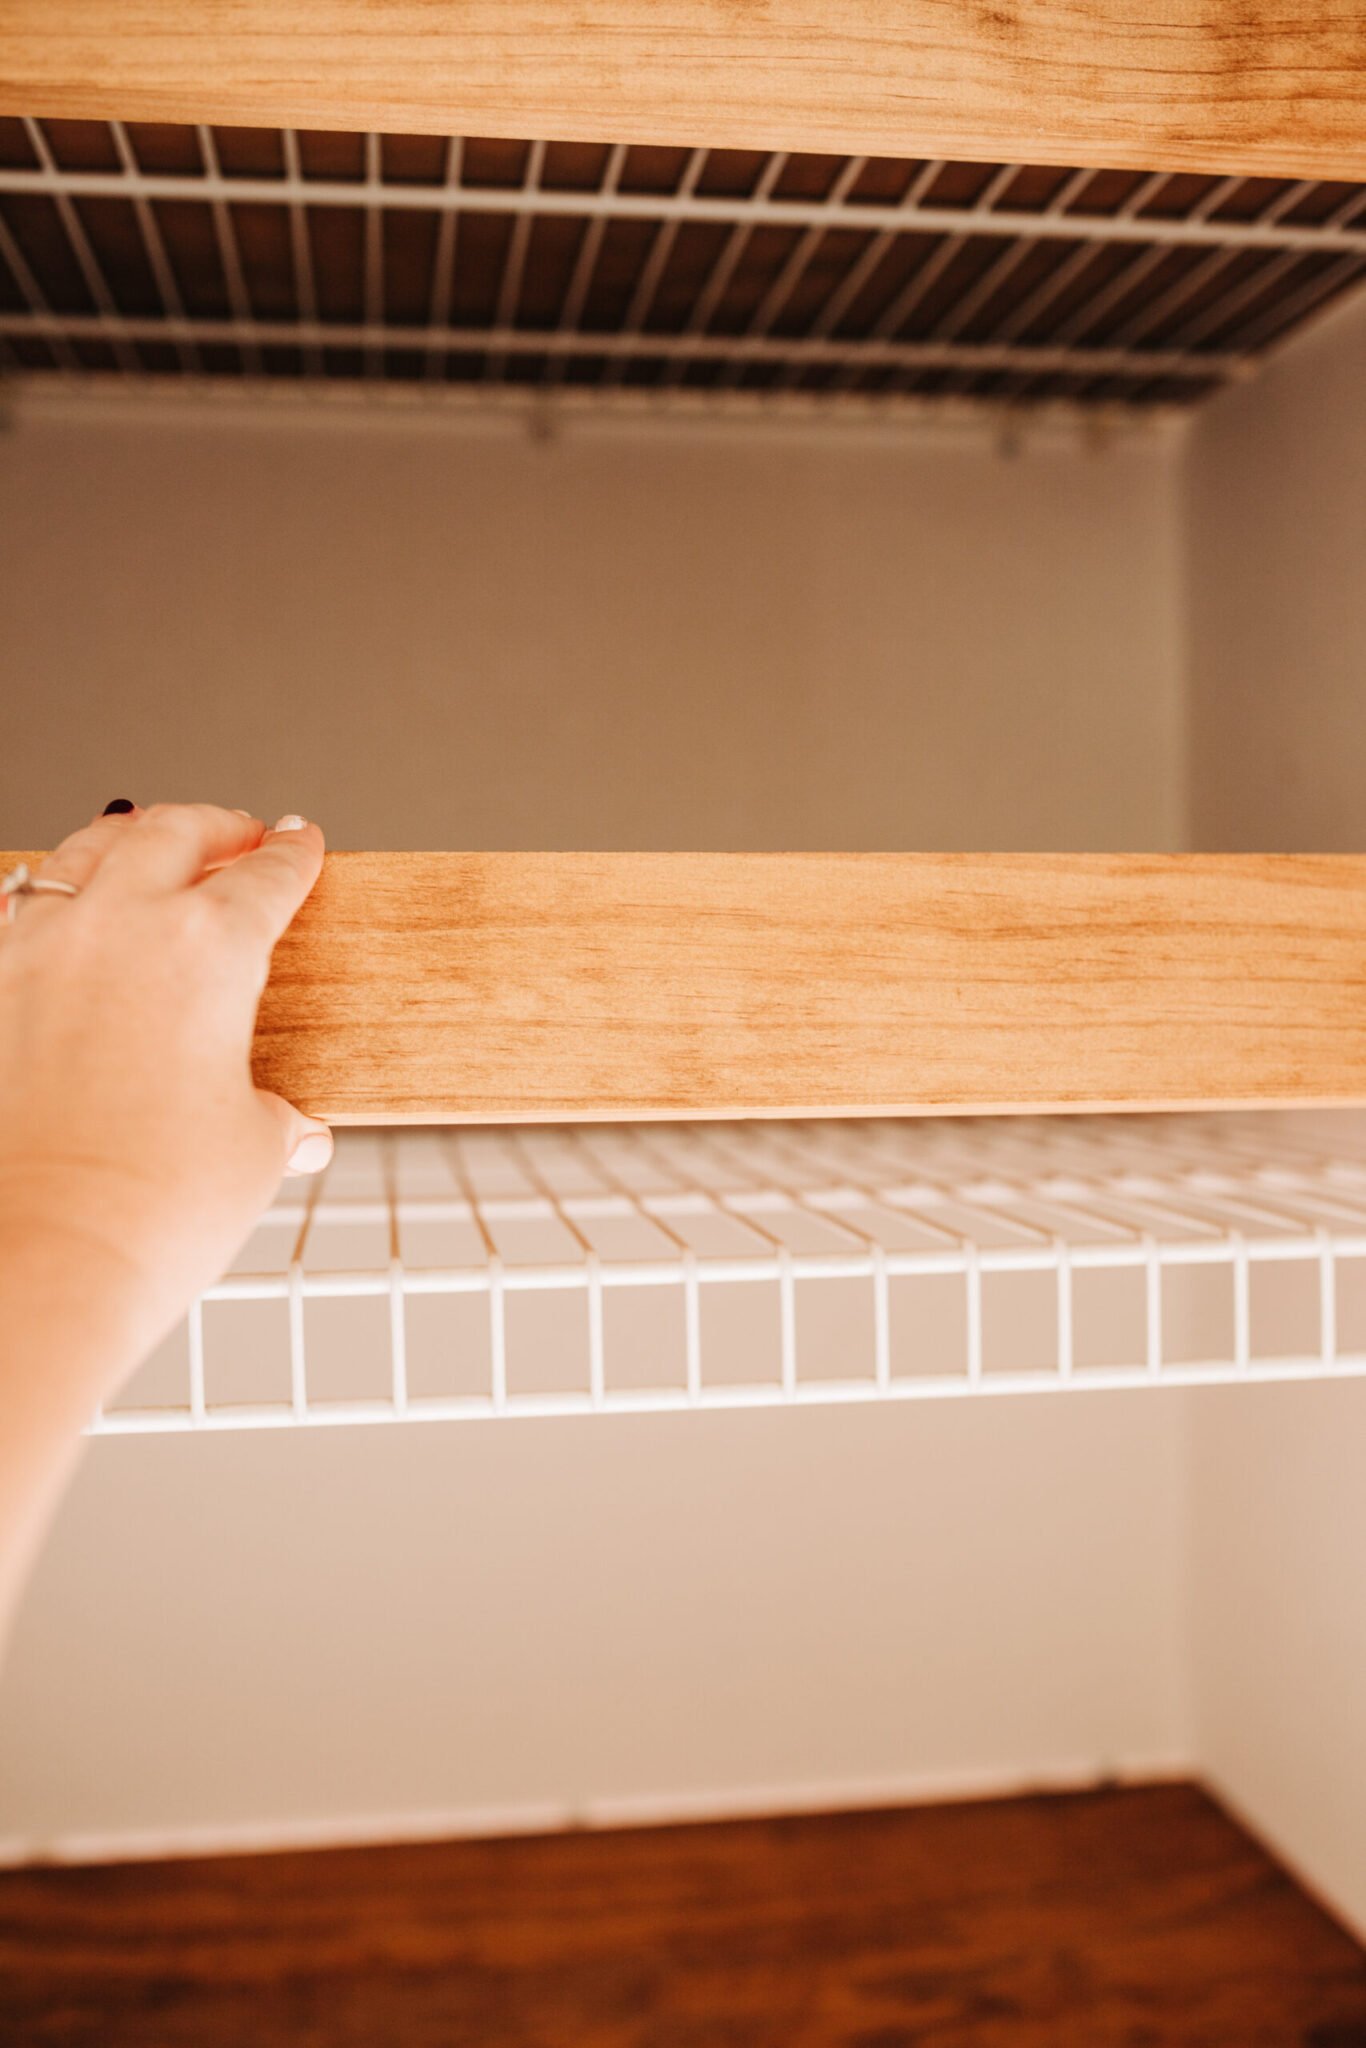
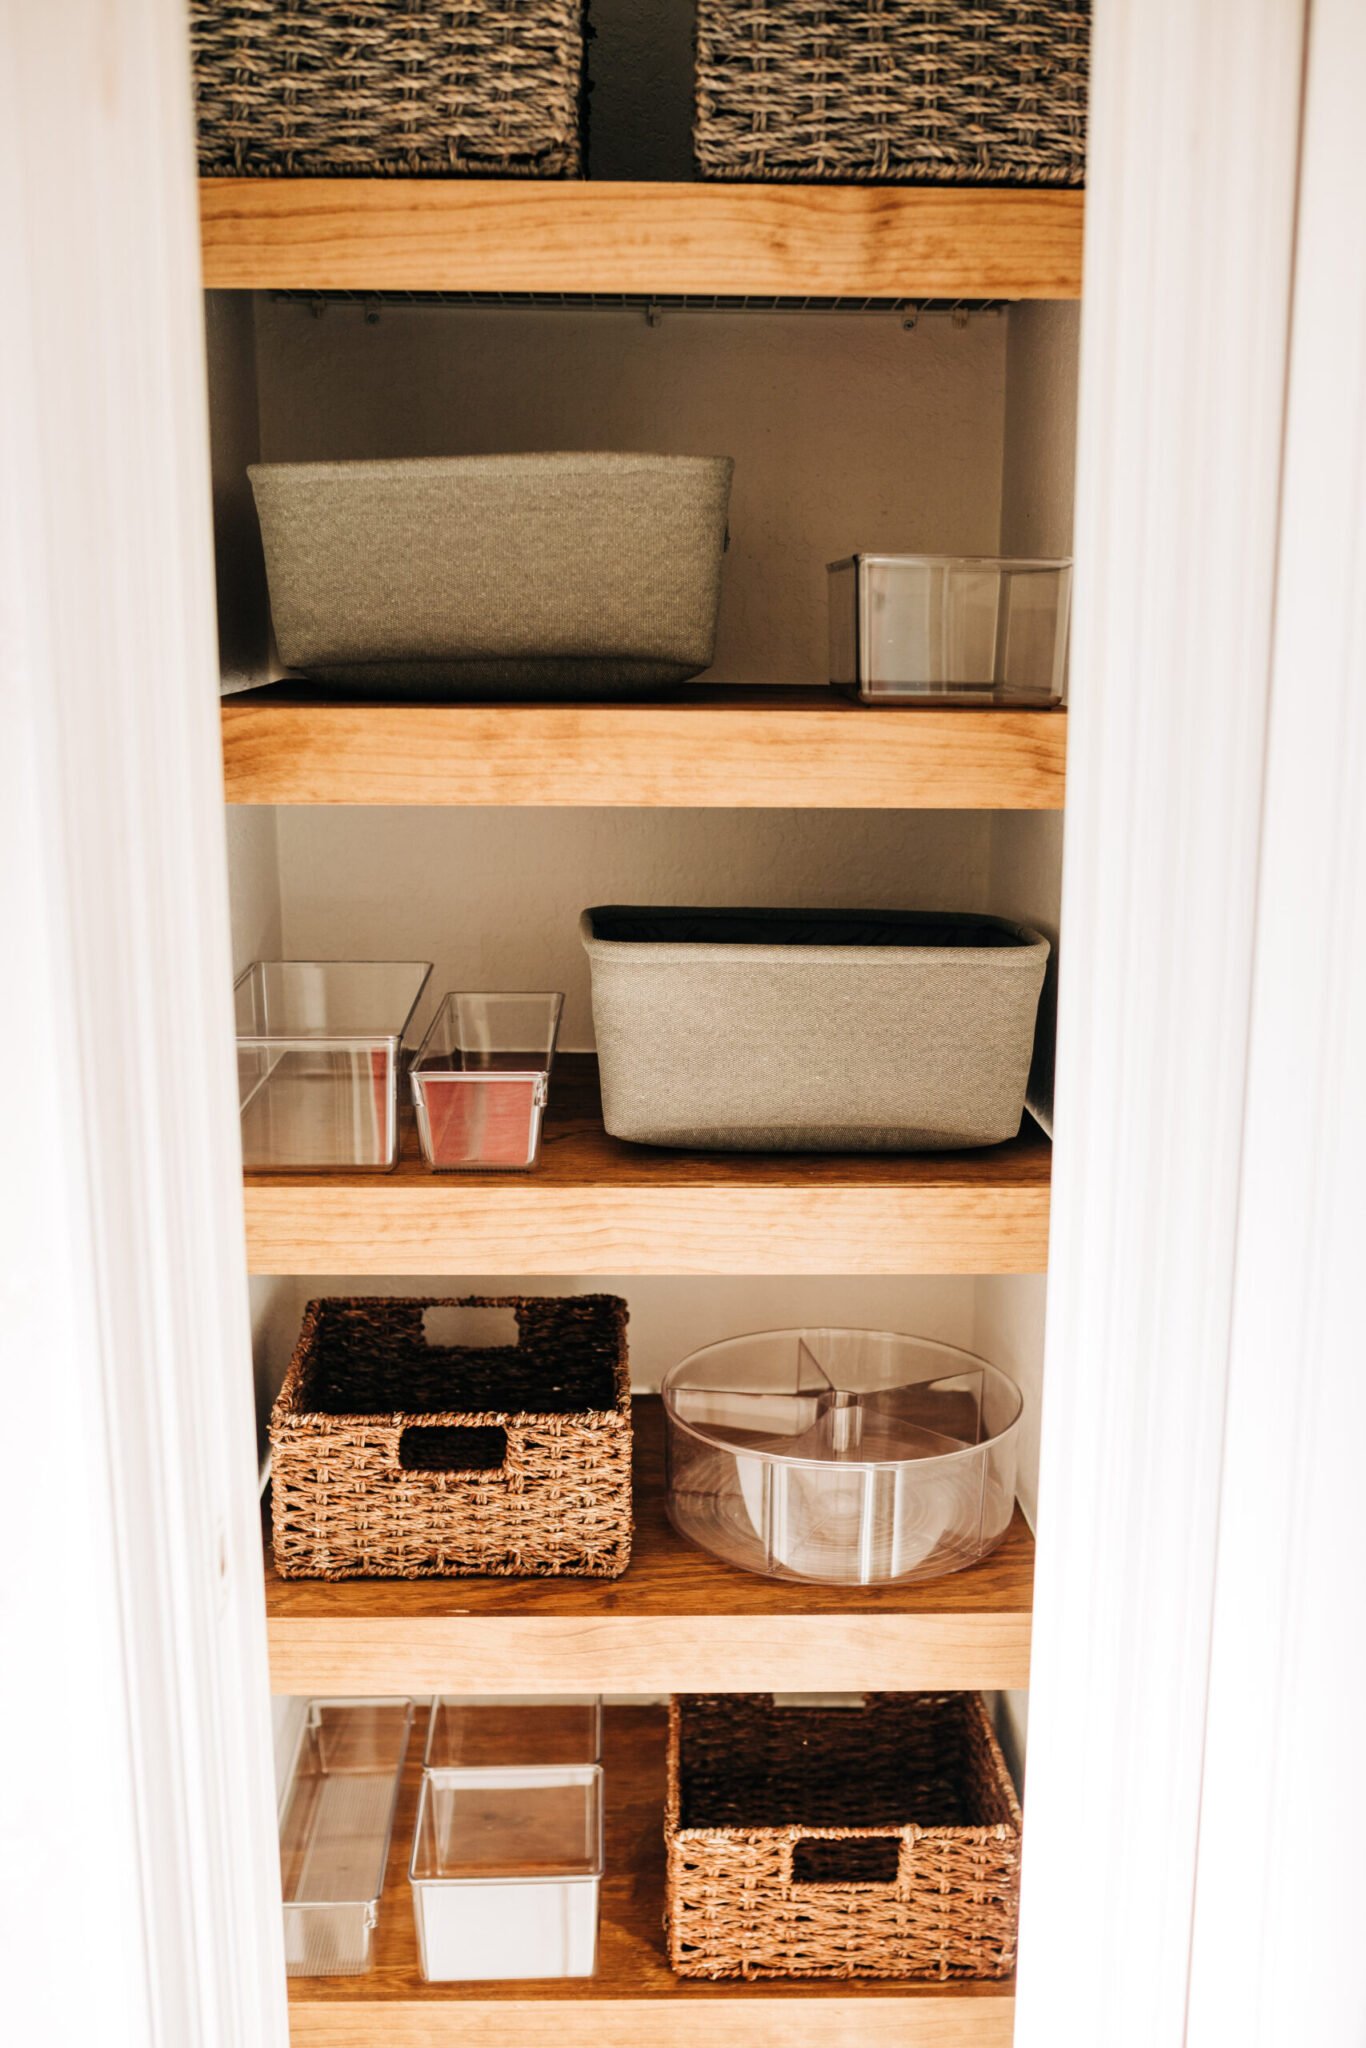
NO MORE WIRE SHELVES!! Juuuust kidding. But what I am not kidding about are these wood covers. They are so simple but SO transformative! I have seen these wire shelves in homes about 1 million times. And while they are perfectly fine as is, sometimes a solid surface is more ideal. It’s a 10/10 for me:) Go here for all of the instructions.

Hopefully, by now you’ve seen Anne’s beautiful office she just completed for a client. So while Anne is an incredible designer, this woman loves a practical DIY. This particular project is a dream for those who are afraid of the term “DIY”. I told you there was something for everyone! This project only requires you to measure and shop. So if you have or find an affordable side table with an X base, measure, then find a fun tray to put on top of the X. Easy peasy. For added storage, she suggests getting a cute box. Now you have a totally unique side table or nightstand.
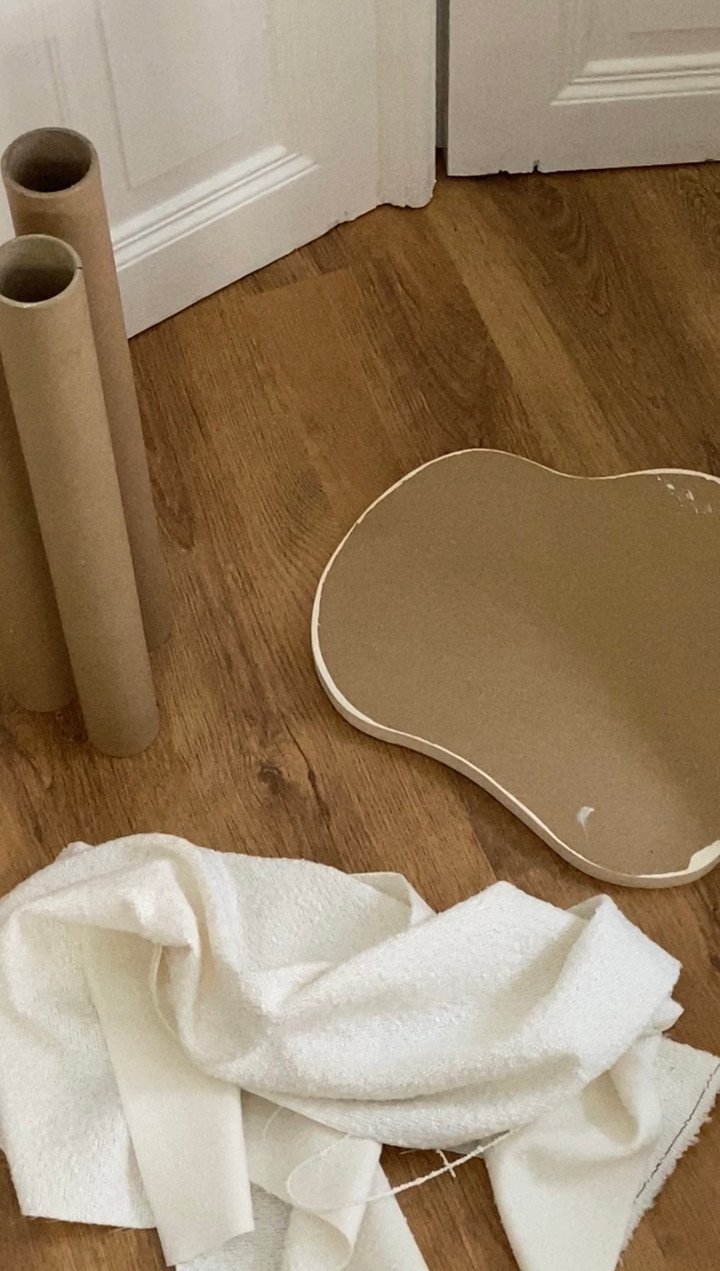
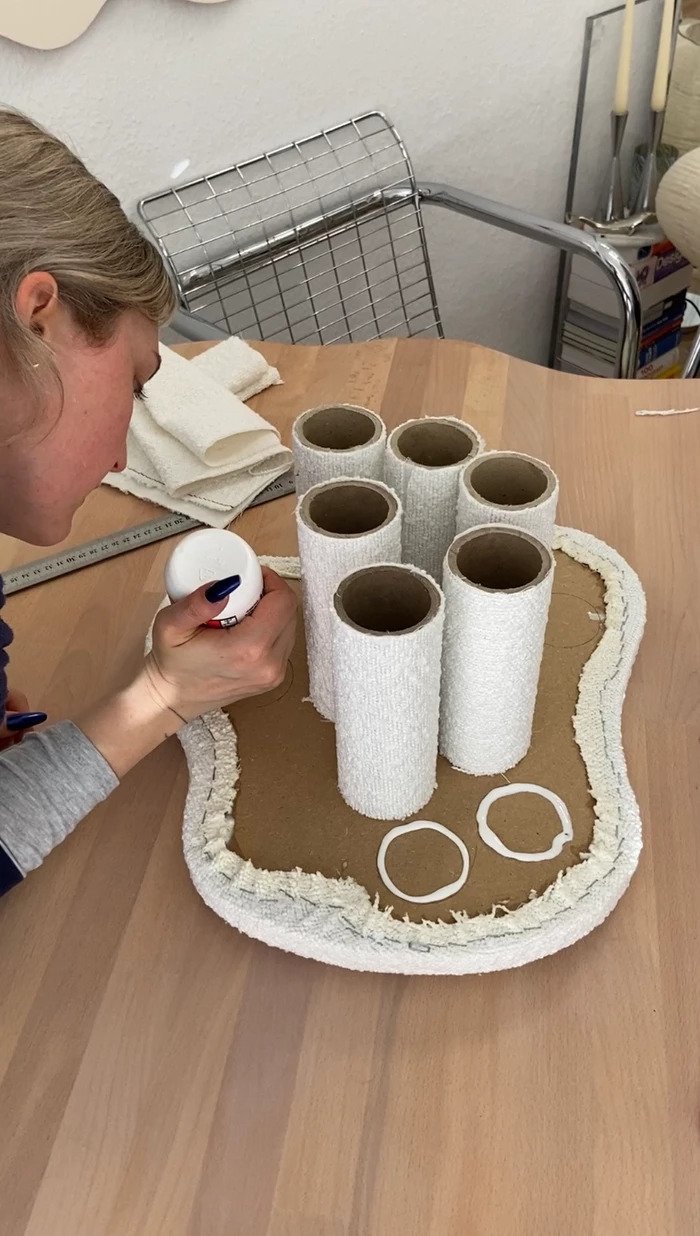
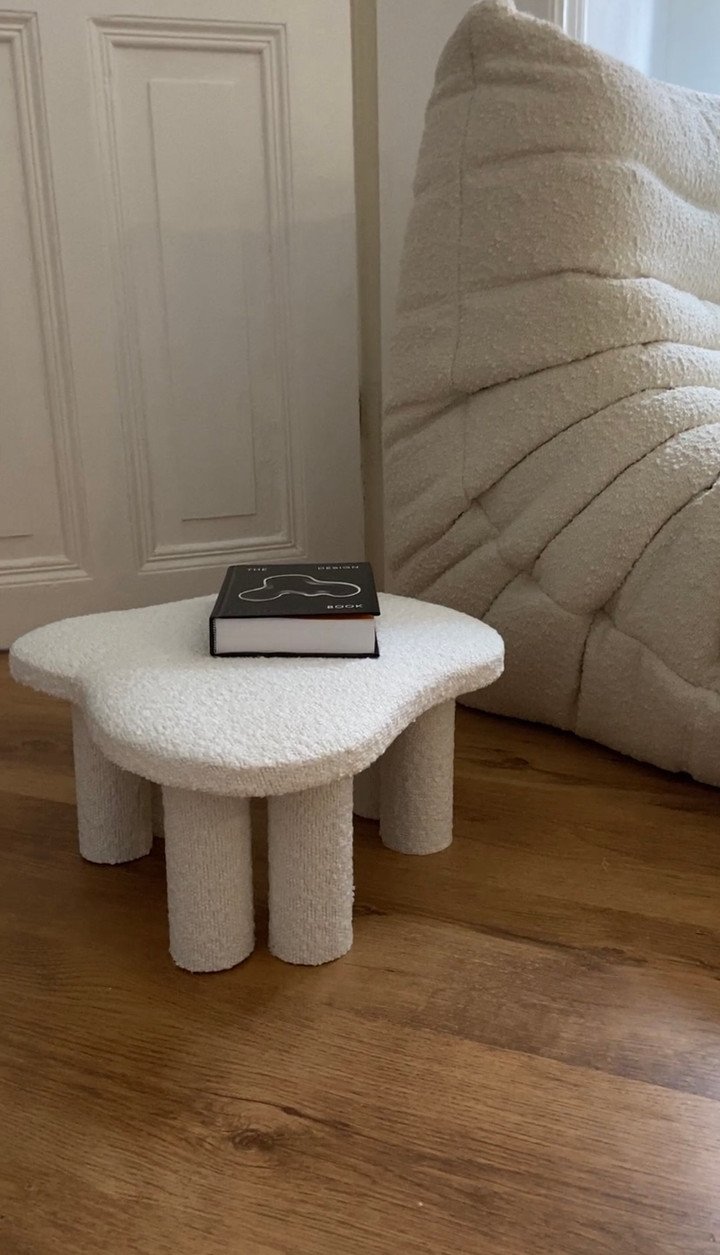
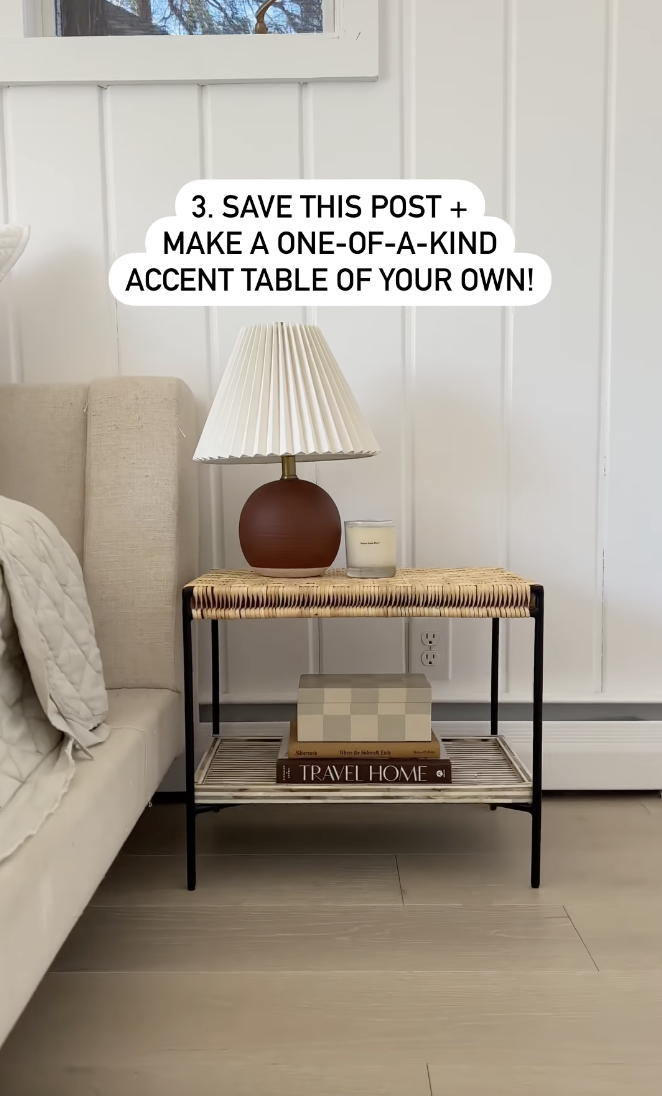
This side table is a bit more involved since it requires building the entire thing. But look how cool it is? I love the white boucle fabric since it’s so beautifully textured but it could also be awesome in a colorful patterned fabric. You’d just want to be careful with how to strategically place the pattern. Here’s the step-by-step (and a guide to boucle fabric)!
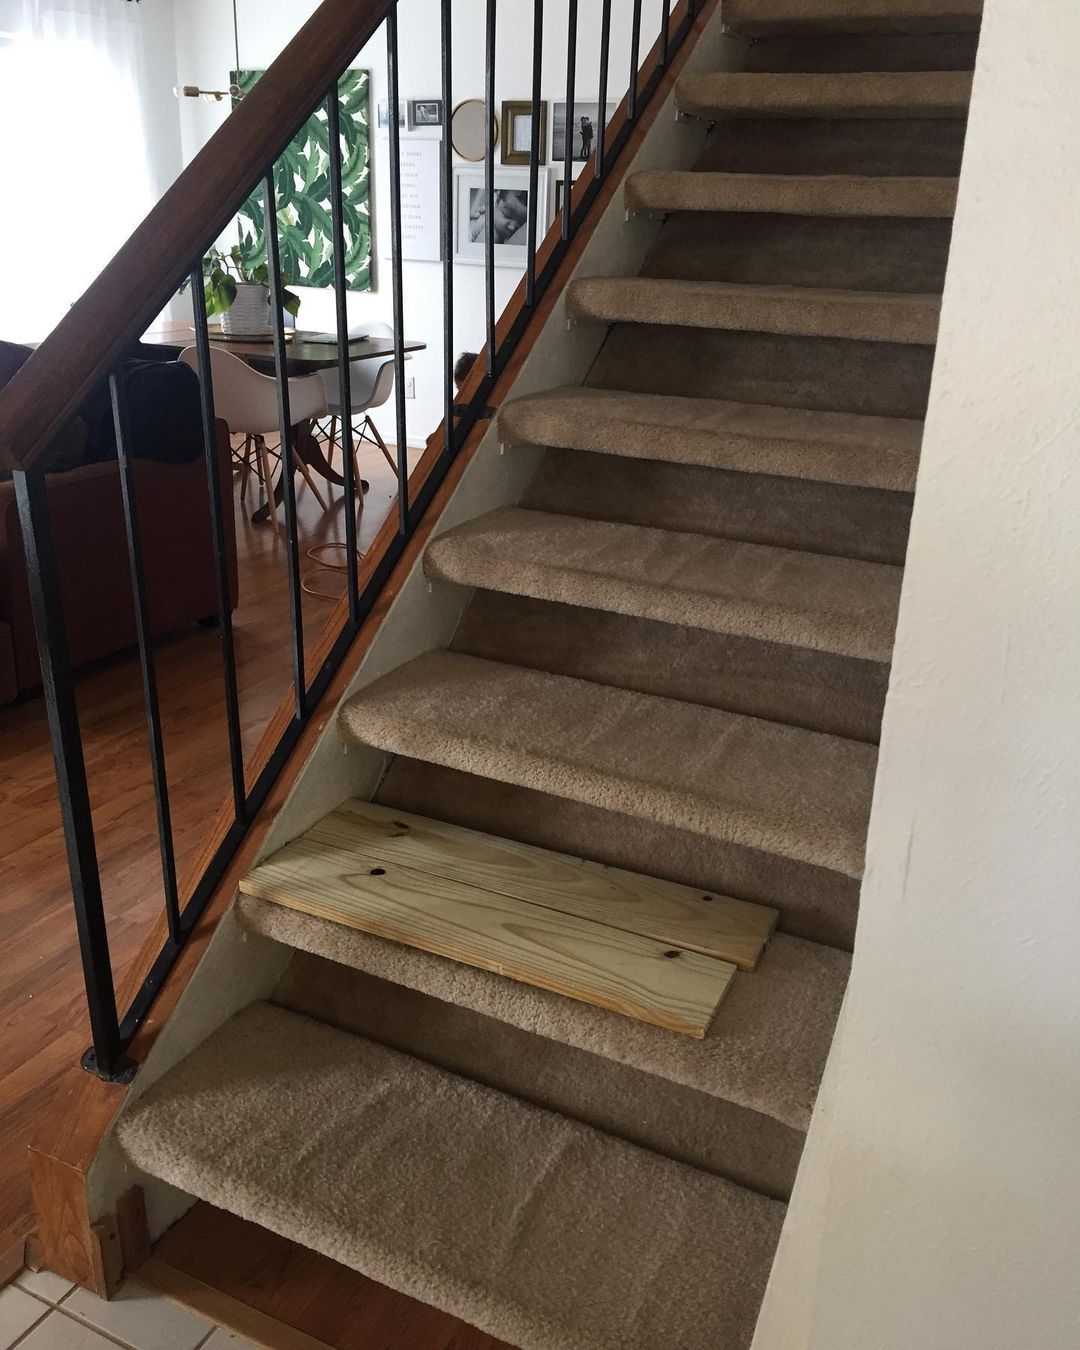
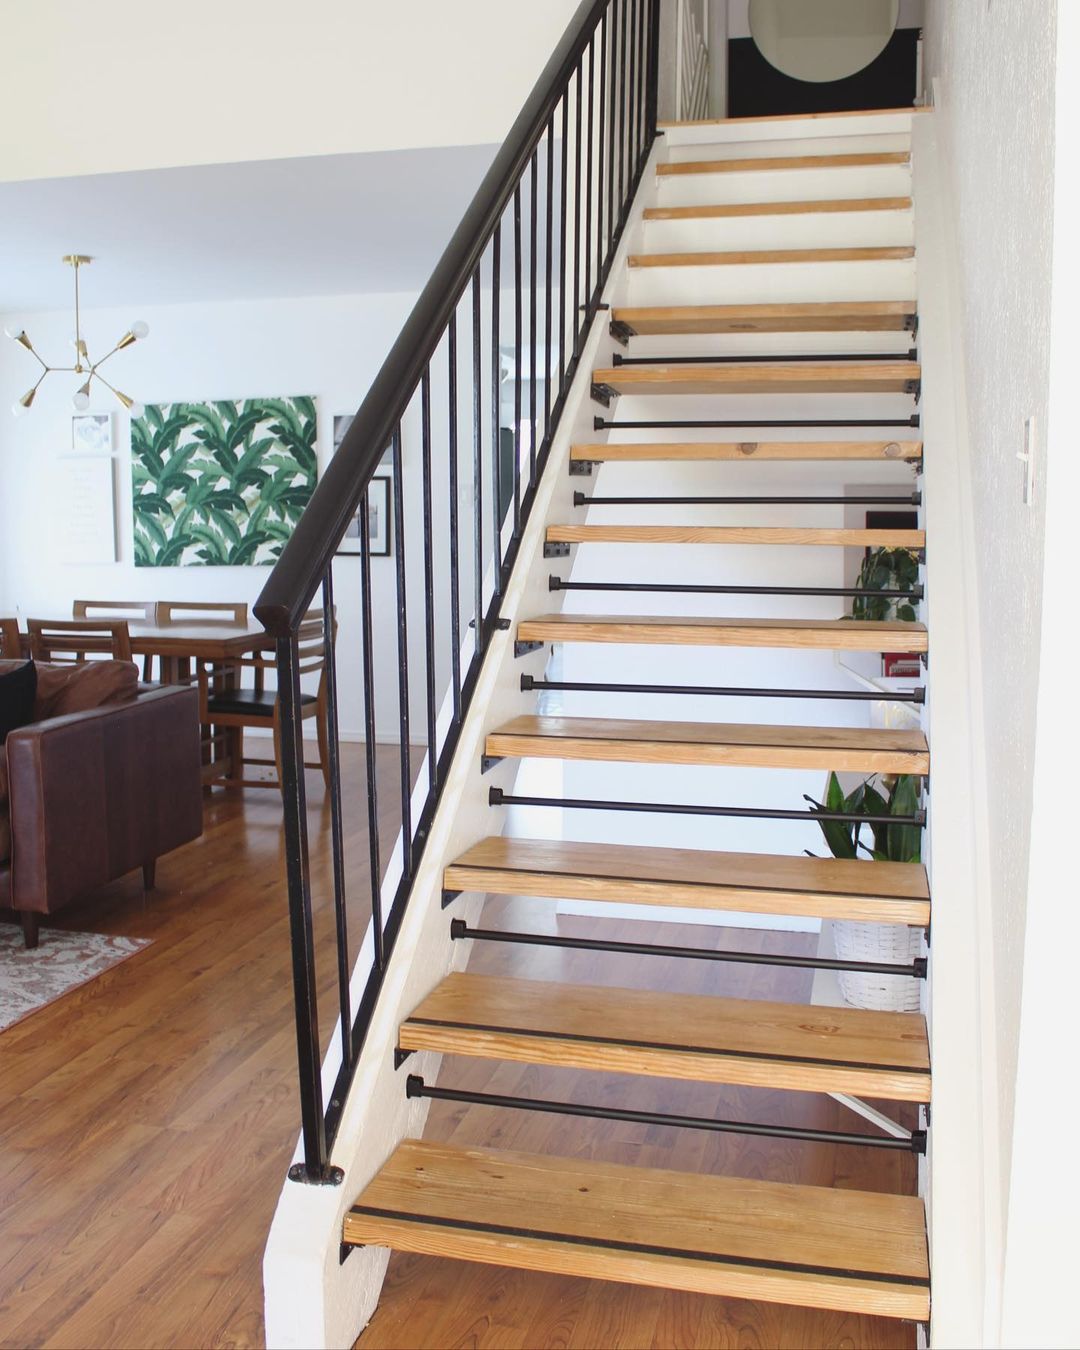
Y’all this project only cost $75!!!!! I almost fell off of my chair when I read that. Now, this is an older DIY but I was just recently introduced to the talented Amanda Walker at The Meridian Experience and did a dive headfirst into her content. While she has many amazing projects she’s shared over the years, I just loved this wild transformation. It completely changes the house! So do yourself a favor, if you don’t know her already and go check her out. As for the stairs, here is the blog post and here is her YouTube video on it too.
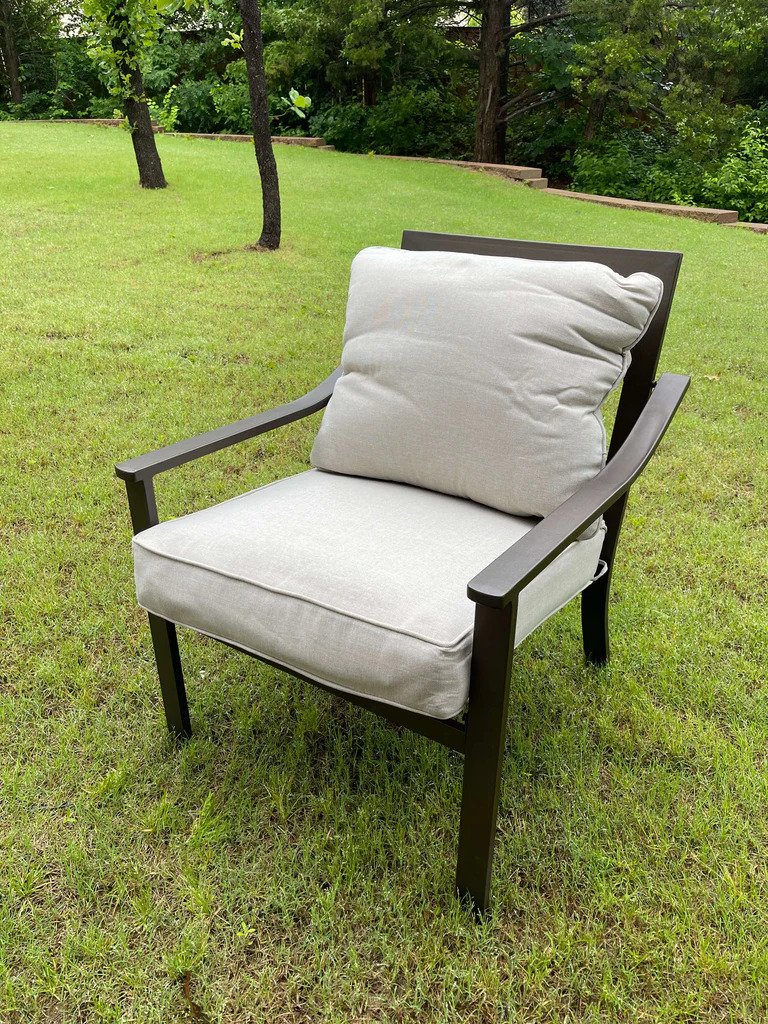
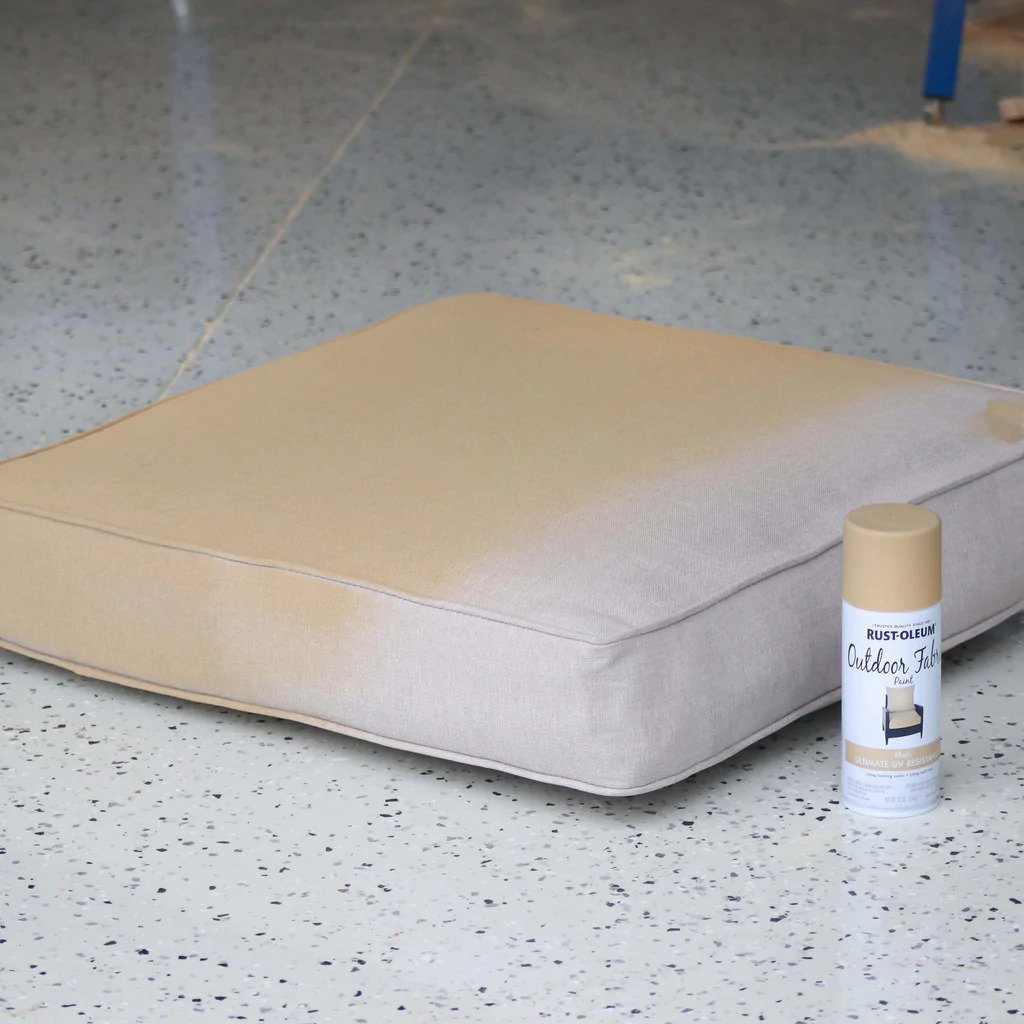
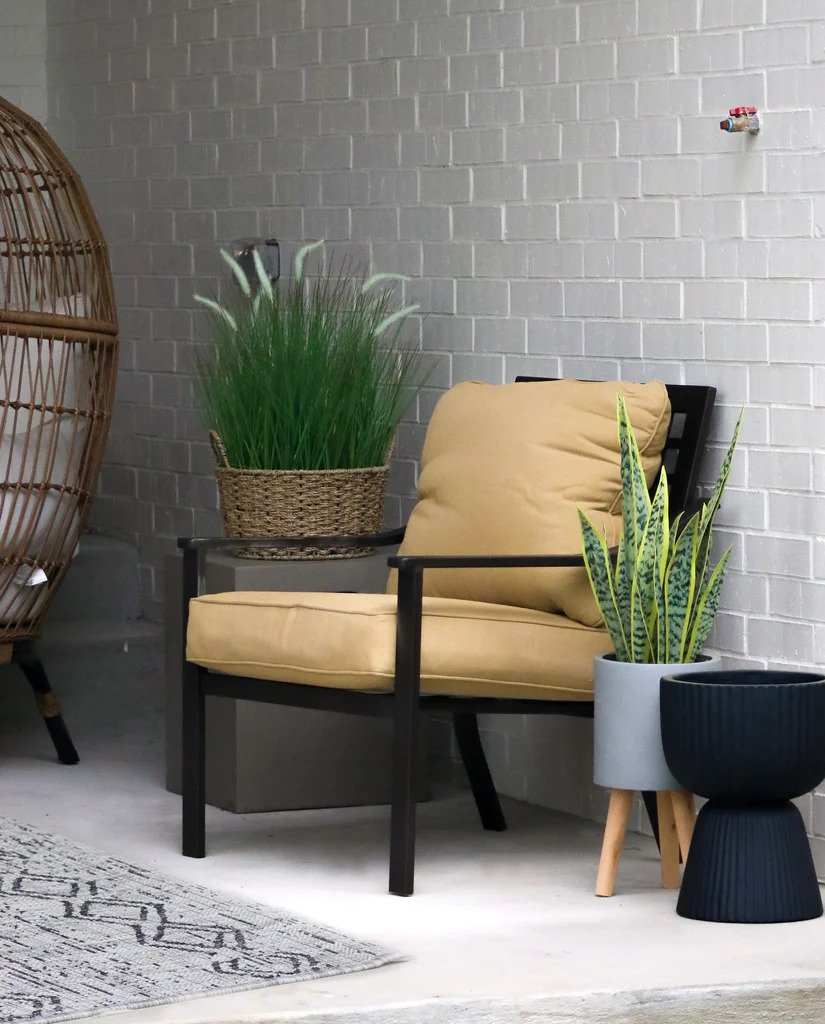
I feel silly saying this but I didn’t know there was such a thing as outdoor fabric paint. Did you? Well, after seeing it in action on Ashley’s Instagram, I am a fan. What an easy and accessible way to freshen up your older patio cushions! Anyone can do this and there are a lot of color options. Here is Ashley’s step-by-step.
Two Tiered Tray by Maria Mendez Reed Of Moving With The Military

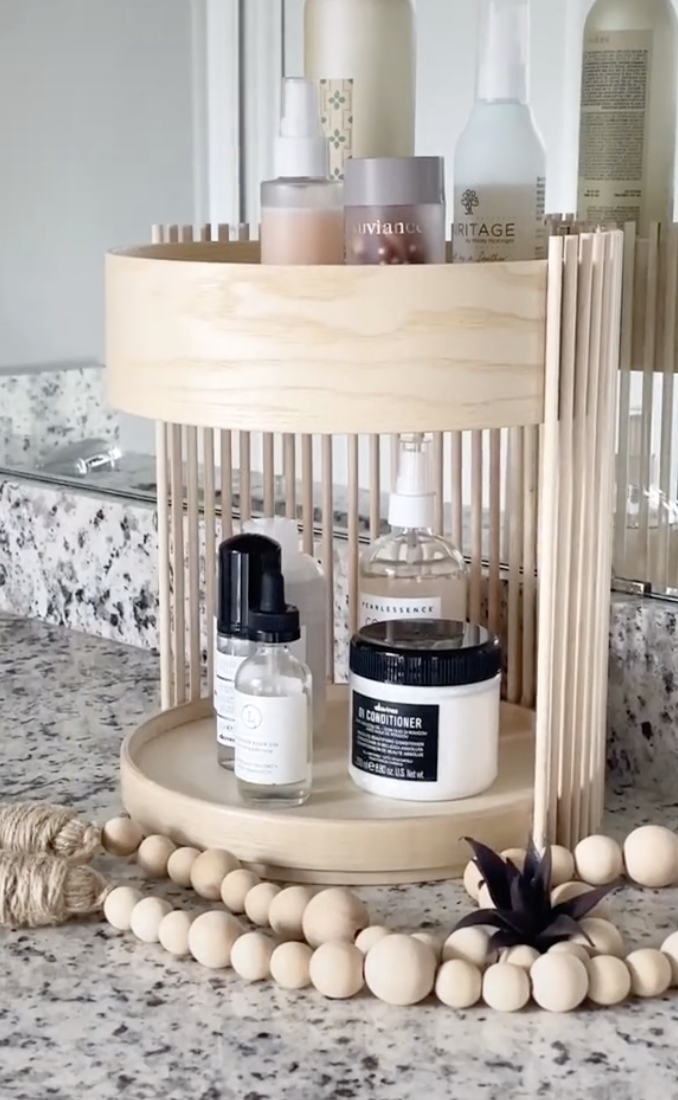
Another IKEA hack, but this time it’s not a cabinet, it’s a round box! I think this is another easy and fun DIY project that would make a great design statement in your bathroom or kitchen. Also if raw wood isn’t your thing, this is easily spray painted. Make it yours, baby! Here are Maria’s instructions.
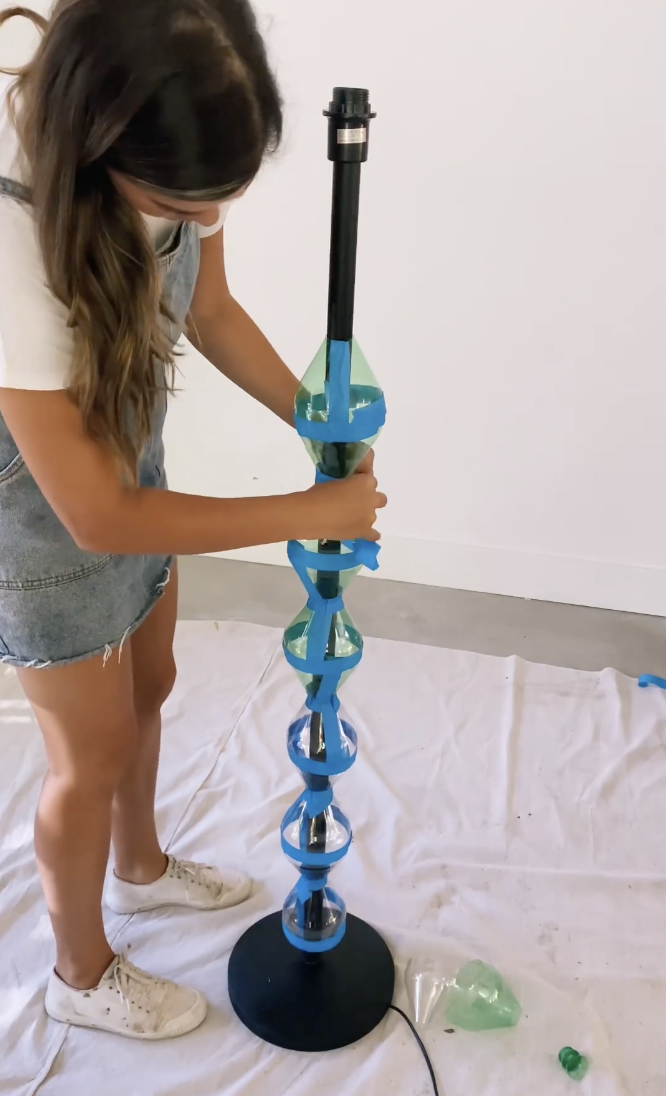
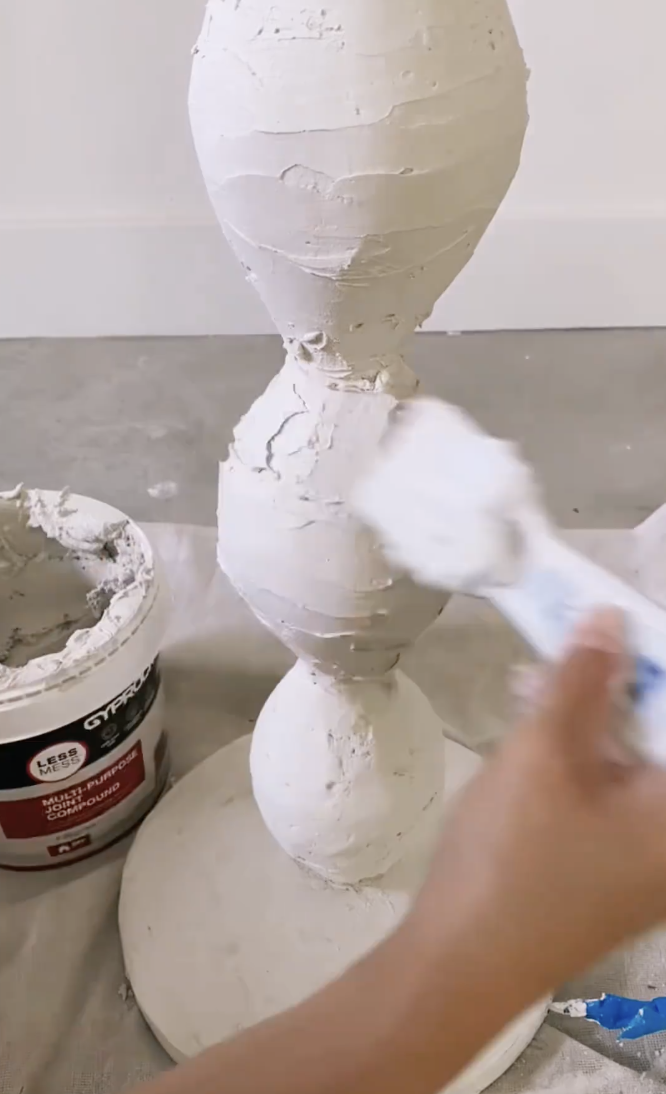
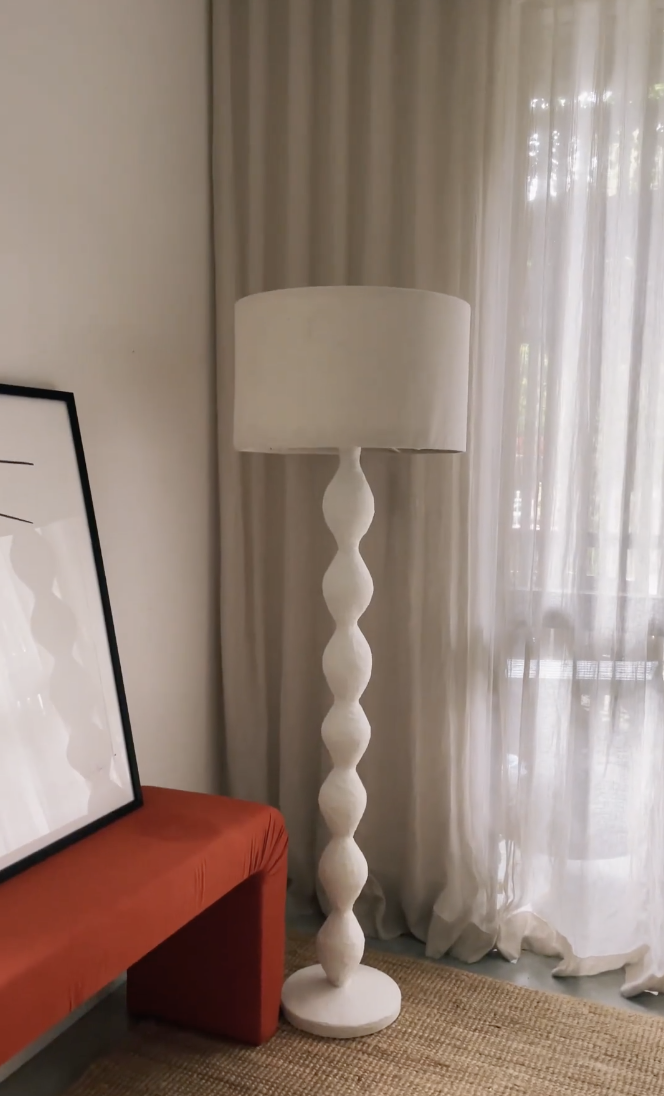
Looks like I’m keeping any 2L soda bottles I come across. Y’all, she made the coolest lamp base out of literal trash. So cool and looks very expensive. So if you are into the plaster look, get yourself some all-purpose joint compound and get started. One man’s trash, amirite?!
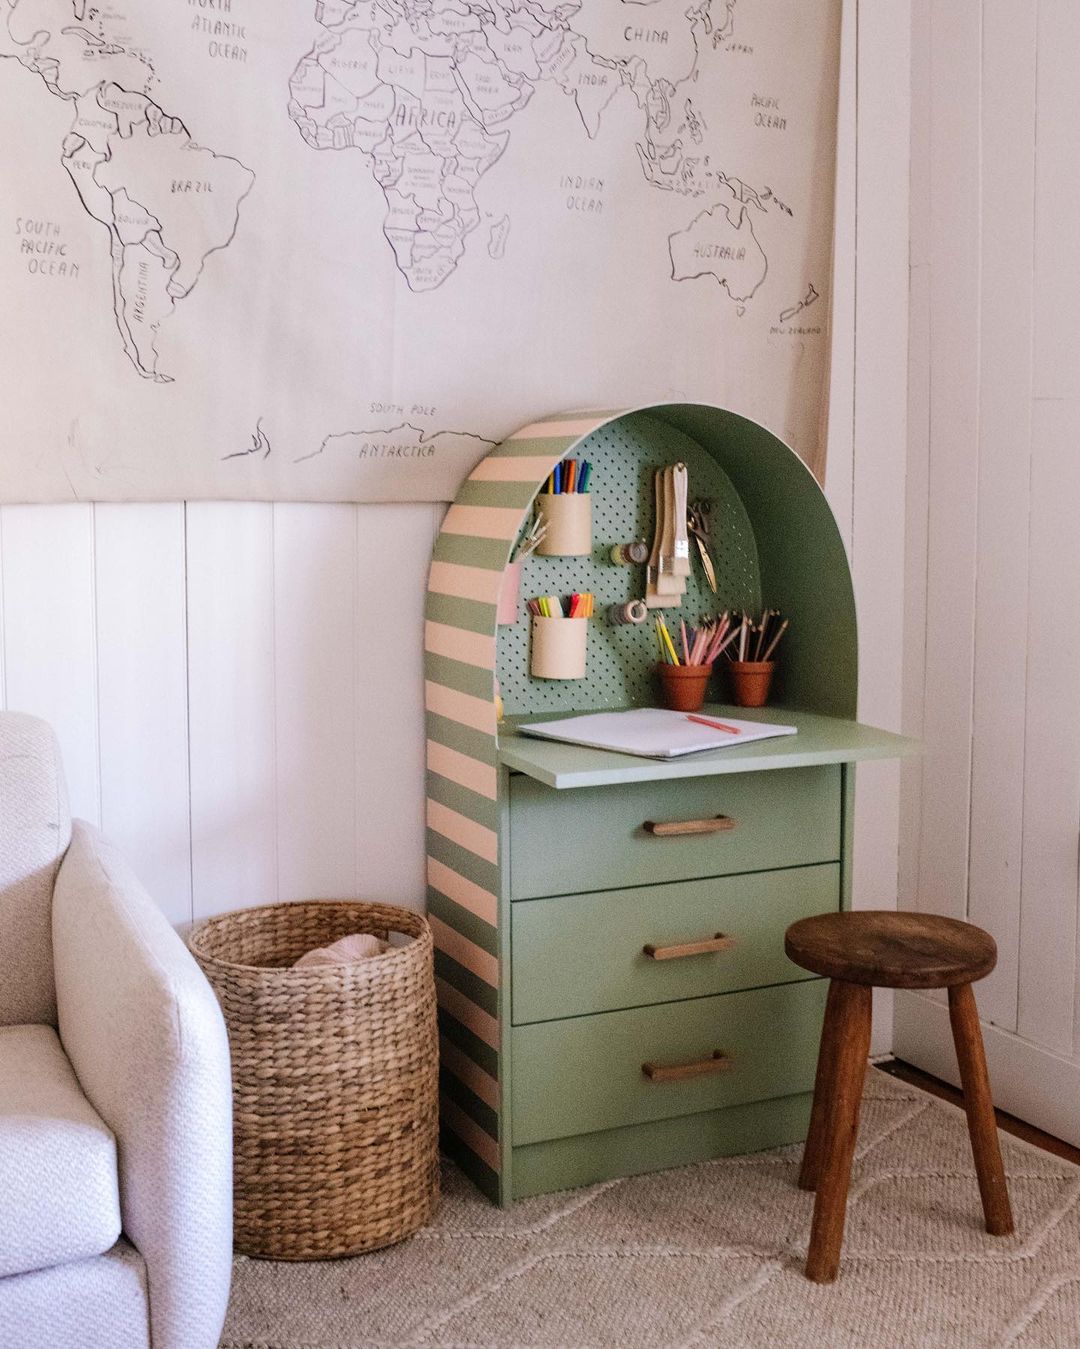
So as I was looking through Geneva’s site, I came across this incredible adorable kid’s arched craft desk. Can you get over how cute it is? Those stripes! This is perfect if you need to give your kid a designated craft area that’s contained and that you won’t mind in your living room if need be. If I had a kid I would 100% be building this. Here are the instructions and if you make it please email me!
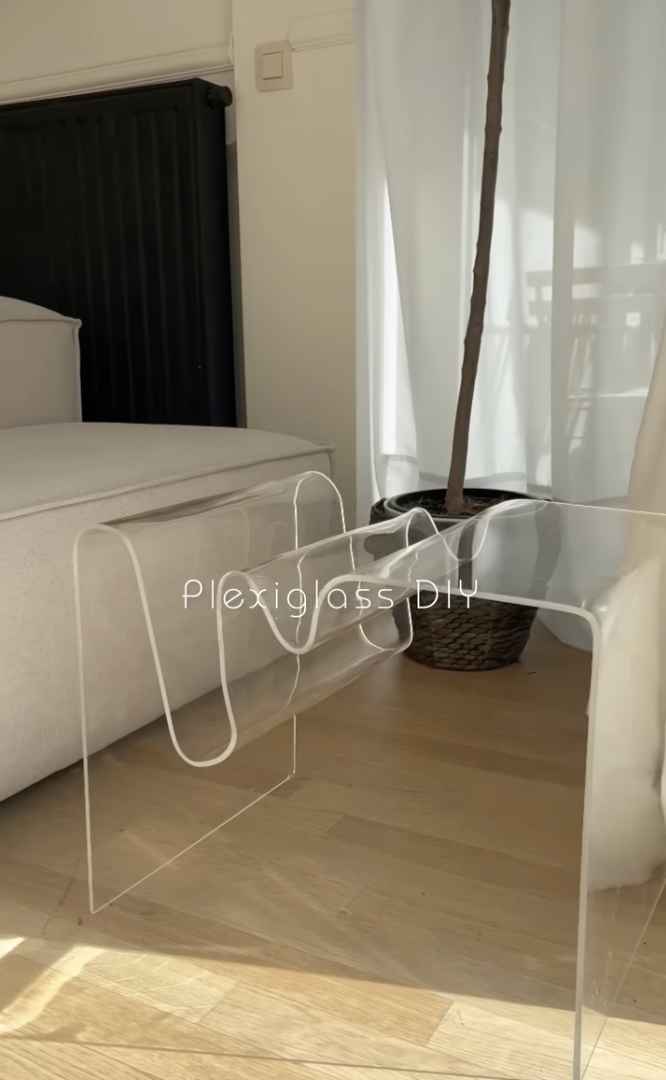
Funnily enough, this is actually a DIY project via All The Peaches Please (the creator who did the cute boucle side table! But Wakemi did an incredible job with it and here is her process video. These types of tables are definitely on trend but I think they are super cool and would be awesomely unexpected in a more traditional home.
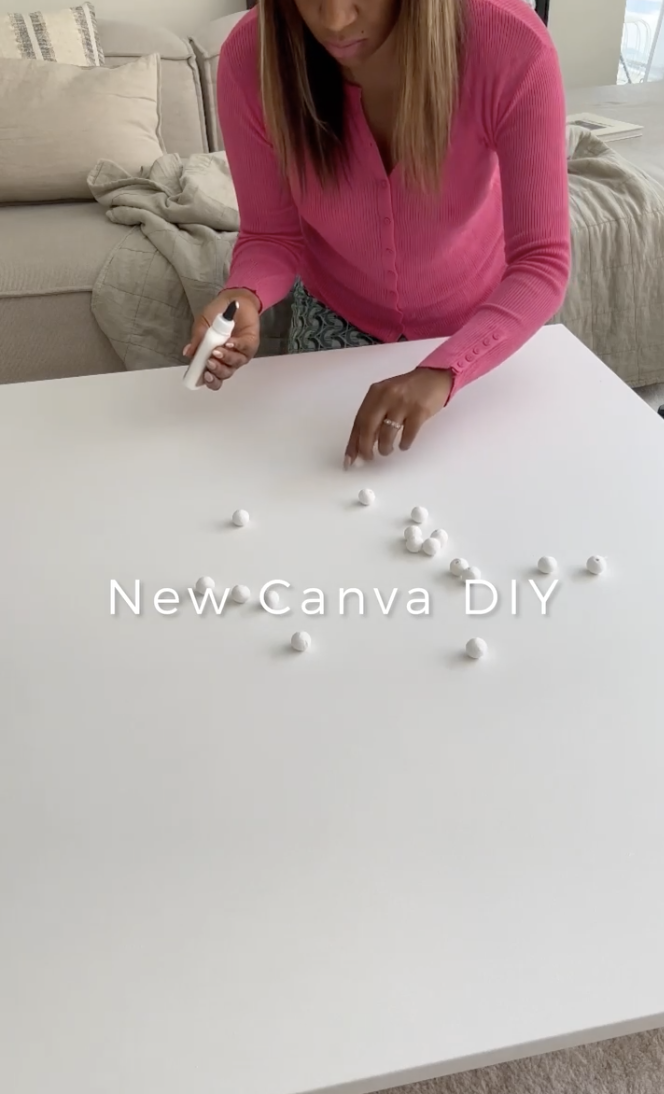
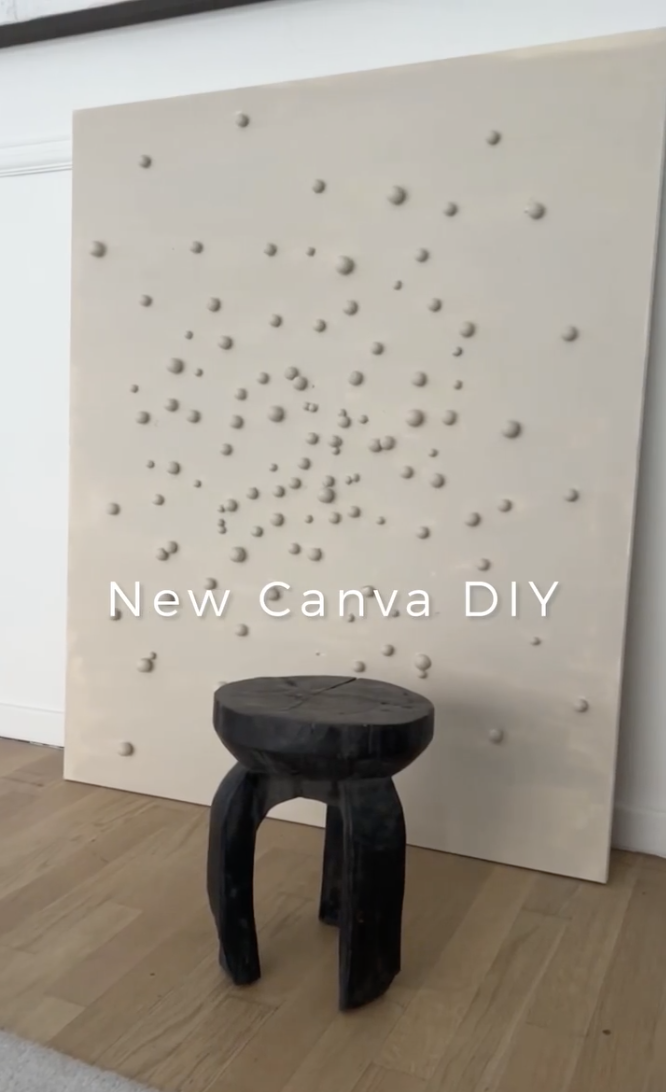
I just thought this piece looked super cool and I’m always a fan of finding ways to make large-scale art for a small-scale budget. The video doesn’t give detailed info but it looks fairly straightforward. I think you just need a canvas, a variety of different-sized wooden beads, super glue, and the paint of your choice. This looks like a lime wash to me but I could be wrong (I do think it would work though!). You can really make this your own.
Wood Vases By Krystle Perkins Of Perkins On Parkway

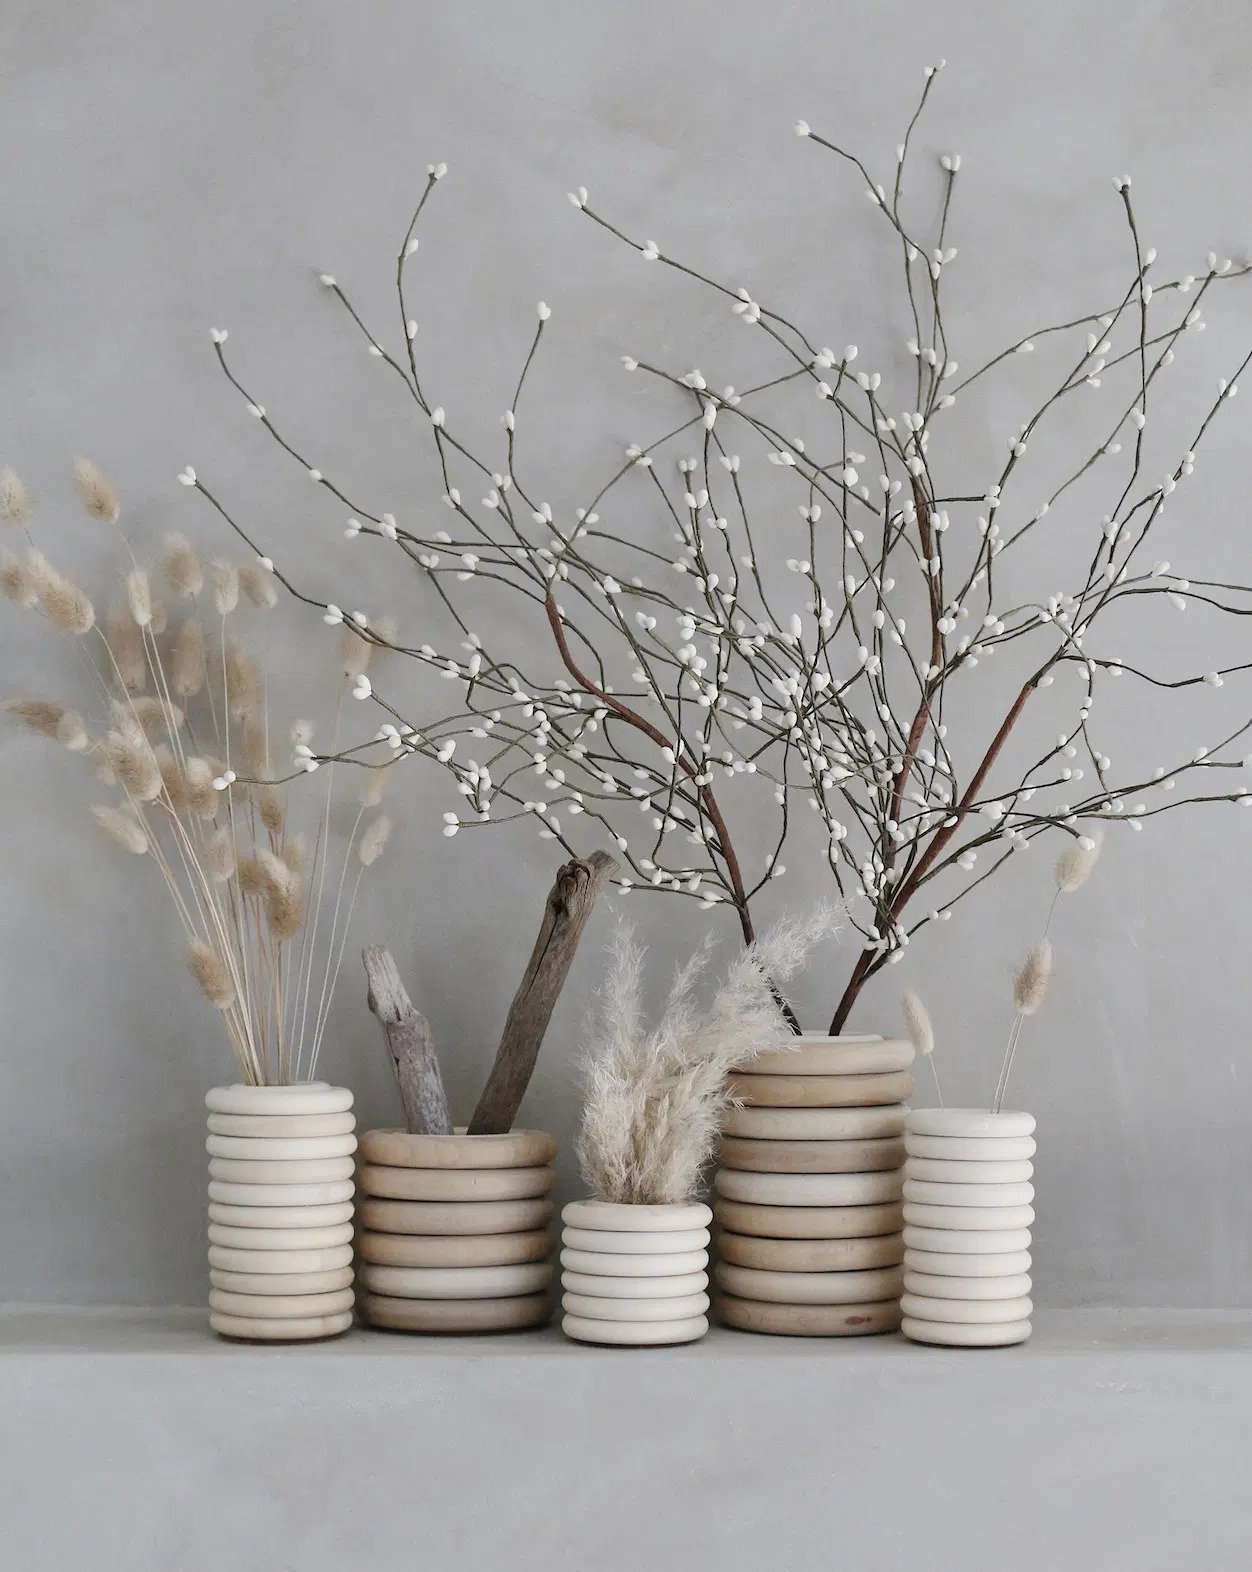
Oh baby I love these and they look so simple! Again, if you want color these are easily painted or stained but I do love the natural wood tone. I think these are simple enough to stand the test of time but trendy enough to feel fresh. Big fan and a great way to use unused glasses or vases.

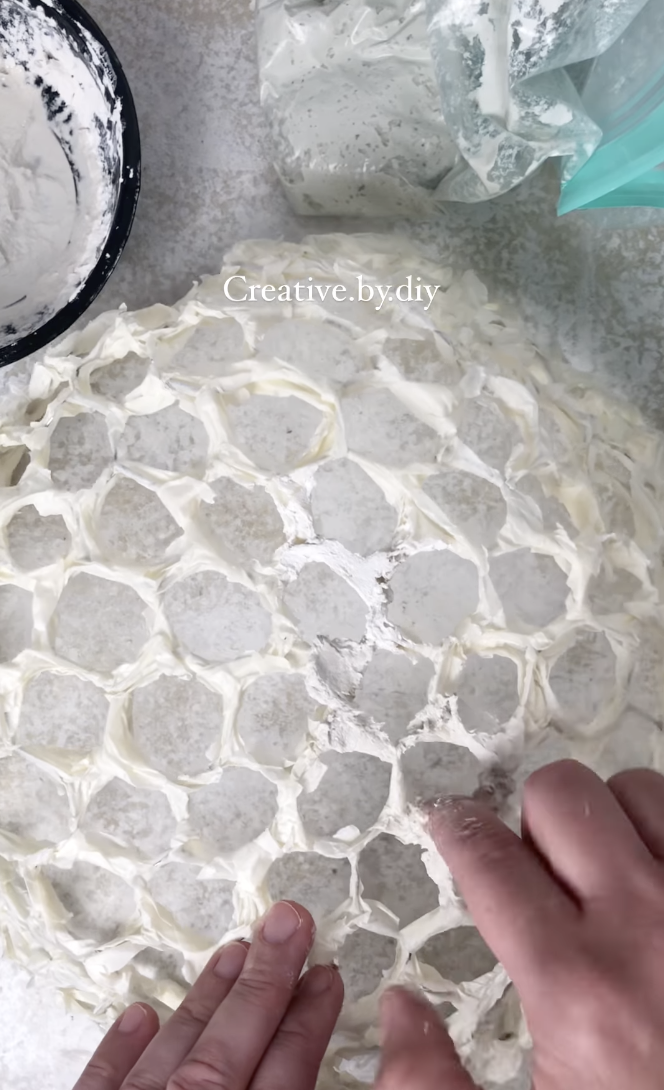
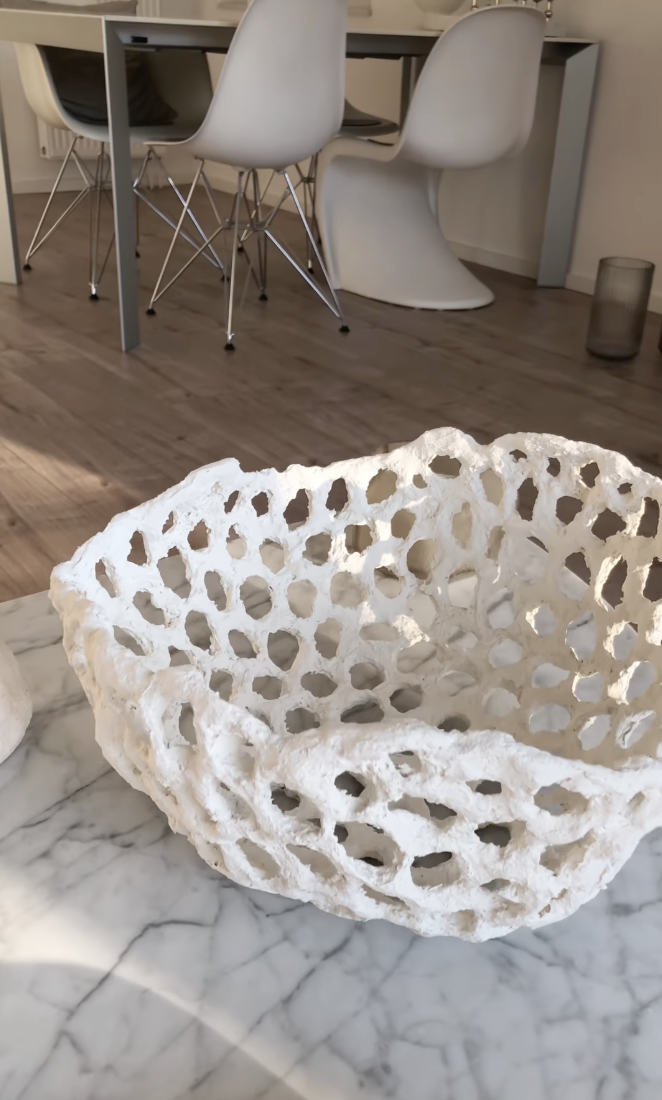
This coral bowl is awesome and would be SO expensive in a store. I love the organic feel and you bet I love the use of joint compound again. Watch her reel for more details but this is a great day project and could live almost anywhere in your home.
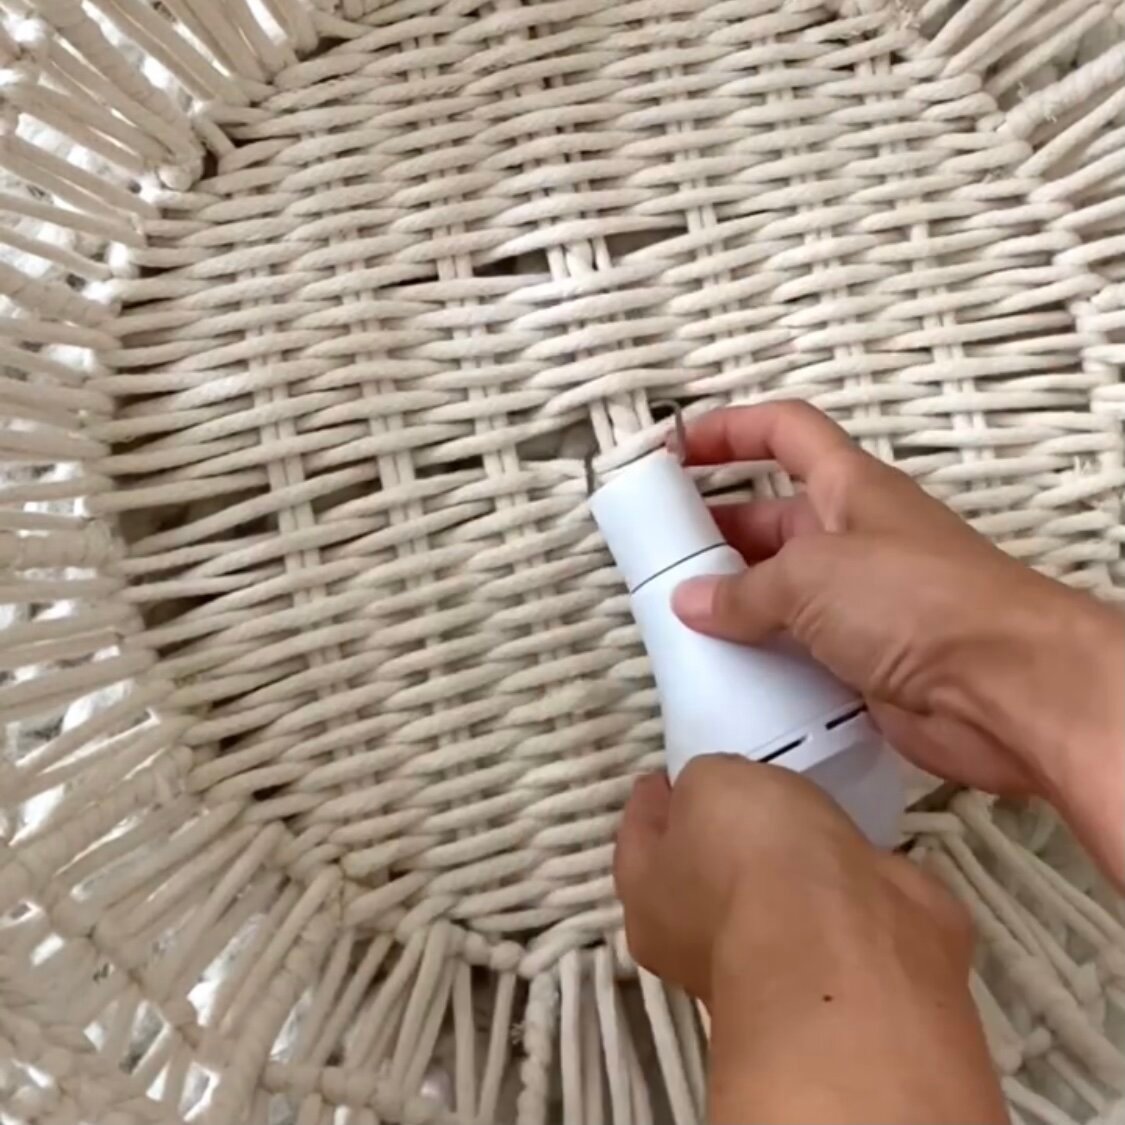
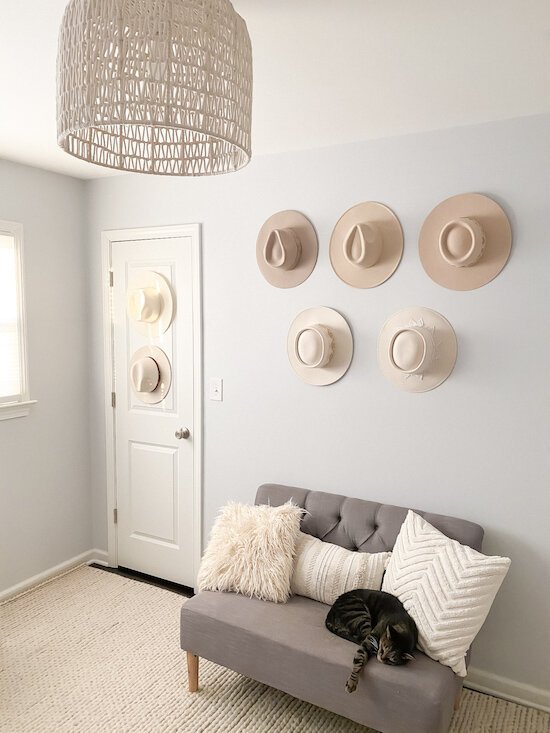
I know that Mallory wrote a great post about what to do if you don’t have overhead lighting…but here is another option that’s WIRELESS! Nicole uses an unused ceiling box cover to mount the basket but if you don’t have one I’m pretty sure you can just screw those hooks right into your ceiling (then just spackle and paint when you move out). Anyway, this is a GREAT renter’s hack or if you just want more overhead lighting but are lacking a junction box:)
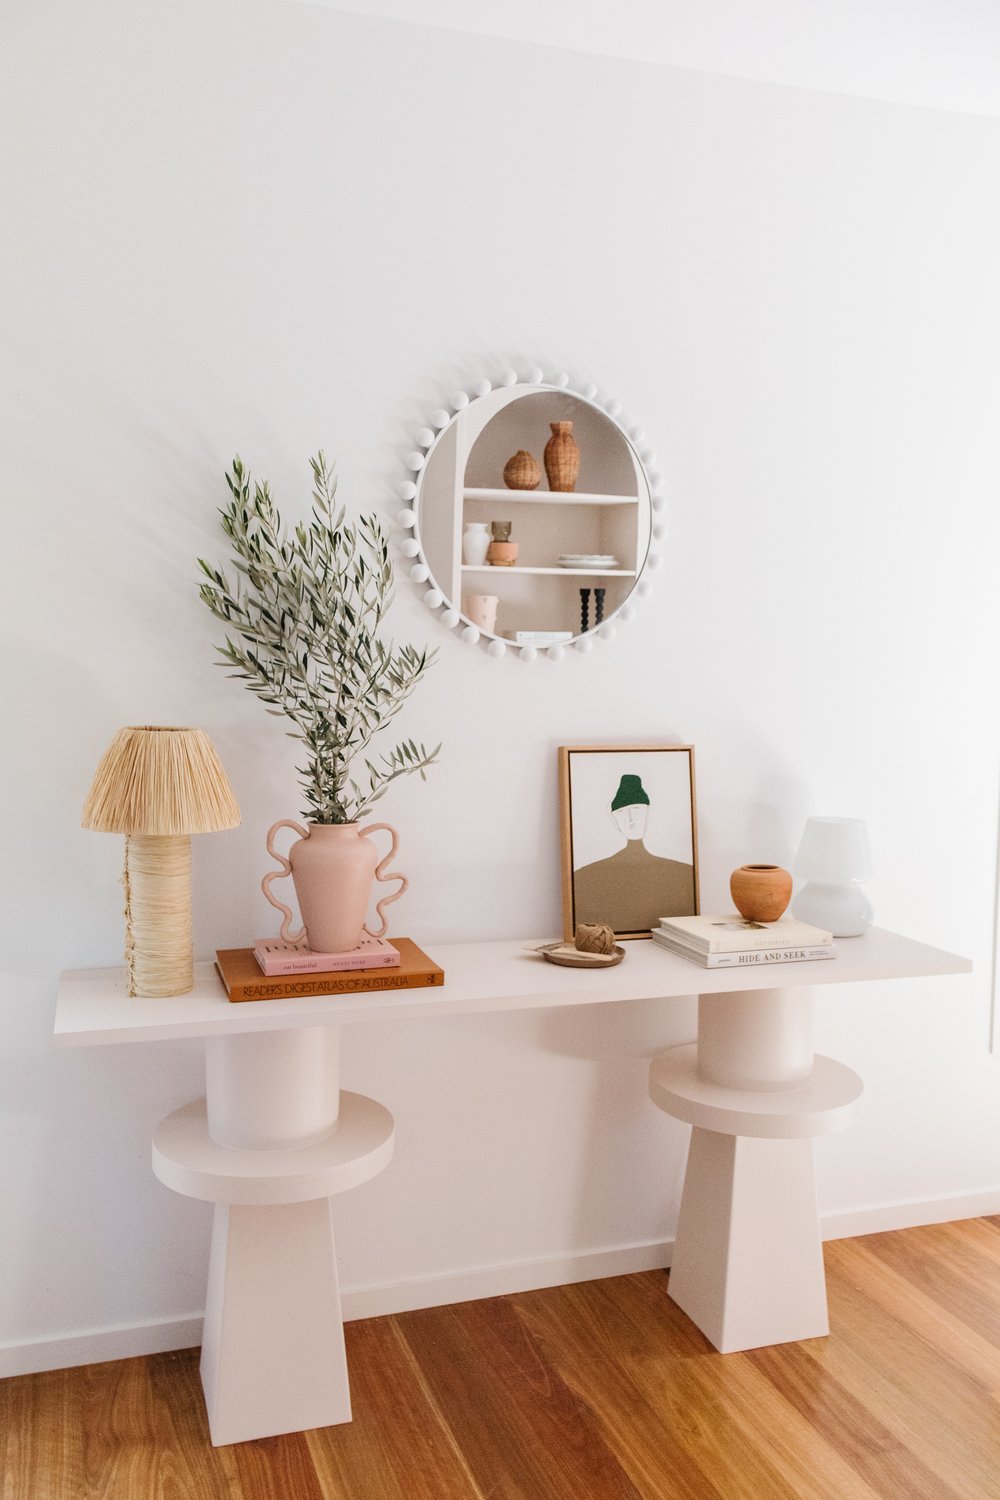
This was another mind-blowing project that I still can’t get over. This console table would easily cost over $1000 if you bought it in a store. According to Jaharn, this is a beginner-level project that took her two hours (not including drying time) and cost a total of $250. Ummm not bad!
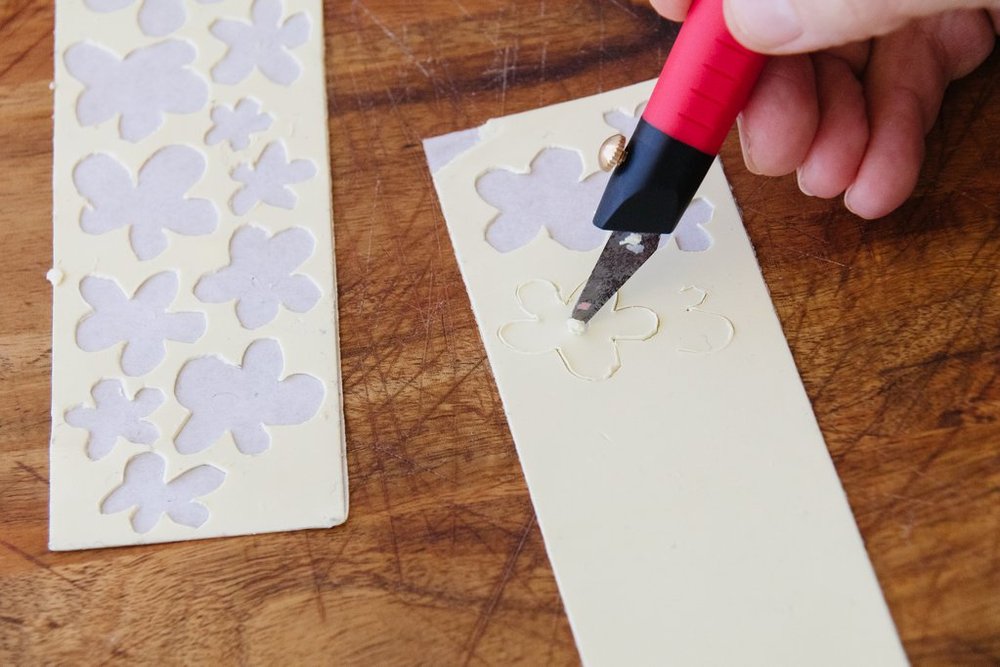
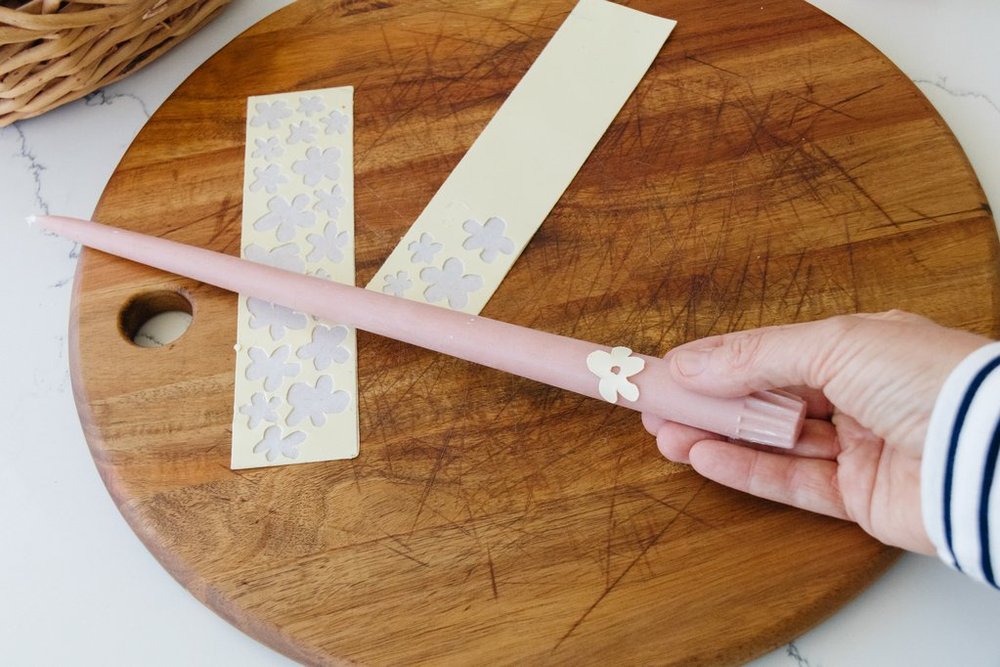
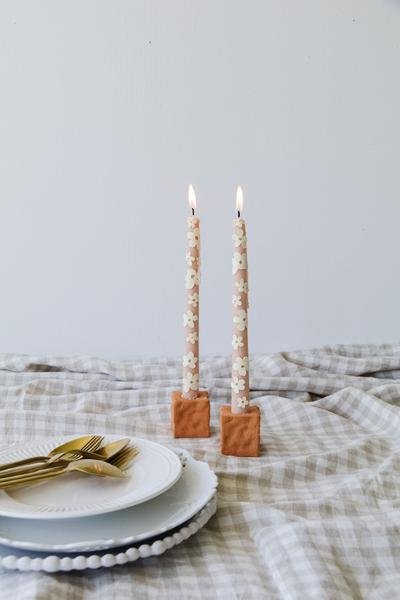


I had to end on probably the sweetest project…these candles. What a wonderful and simple project to help make something really unique and special. She outlines everything here and this is one I will absolutely be doing with friends.
That’s it for today. Hope you feel inspired, hope you have a wonderful weekend, and if you have any other awesome DIY tutorials, stick them in the comments!
Love you, meant it.
THIS POST WAS ORIGINALLY PUBLISHED HERE.
