This post will likely be the closest thing to my personal diary that I ever put on the internet (and I literally wrote about being single and depressed during the holidays during quarantine). I am slightly terrified that after seeing these “patterns” or “drawings” that I “created,” I will be immediately kicked out of the design community forever. Not that I thought I would only come up with masterpieces but I had higher hopes for my work. Showing them feels super vulnerable since they came physically from my right hand (FYI I’m right-handed) but the creative process is bad until it’s good right? RIGHT? The good news is that by the end you will see what I plan to paint in my DIY closet makeover and I’m really pumped about it. Ok, let’s remind you of what the space looks like…
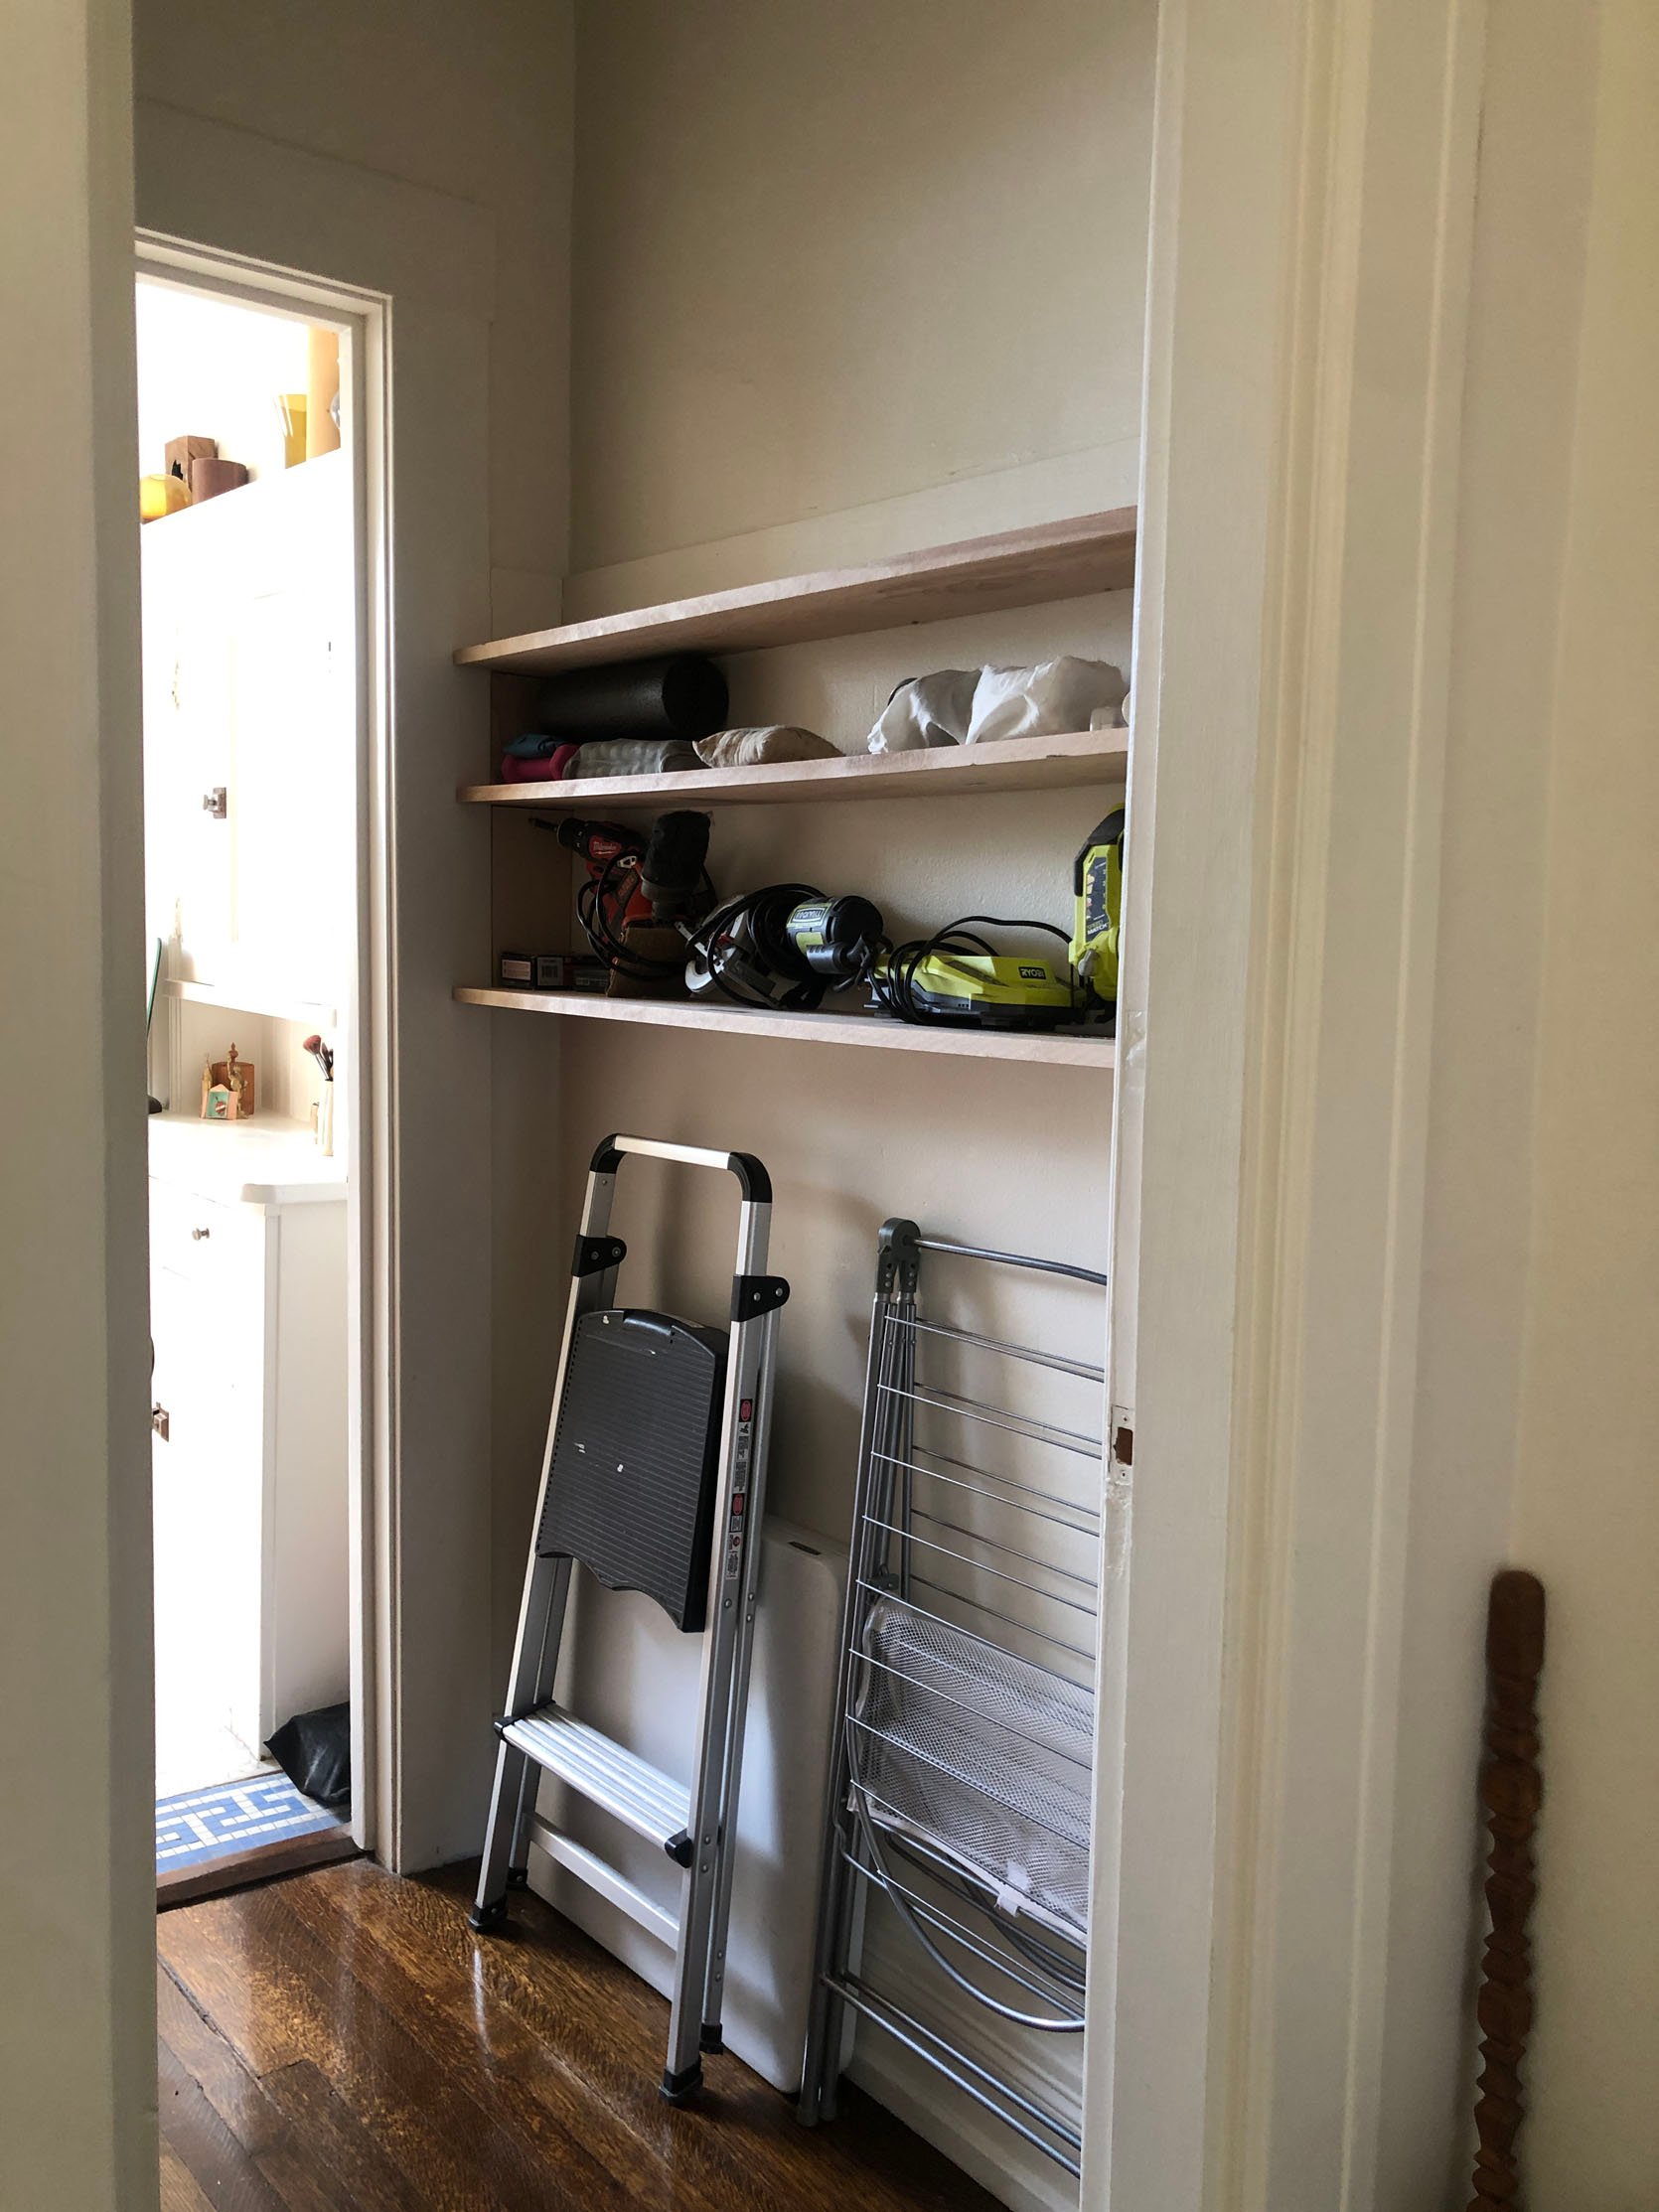
Here she is in her current state. The shelves my dad built have been made (as you know) but I still need to sand and stain them which will happen this weekend since I am currently out of town:) A lot of you suggested I get hooks to hang my ladder and drying rack. Unfortunately, I need to lean a couple more things behind those two main pieces so they won’t actually be against the wall. But don’t worry, my curtain will cover everything and having those things on the floor doesn’t bother me. Now let me remind you of my paint plan…
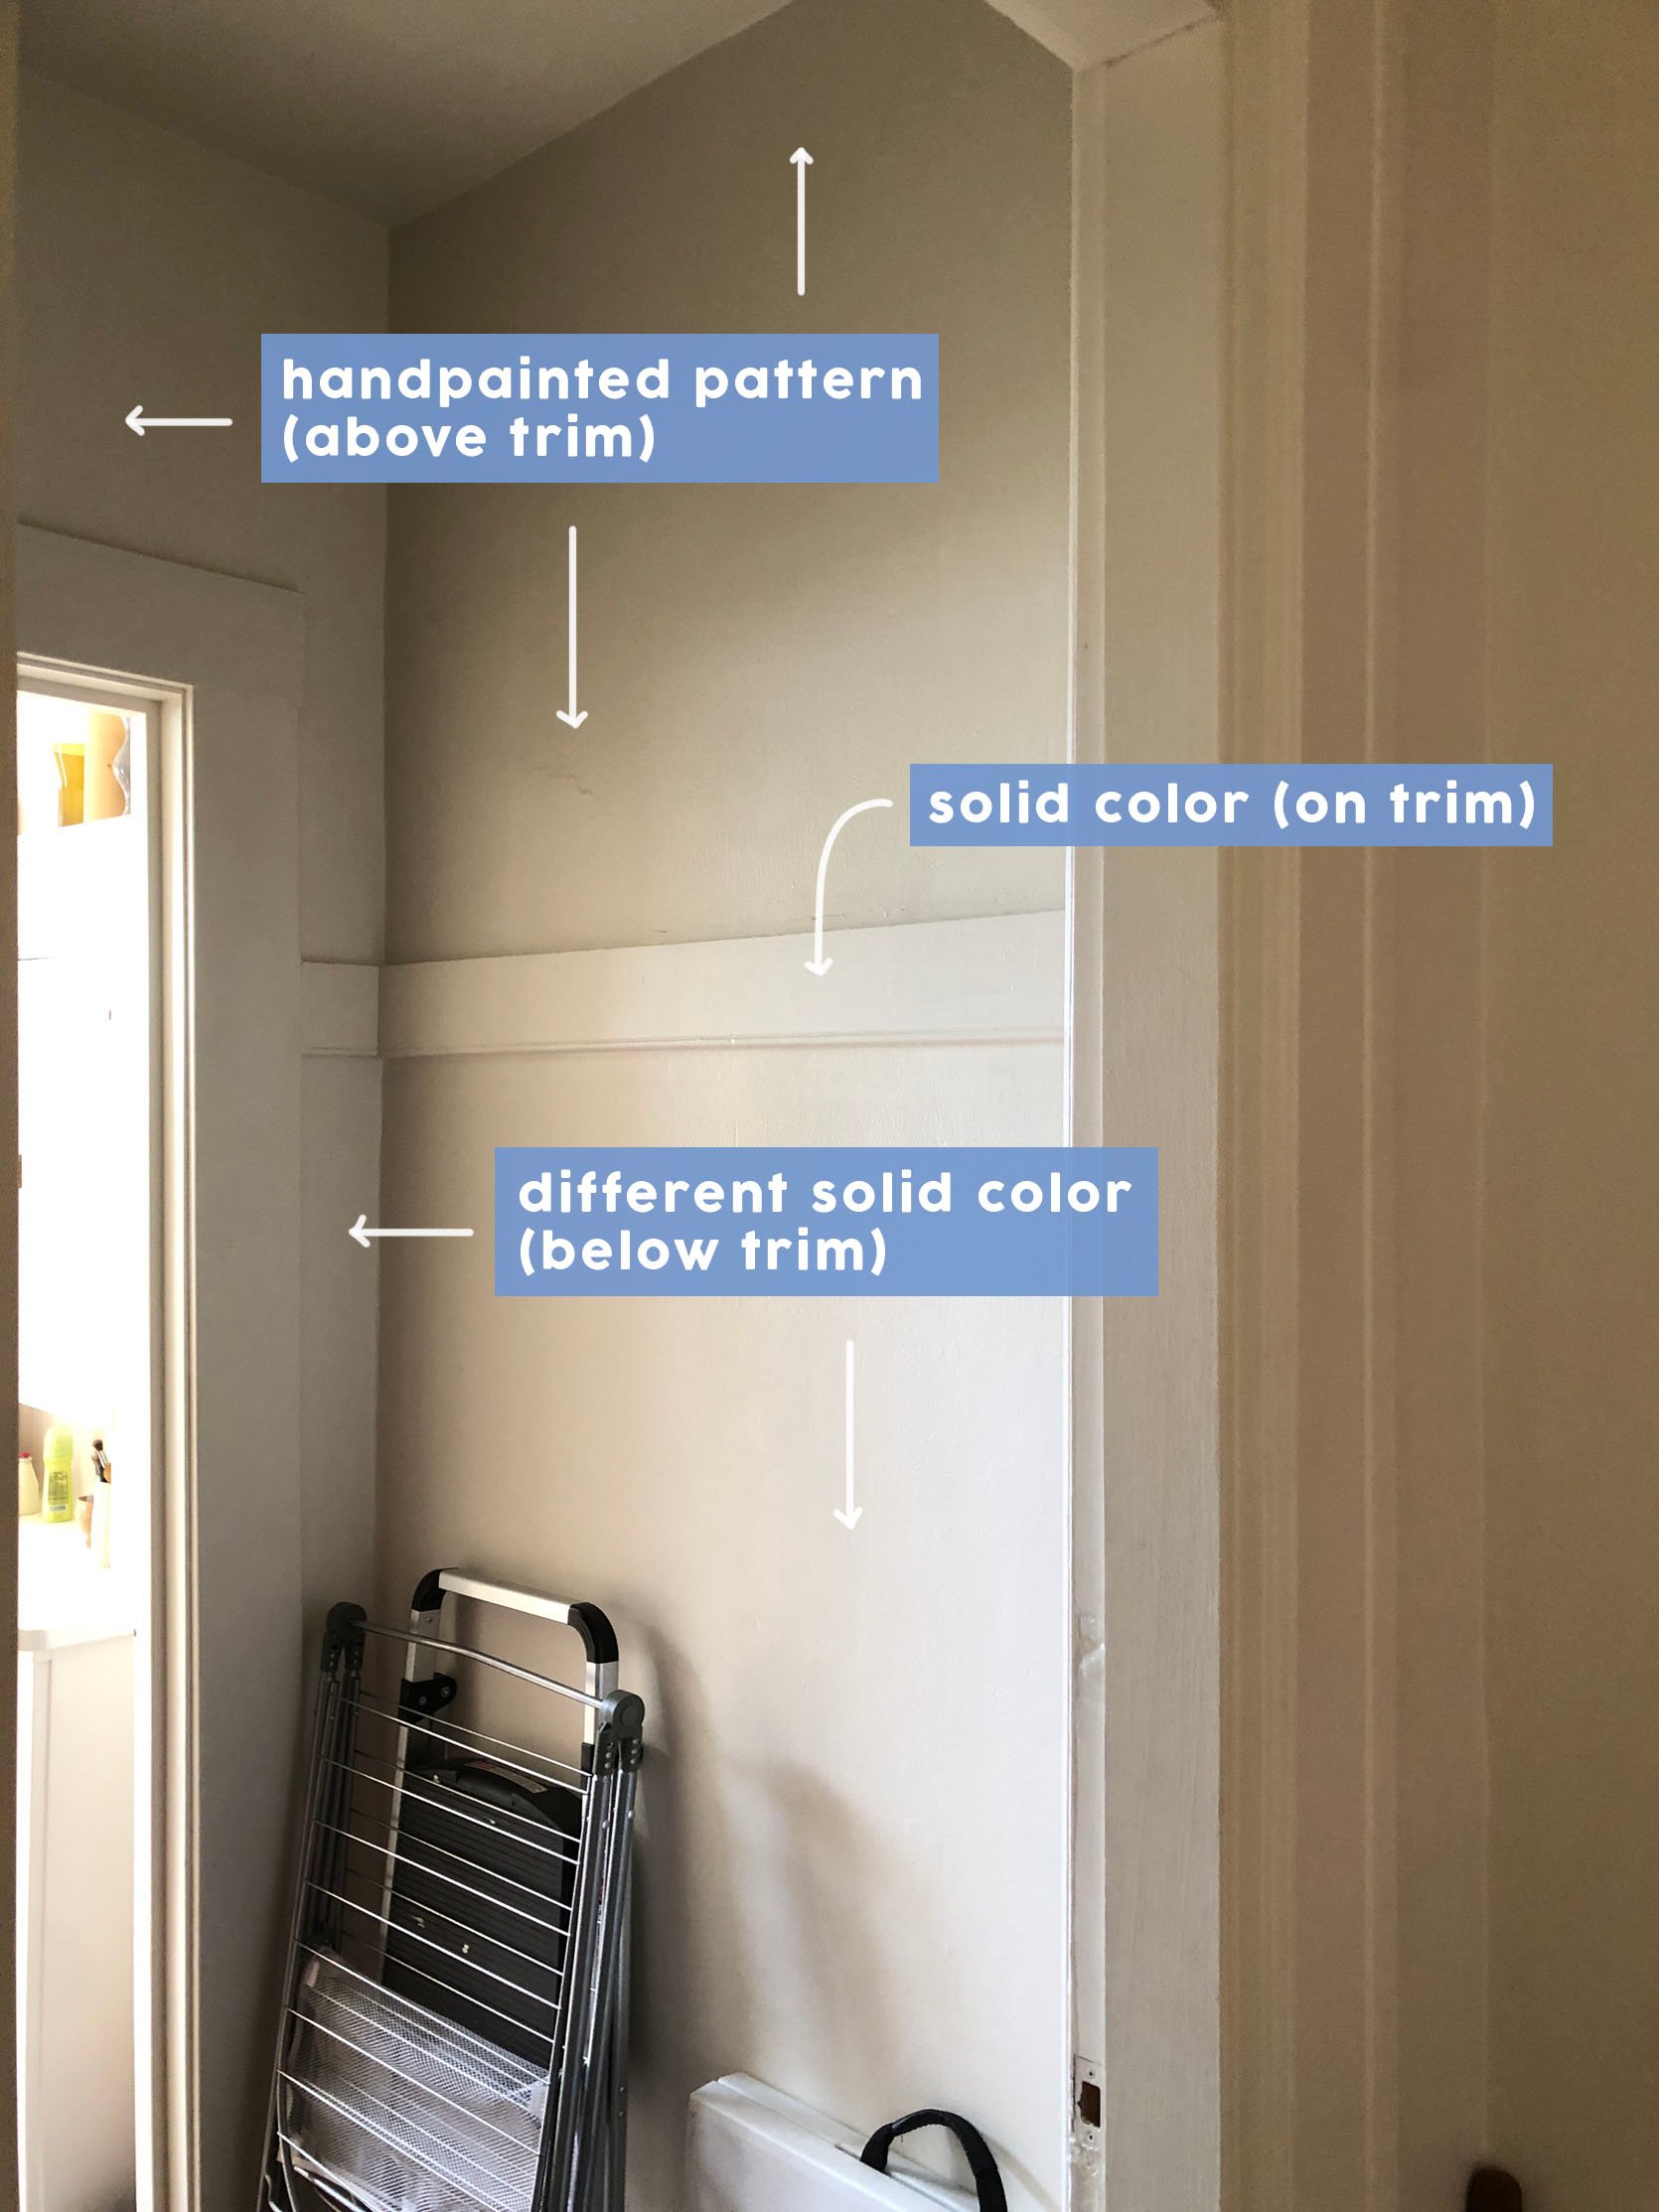
As you can see from this graphic, I’m only painting the pattern above the trim. It’s going to be so much easier and most of the bottom will be covered by the curtain on this side and my clothes on the other. No point in wasting time, right? My one-month deadline is coming in hot!
Ok now, let’s get vulnerable…
This was my first attempt at doodling. I wasn’t trying to put any pressure on myself but I truly hated allll of it. I quickly started to doubt if I possessed even an ounce of creativity in my head. Then I decided to get out the watercolors.
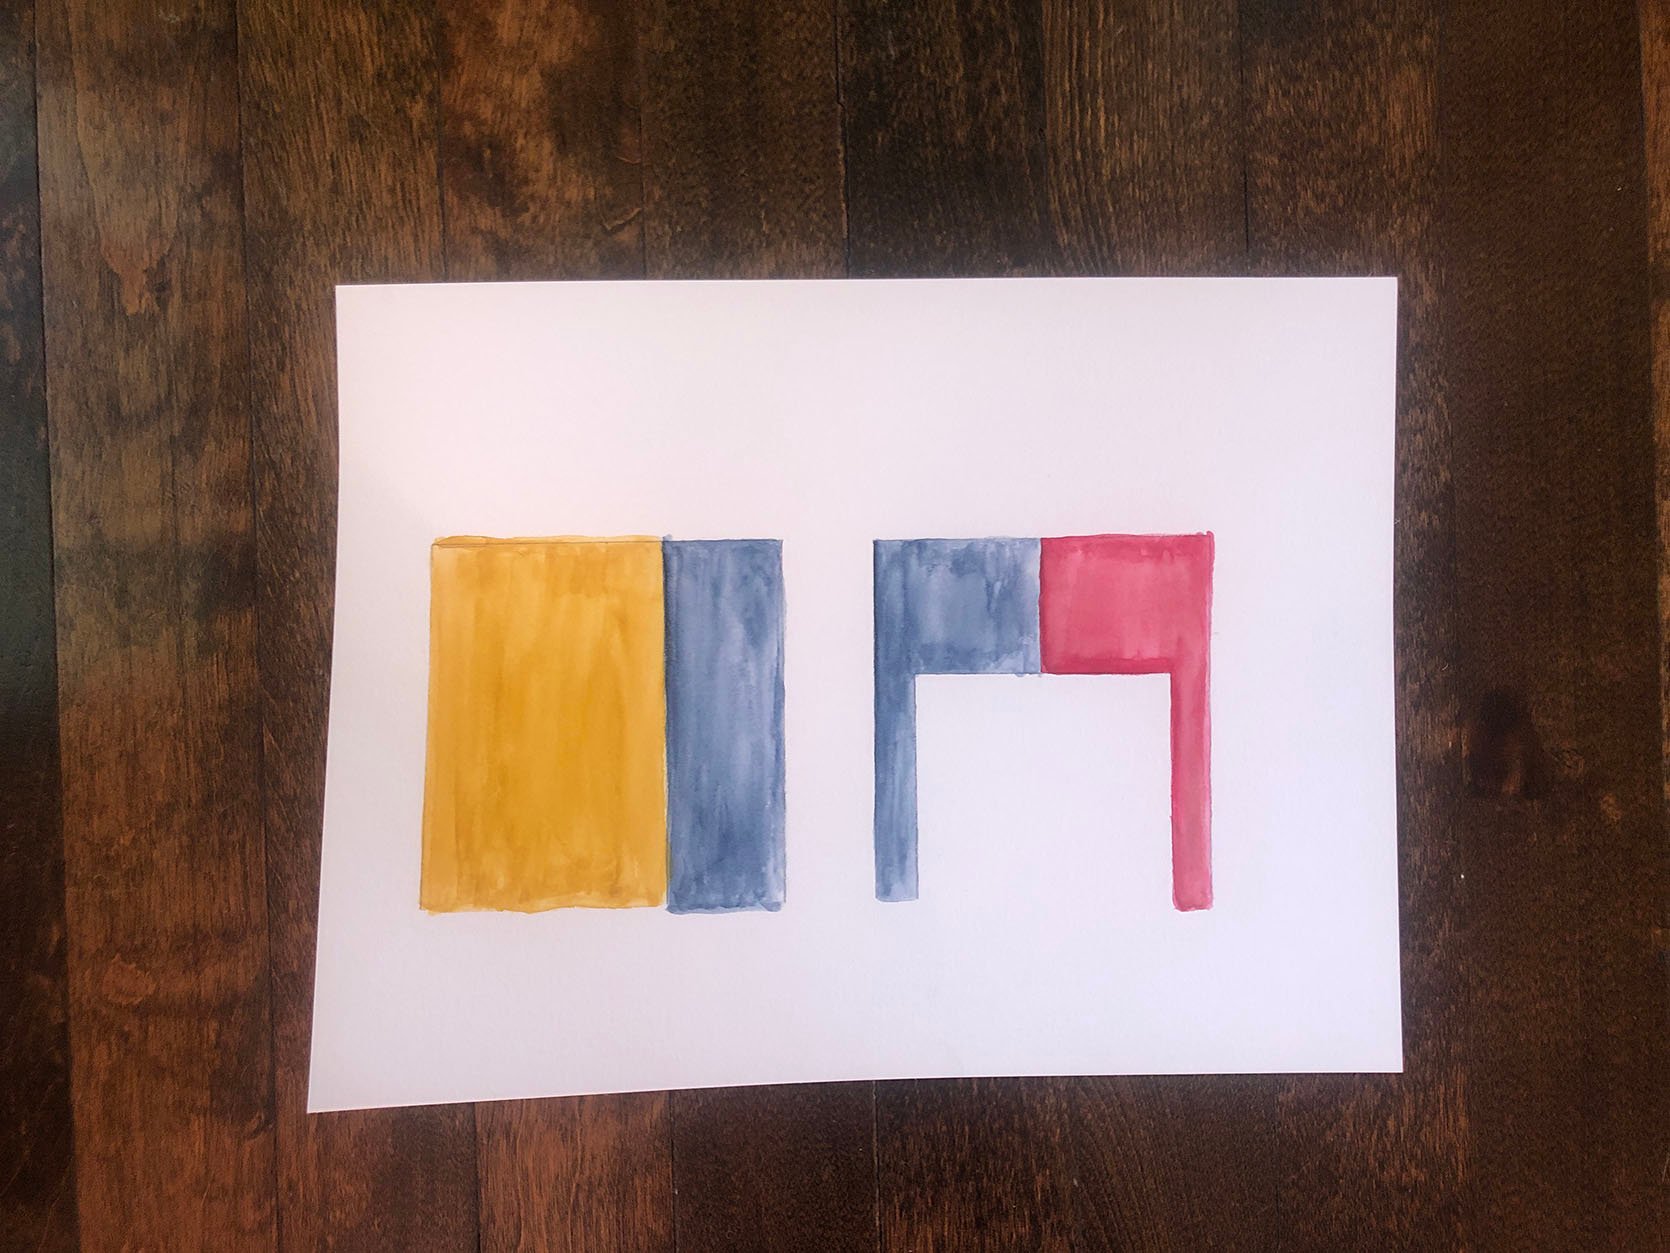
I liked the idea of doing a really simple color block as the base under whatever pattern I came up with…but my watercolor palette was very limited (aka had none of the colors I wanted) and even with the paint totally dry, I couldn’t layer new colors on top. Maybe that’s something I used to know when I was young but my knowledge was now nonexistent and my patience ran out. So back to the pencil I went.
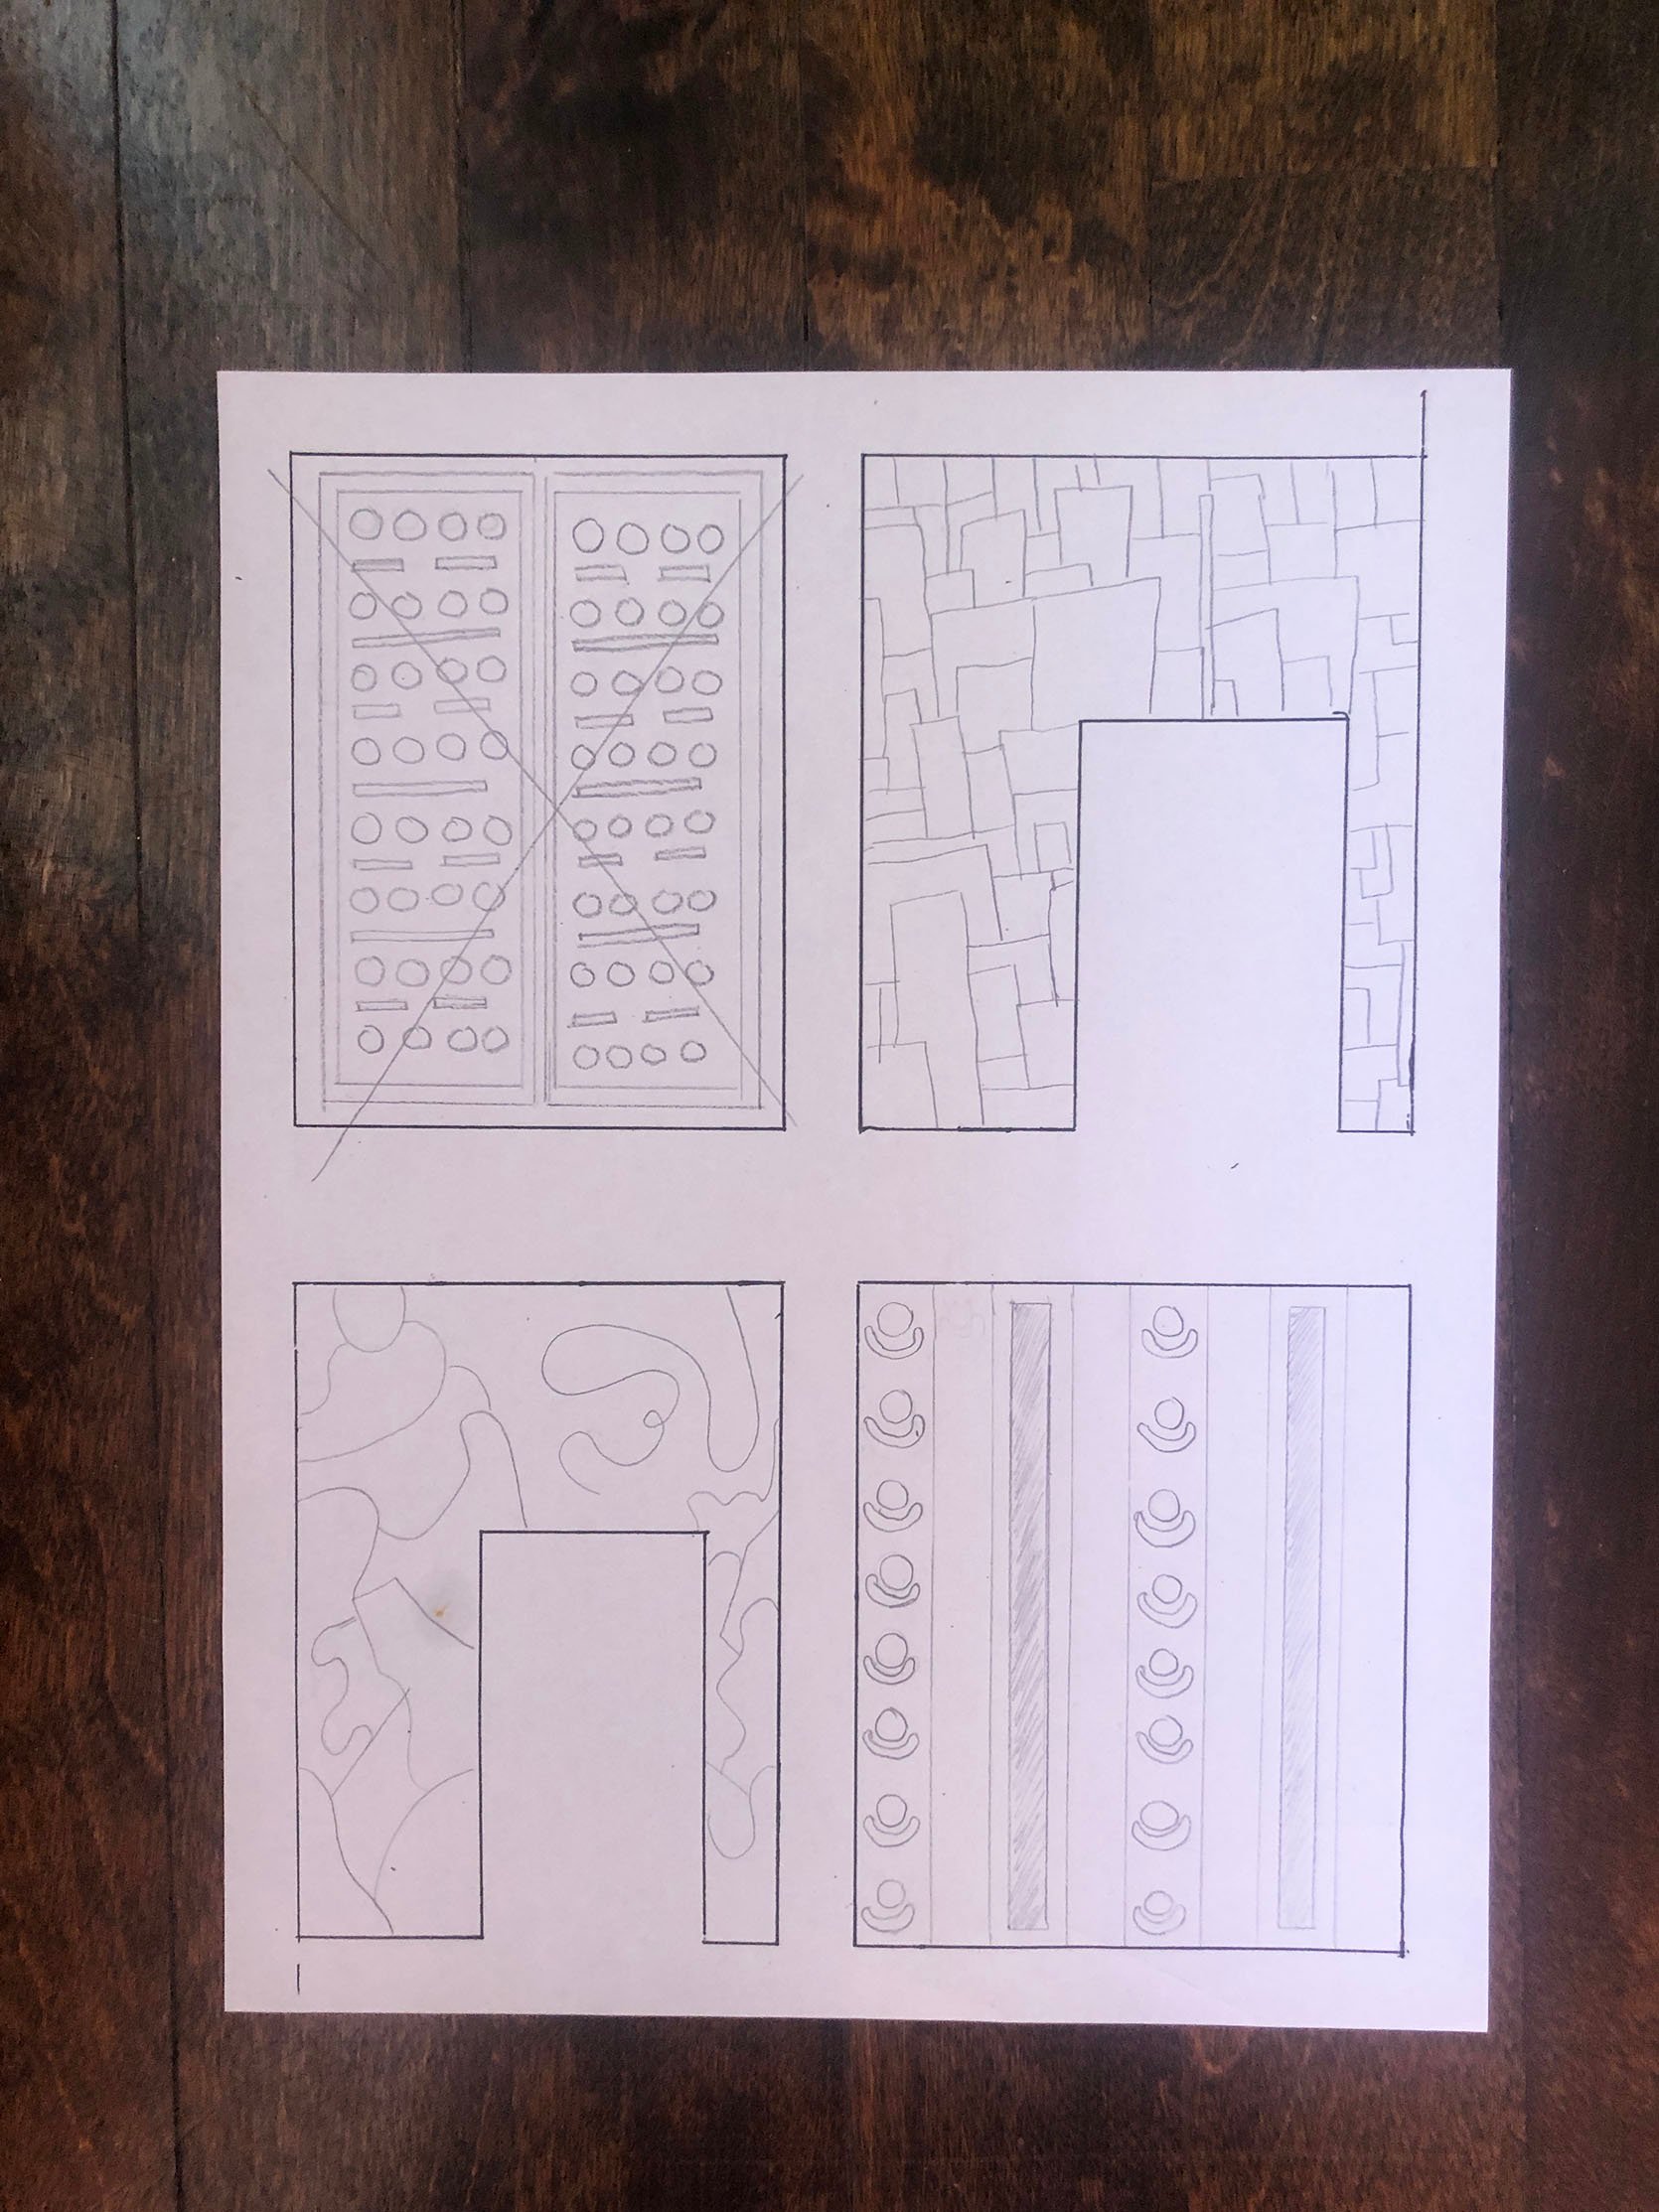
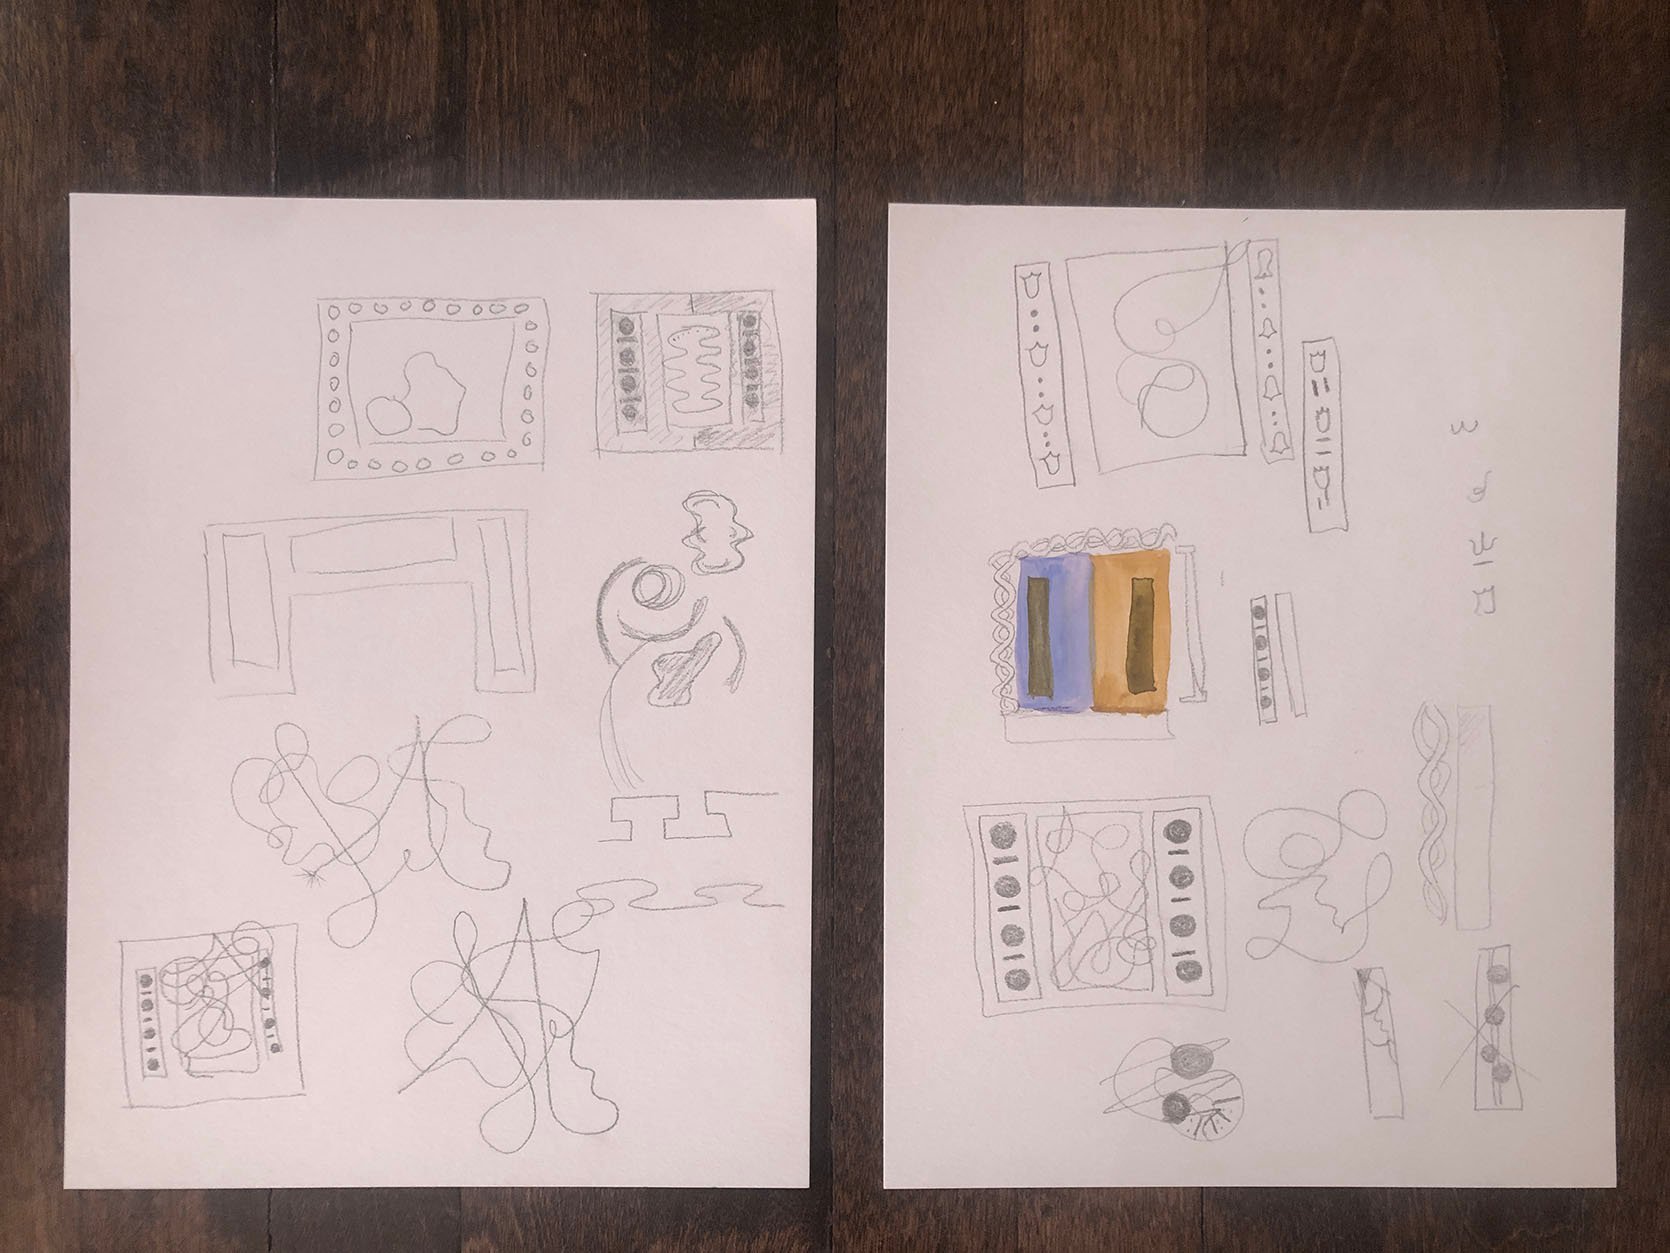
Here I made a rough template of the four walls and then photocopied a handful to try out different patterns. These would not have gone altogether FYI. I just did something different on each “wall” to see if I maybe liked any of them. I DID NOT. Maybe if I had the right colors to play with that would’ve helped but I still was NOT happy and again, defeated. Then I remembered how much I liked the walls in a room I stayed in at the Freehand New York. They were just simple line drawings on the walls and it looks awesome. So then I tried this…
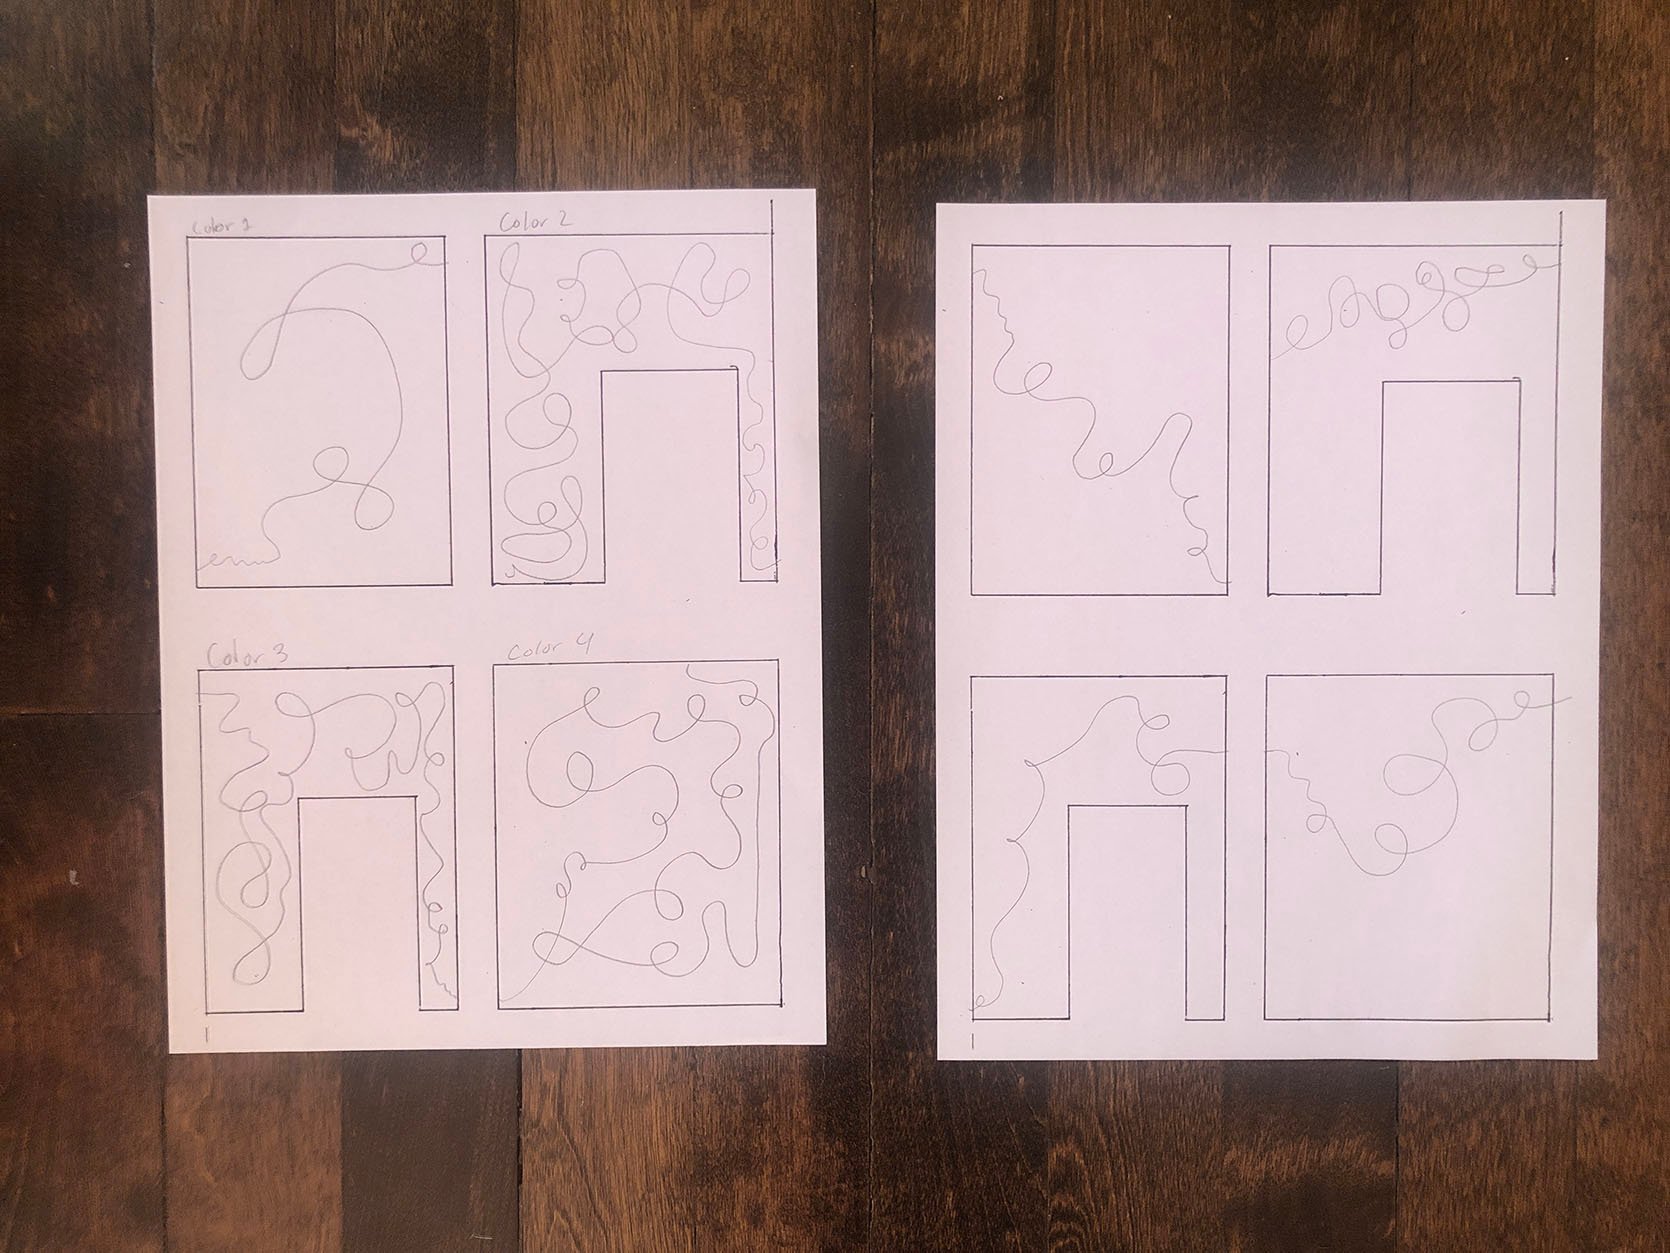
The idea was to paint each wall a different but complementary color and then essentially have a single line make its way through each wall in a fun way. The paper on the left was a little too much. Ha. Then the one on the right is better but would need A LOT of editing. This was just the first draft.
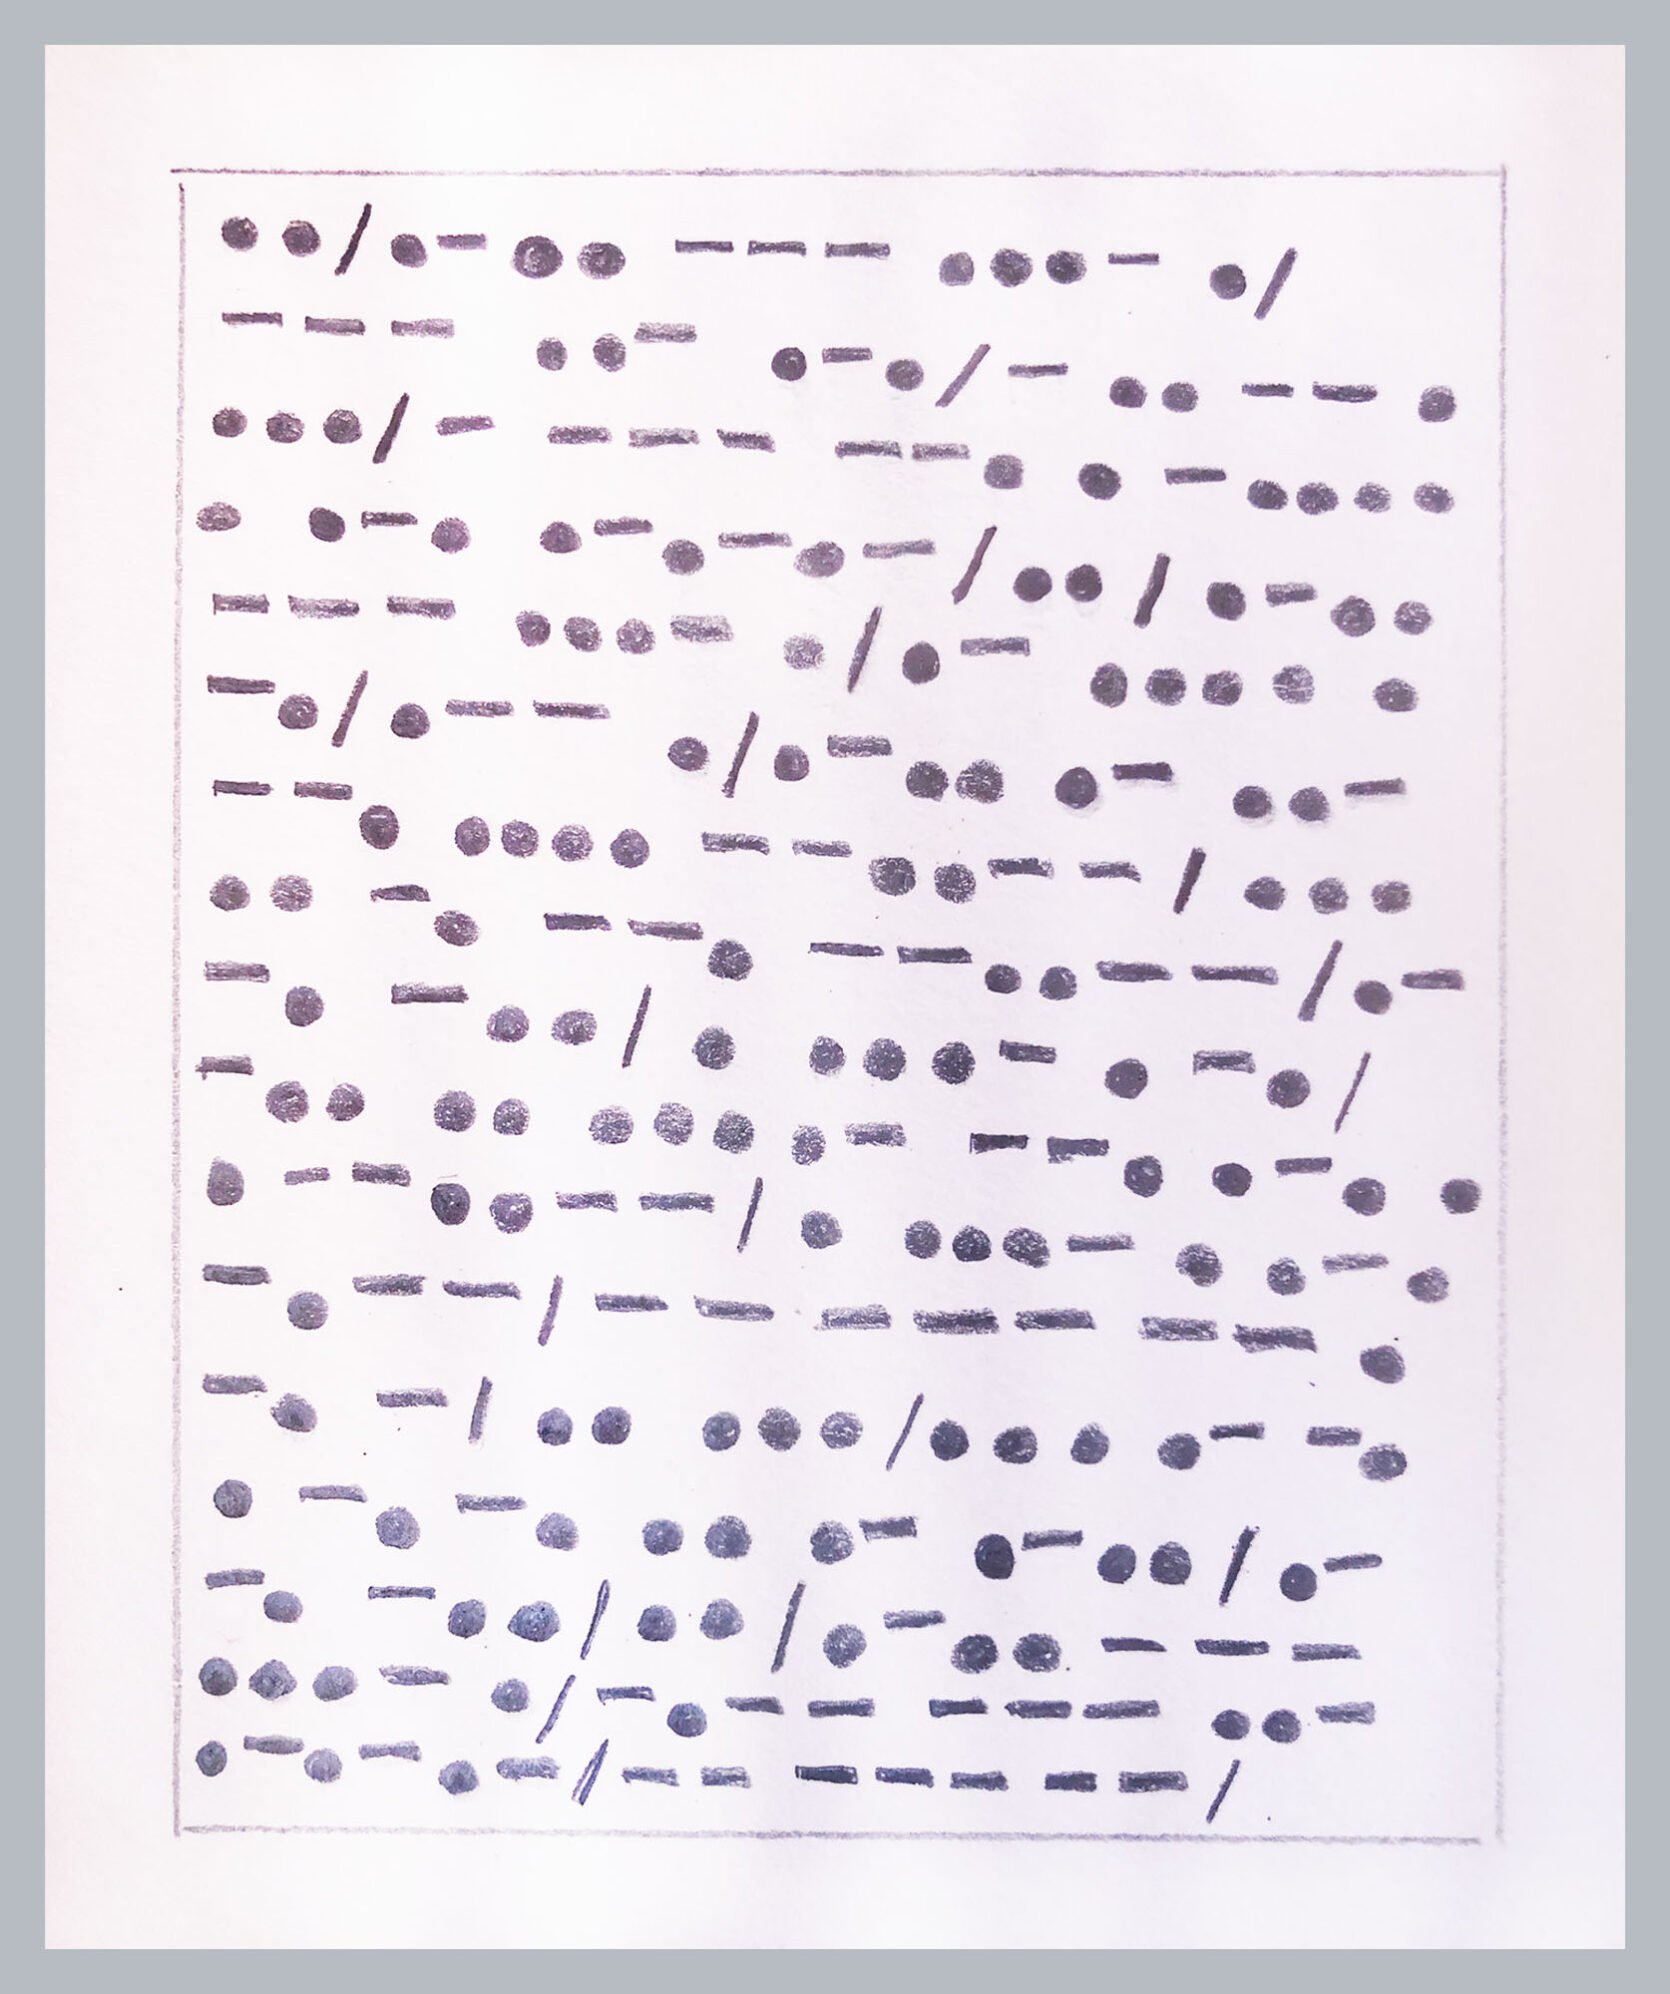
But then an idea came to me! I’d seen morse code art and thought that would look so cool and could have a ton of meaning for me. I immediately thought of coding out my mom’s name and a sweet card she wrote me years ago. I love the idea of feeling her the moment I walk into my front door (and maybe forget that there’s a toilet staring at me dead in the eyes). I also think this closet is a perfect place for this design because not only did she love to dress up but some of my favorite pieces of hers are stored in there. For some context for those that may not know, my mom passed away 11 years ago. This probably makes more sense with that info:)
Anyway, this drawing of my mom’s card in Morse code looks comically horrible since I did it pretty fast, but I think it will look really cool when it’s carefully done and properly measured all out. Plus the “style” is totally in line with my love of shapes and goes perfectly with the rest of my apartment’s design.
So that’s the idea! I might play with scale and still might color block the walls to make it a little more joyful because that’s what it’s supposed to represent to me. It’ll be like my own little secret whenever I look up at it:)
Oh, I actually have another update!
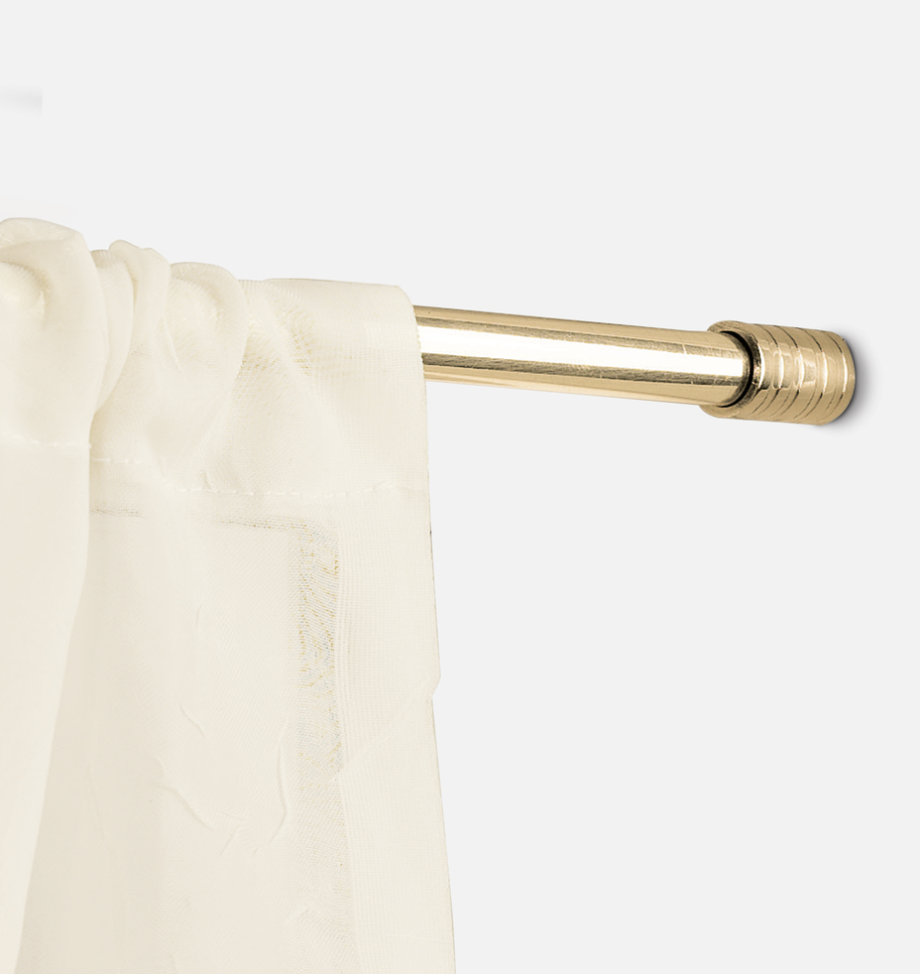

Cafe Curtain Rod | Pinch Rings
I decided that as much as I wanted to have the rod attached to the bottom of the top shelf, it was going to leave a little gap between the side of the curtain and the wall. NO thank you. So I happened upon this cafe curtain rod from Rejuvenation. It was only $50 and could be cut to size! I paid for it with my own money and also bought 12 of the unlacquered brass version of those curtain pinch rings. All in all, after tax and shipping, it came out just over $100. I will be making two little holes in the trim but they can be easily patched and since this whole thing is custom I am happy to leave it for future tenants.
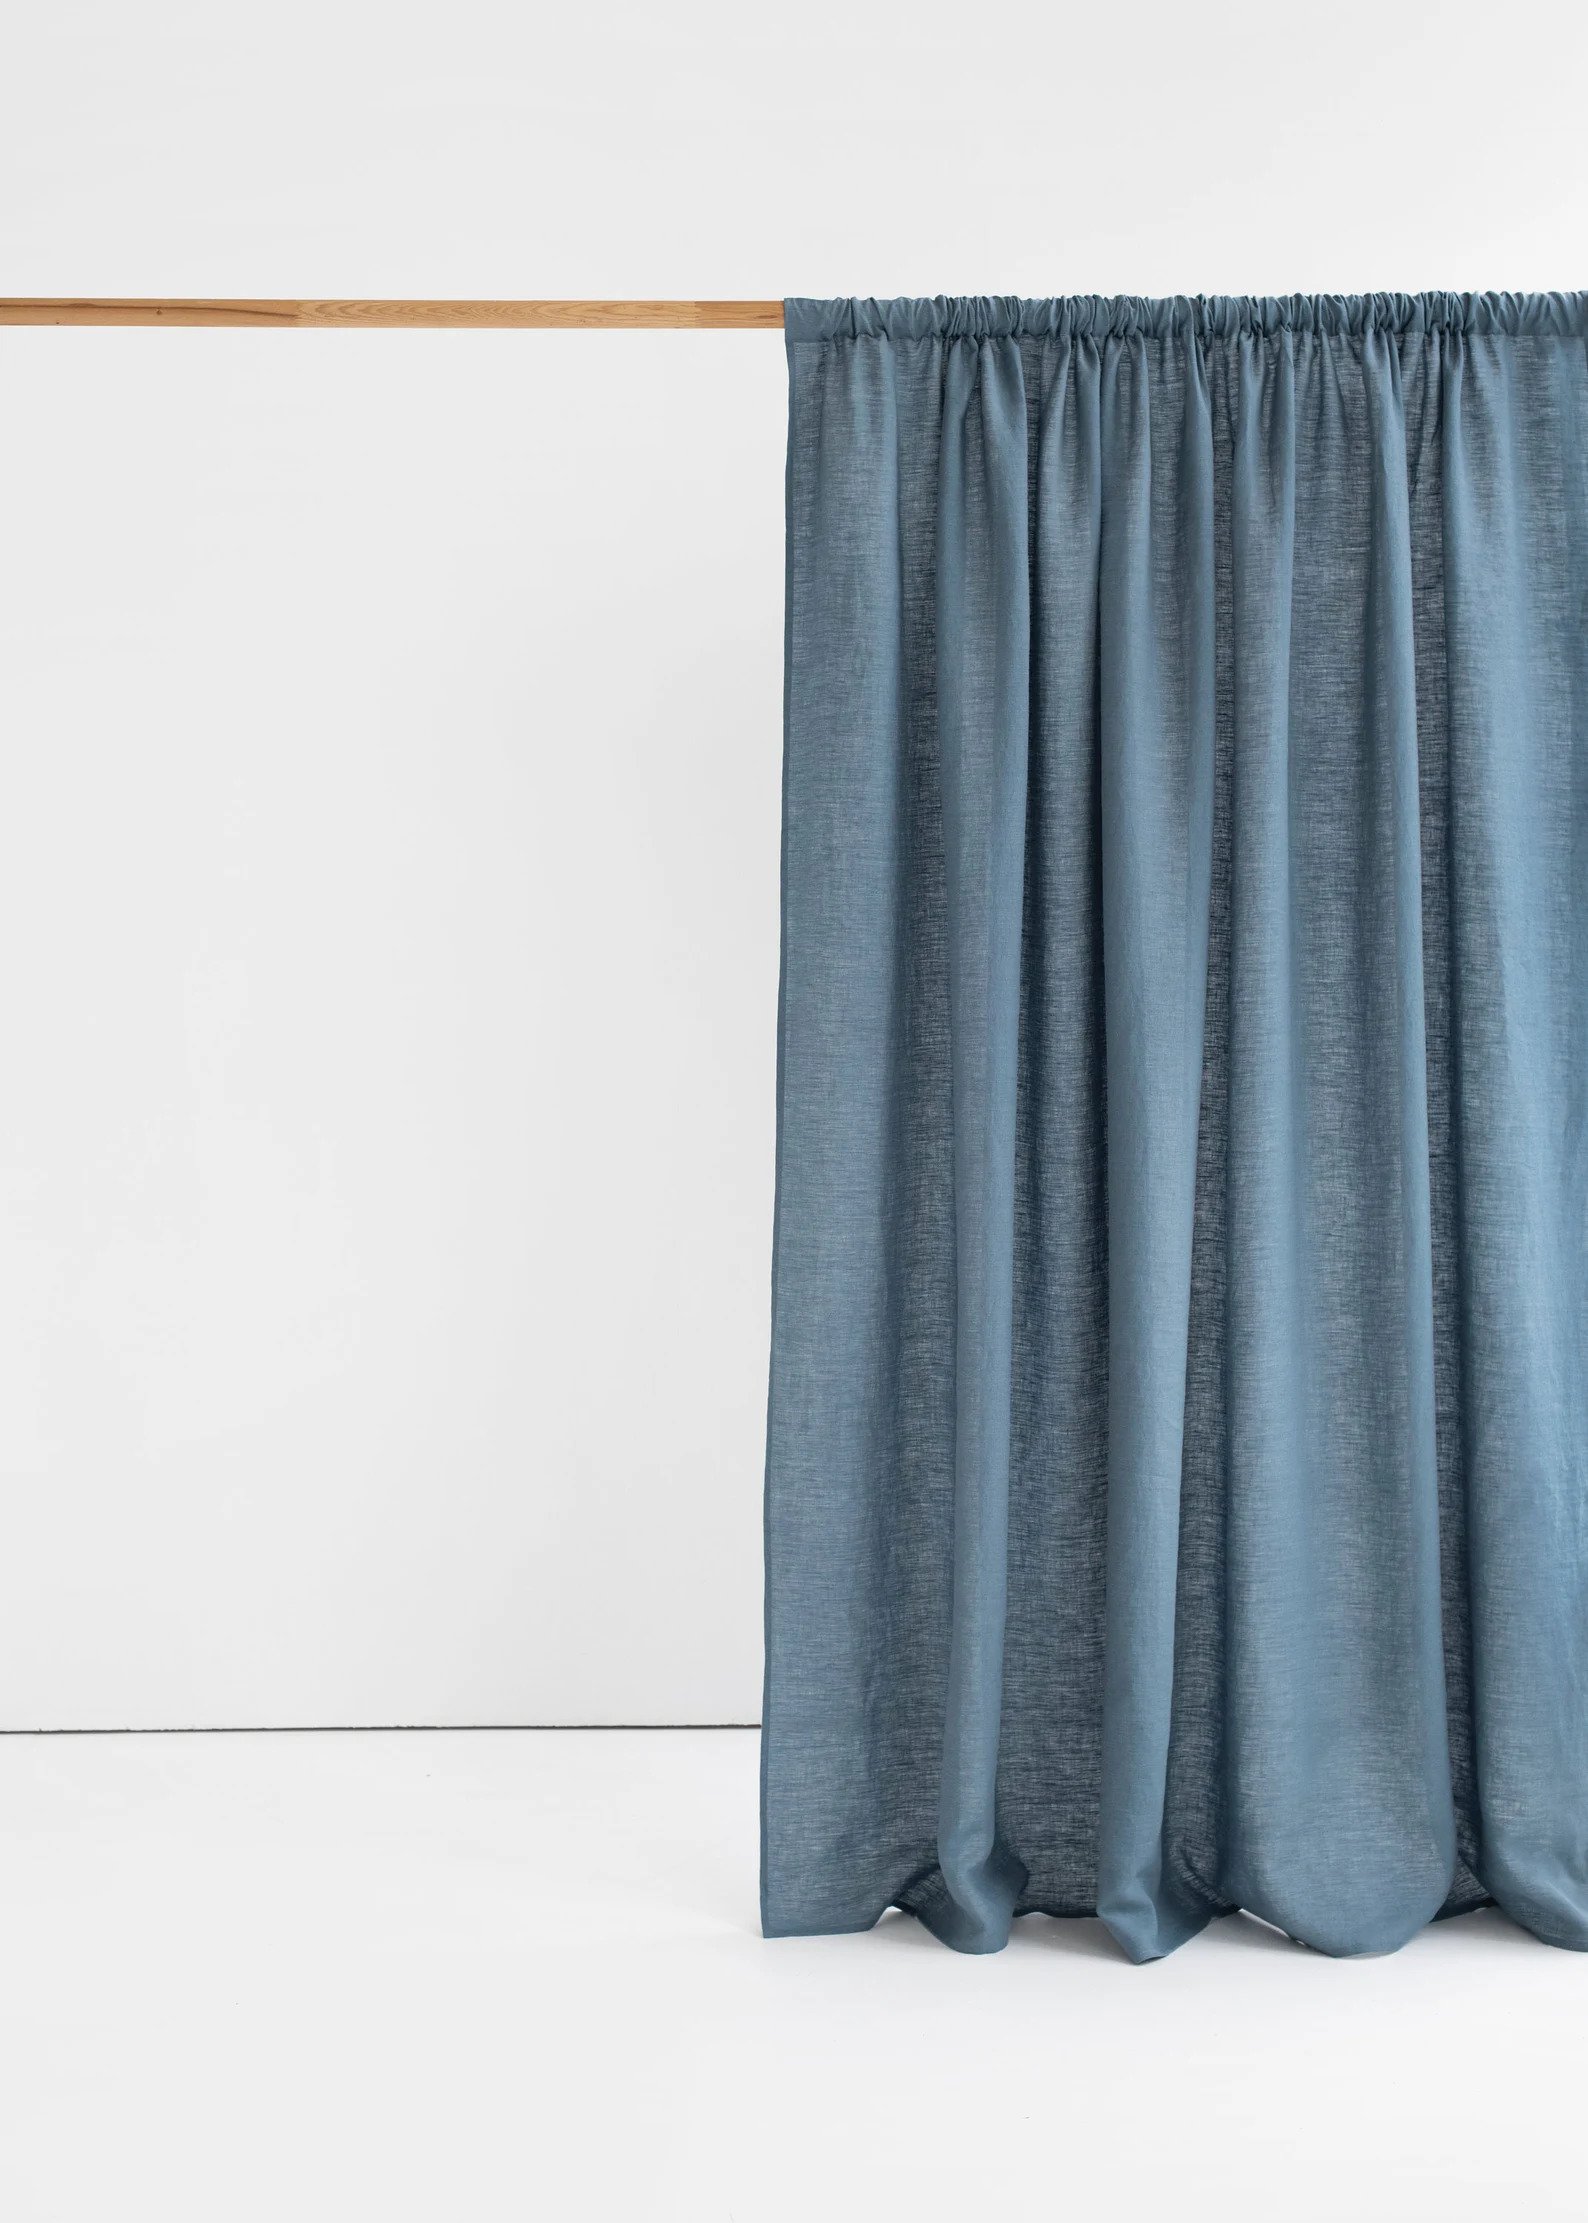
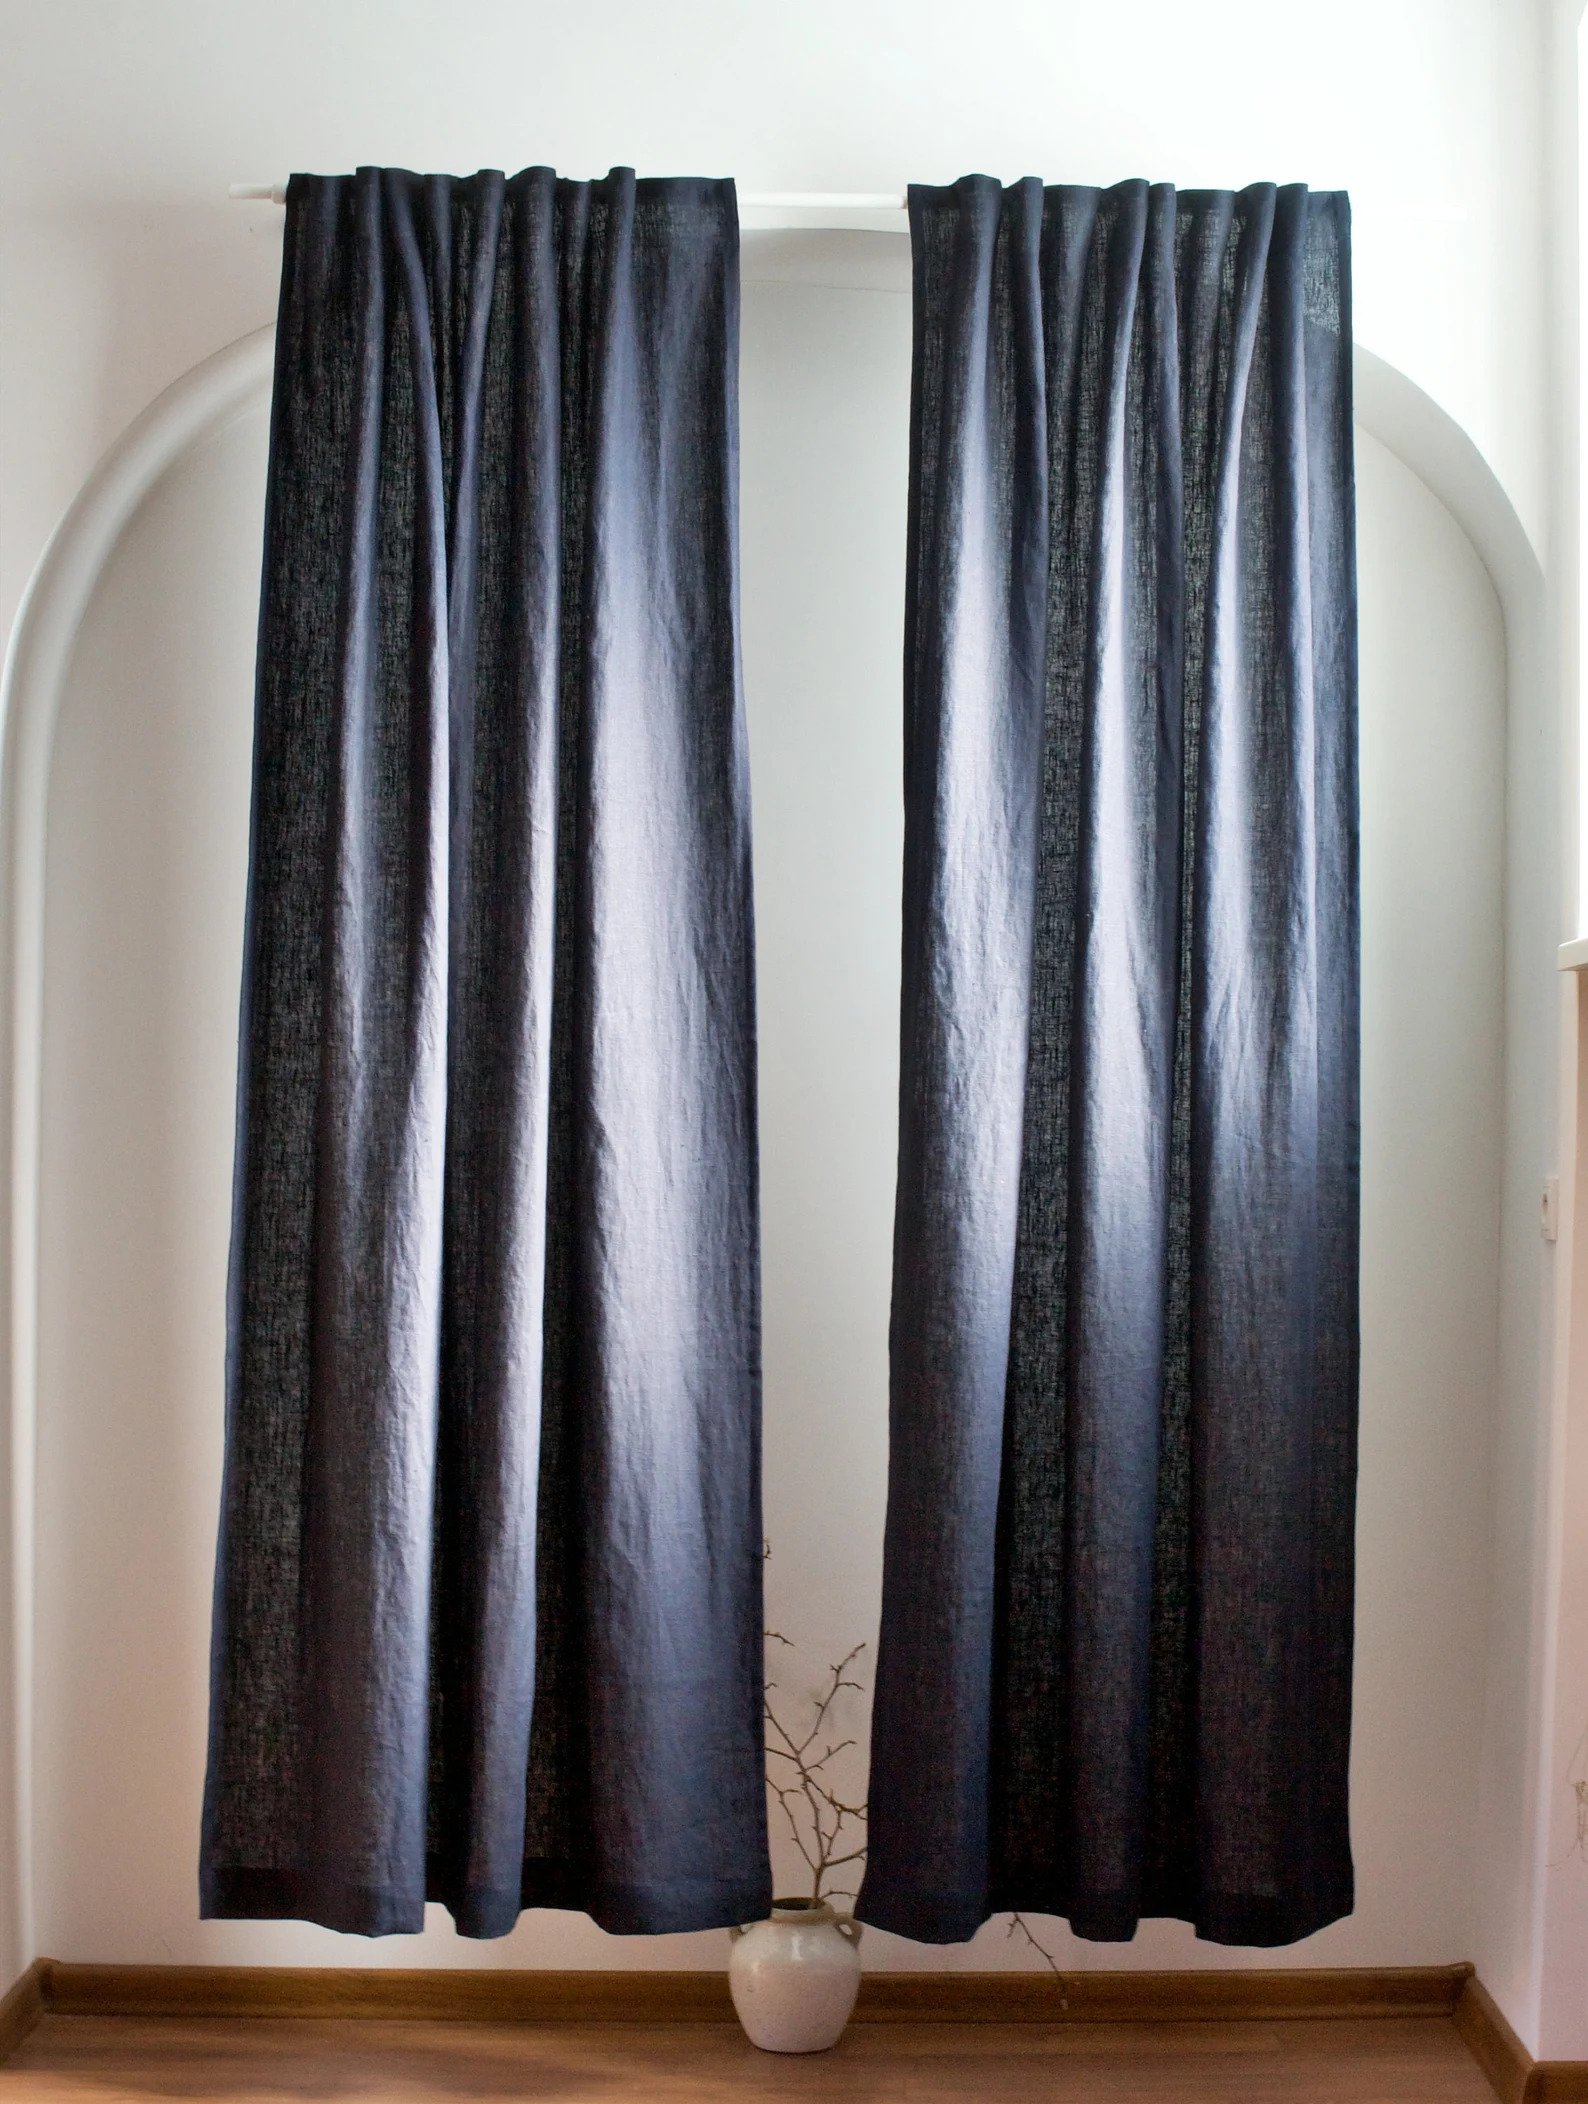
Semi-Sheer Linen Drape | Dark Linen Curtain
So now that I have the rod I need a curtain! I told my dad I was planning to go to my favorite fabric store and get one made when he asked why I wouldn’t just get a readymade curtain panel and get it hemmed. Great question dad. It hadn’t crossed my mind. Why do I always make things way more complicated than they have to be????? Now that I had a much smarter plan, I found these two blue linen curtain panels that should be wide enough so I only need one. The space is 52″ wide. I like the idea of the lighter blue but not sure quite yet. Next update hopefully I’ll have the answer.
Thanks for enduring my middle school-level drawings. I hope we are all impressed by the end result. GULP.
Love you, mean it.
THIS POST WAS ORIGINALLY PUBLISHED HERE.
