I can’t believe it’s already been a year since we found and purchased our Las Vegas condo. Now that we’re feeling like the condo is in a good state for a tenant, we are finally saying goodbye to Las Vegas and beginning our journey back home.
To refresh your memory a bit, a little over a year ago, my husband and I were on the hunt for our dream home in Los Angeles. There were slim pickings, with most of the homes being in poor condition and overpriced. We searched high and low for a reasonable place to buy, but never quite found it, so we moved on to the next plan, and purchased a condo at a great price, utilizing the great interest rate being offered (at the time). We decided we’d buy it, fix it up, live in it, and eventually rent it out, then head back home to Los Angeles once the condo was in good condition. We’ve made several improvements so far, and most of them were made considering what would be most durable and best for a tenant. That said, here are some of the biggest and most beautiful updates we made with a tenant in mind. But we did have a little help on what was worth it or not…
Market Research (Instagram and Tiktok)
We took our time working on this place because we wanted to make sure the tenants who reside here feel at home. We want them to love where they live. Though we realize the love and care we have given to the condo will not likely be demonstrated by tenants, we just could not find it in ourselves to half-ass the job. That said, we took to social media to create polls where my audience could give their input about what updates were worth it and which ones weren’t. This led to thousands of replies with renters sharing their sentiments towards their apartments and voicing what type of place they felt was worth caring for. To my surprise, I found that a lot of these renters were much like me – taking pride in where they live and thrilled to keep up their spaces. Even with this feedback, we plan to do our absolute best when it comes to vetting the tenants that will be moving into this condo.
LVP (Luxury Vinyl Planks) Throughout – Durability, Waterproof, And Scratch-Resistant

LVP (sold by floor & decor and is no longer available)
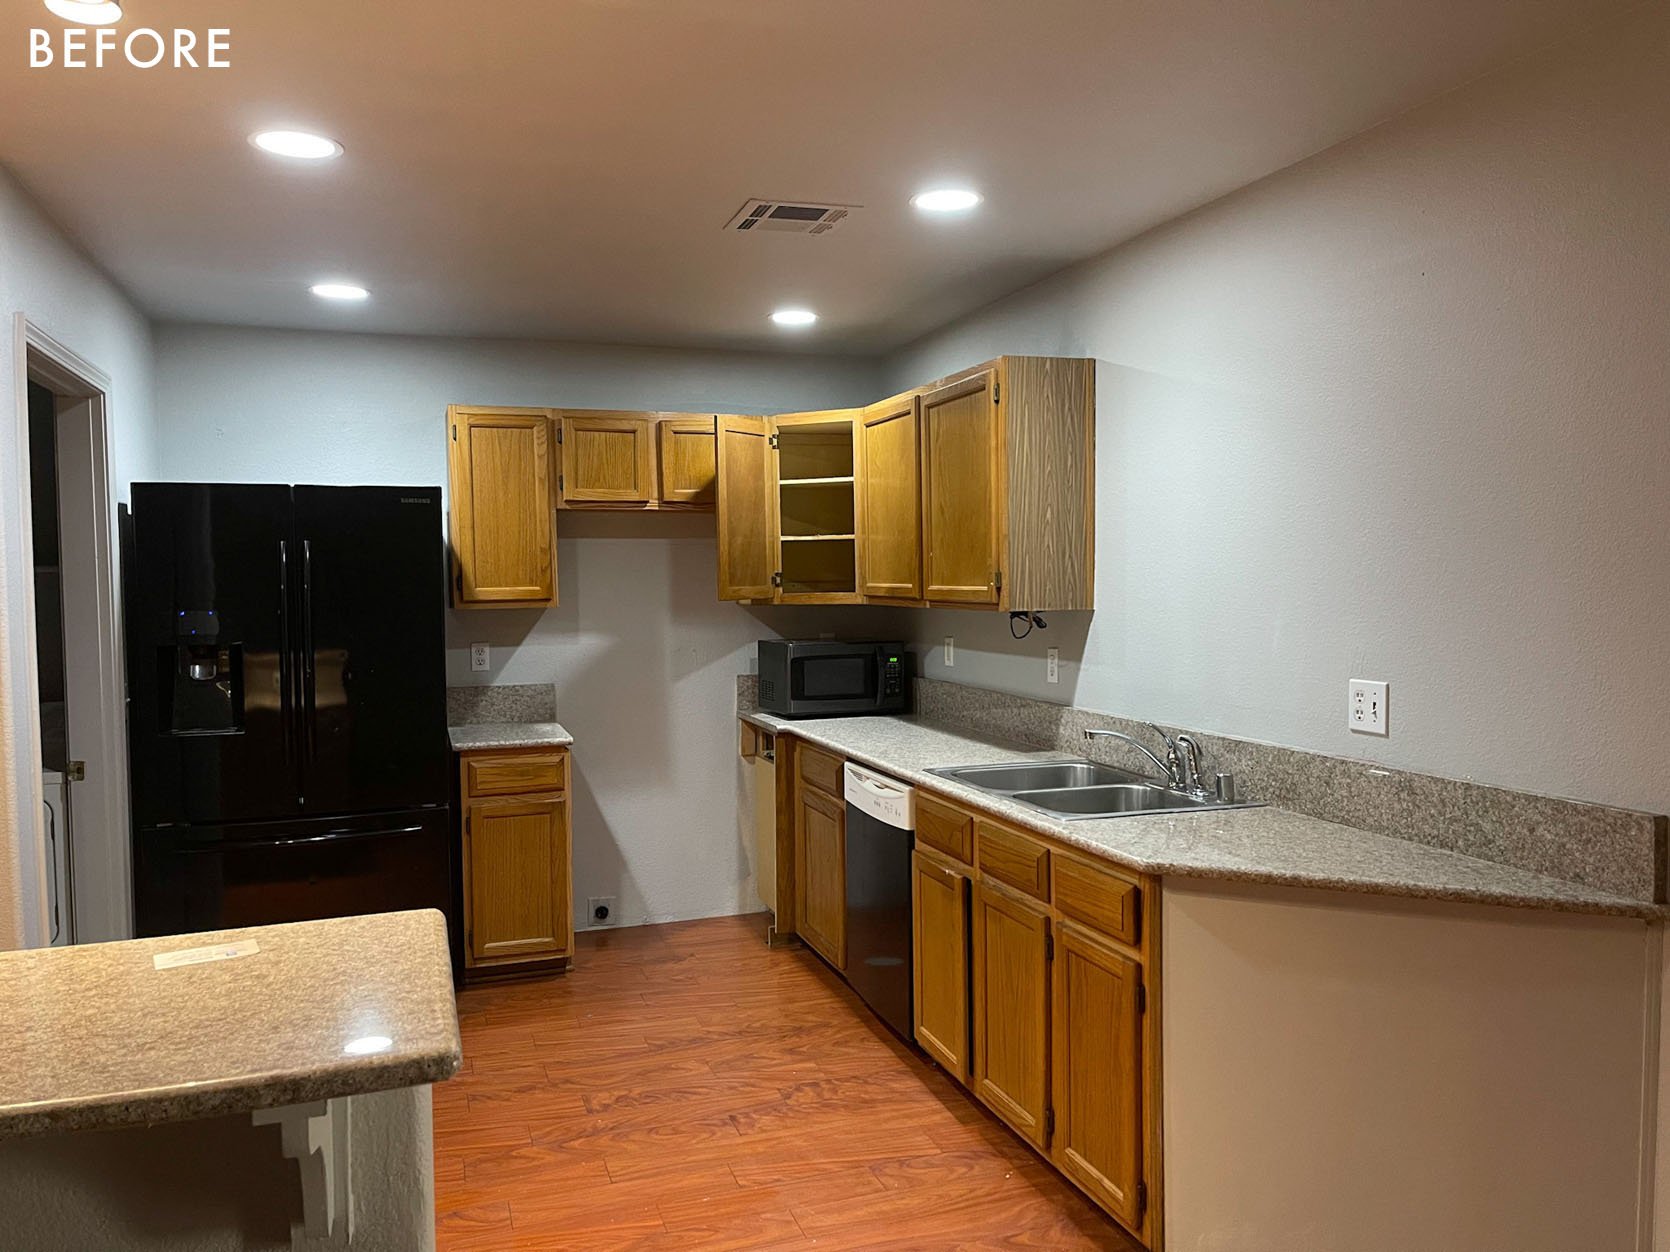
We didn’t have much choice on whether or not we would be replacing the original laminate floors throughout the house, as they were bubbling in several spots in the kitchen and had burn marks on them in a couple of the rooms. We correctly assumed that the floors were bubbling from prior water damage, which also played a factor in our decision to get LVP (luxury vinyl planks) throughout the condo. We wanted to ensure that the floors were waterproof (just in case) lord forbid there are any plumbing issues in the future *knocks on wood*. Along with being waterproof, LVP is also scratch-resistant, extremely durable, and won’t harbor any smells the same way carpet could. The type of LVP we choose is light enough to brighten up the space as well to ensure the place doesn’t feel too dark. Our condo is 1,100 square feet and we were able to lay flooring throughout the entire house (excluding the kitchen) with the LVP material costing $800.
When receiving social media feedback regarding the flooring, I was very surprised to find how many people loved the LVP. I received several thousand responses complimenting how it looks so similar to wood. This is due to the pattern/print added to the top of the LVP. In fact, people are sometimes surprised that it isn’t a different material. Receiving these responses makes me so happy because this helps to validate the choice we made, aesthetically. It’s a beautiful thing when durability can meet beauty. This leads to why we chose our kitchen flooring.
Brick In The Kitchen (More Durability, More Waterproof, More Scratch-Resistance
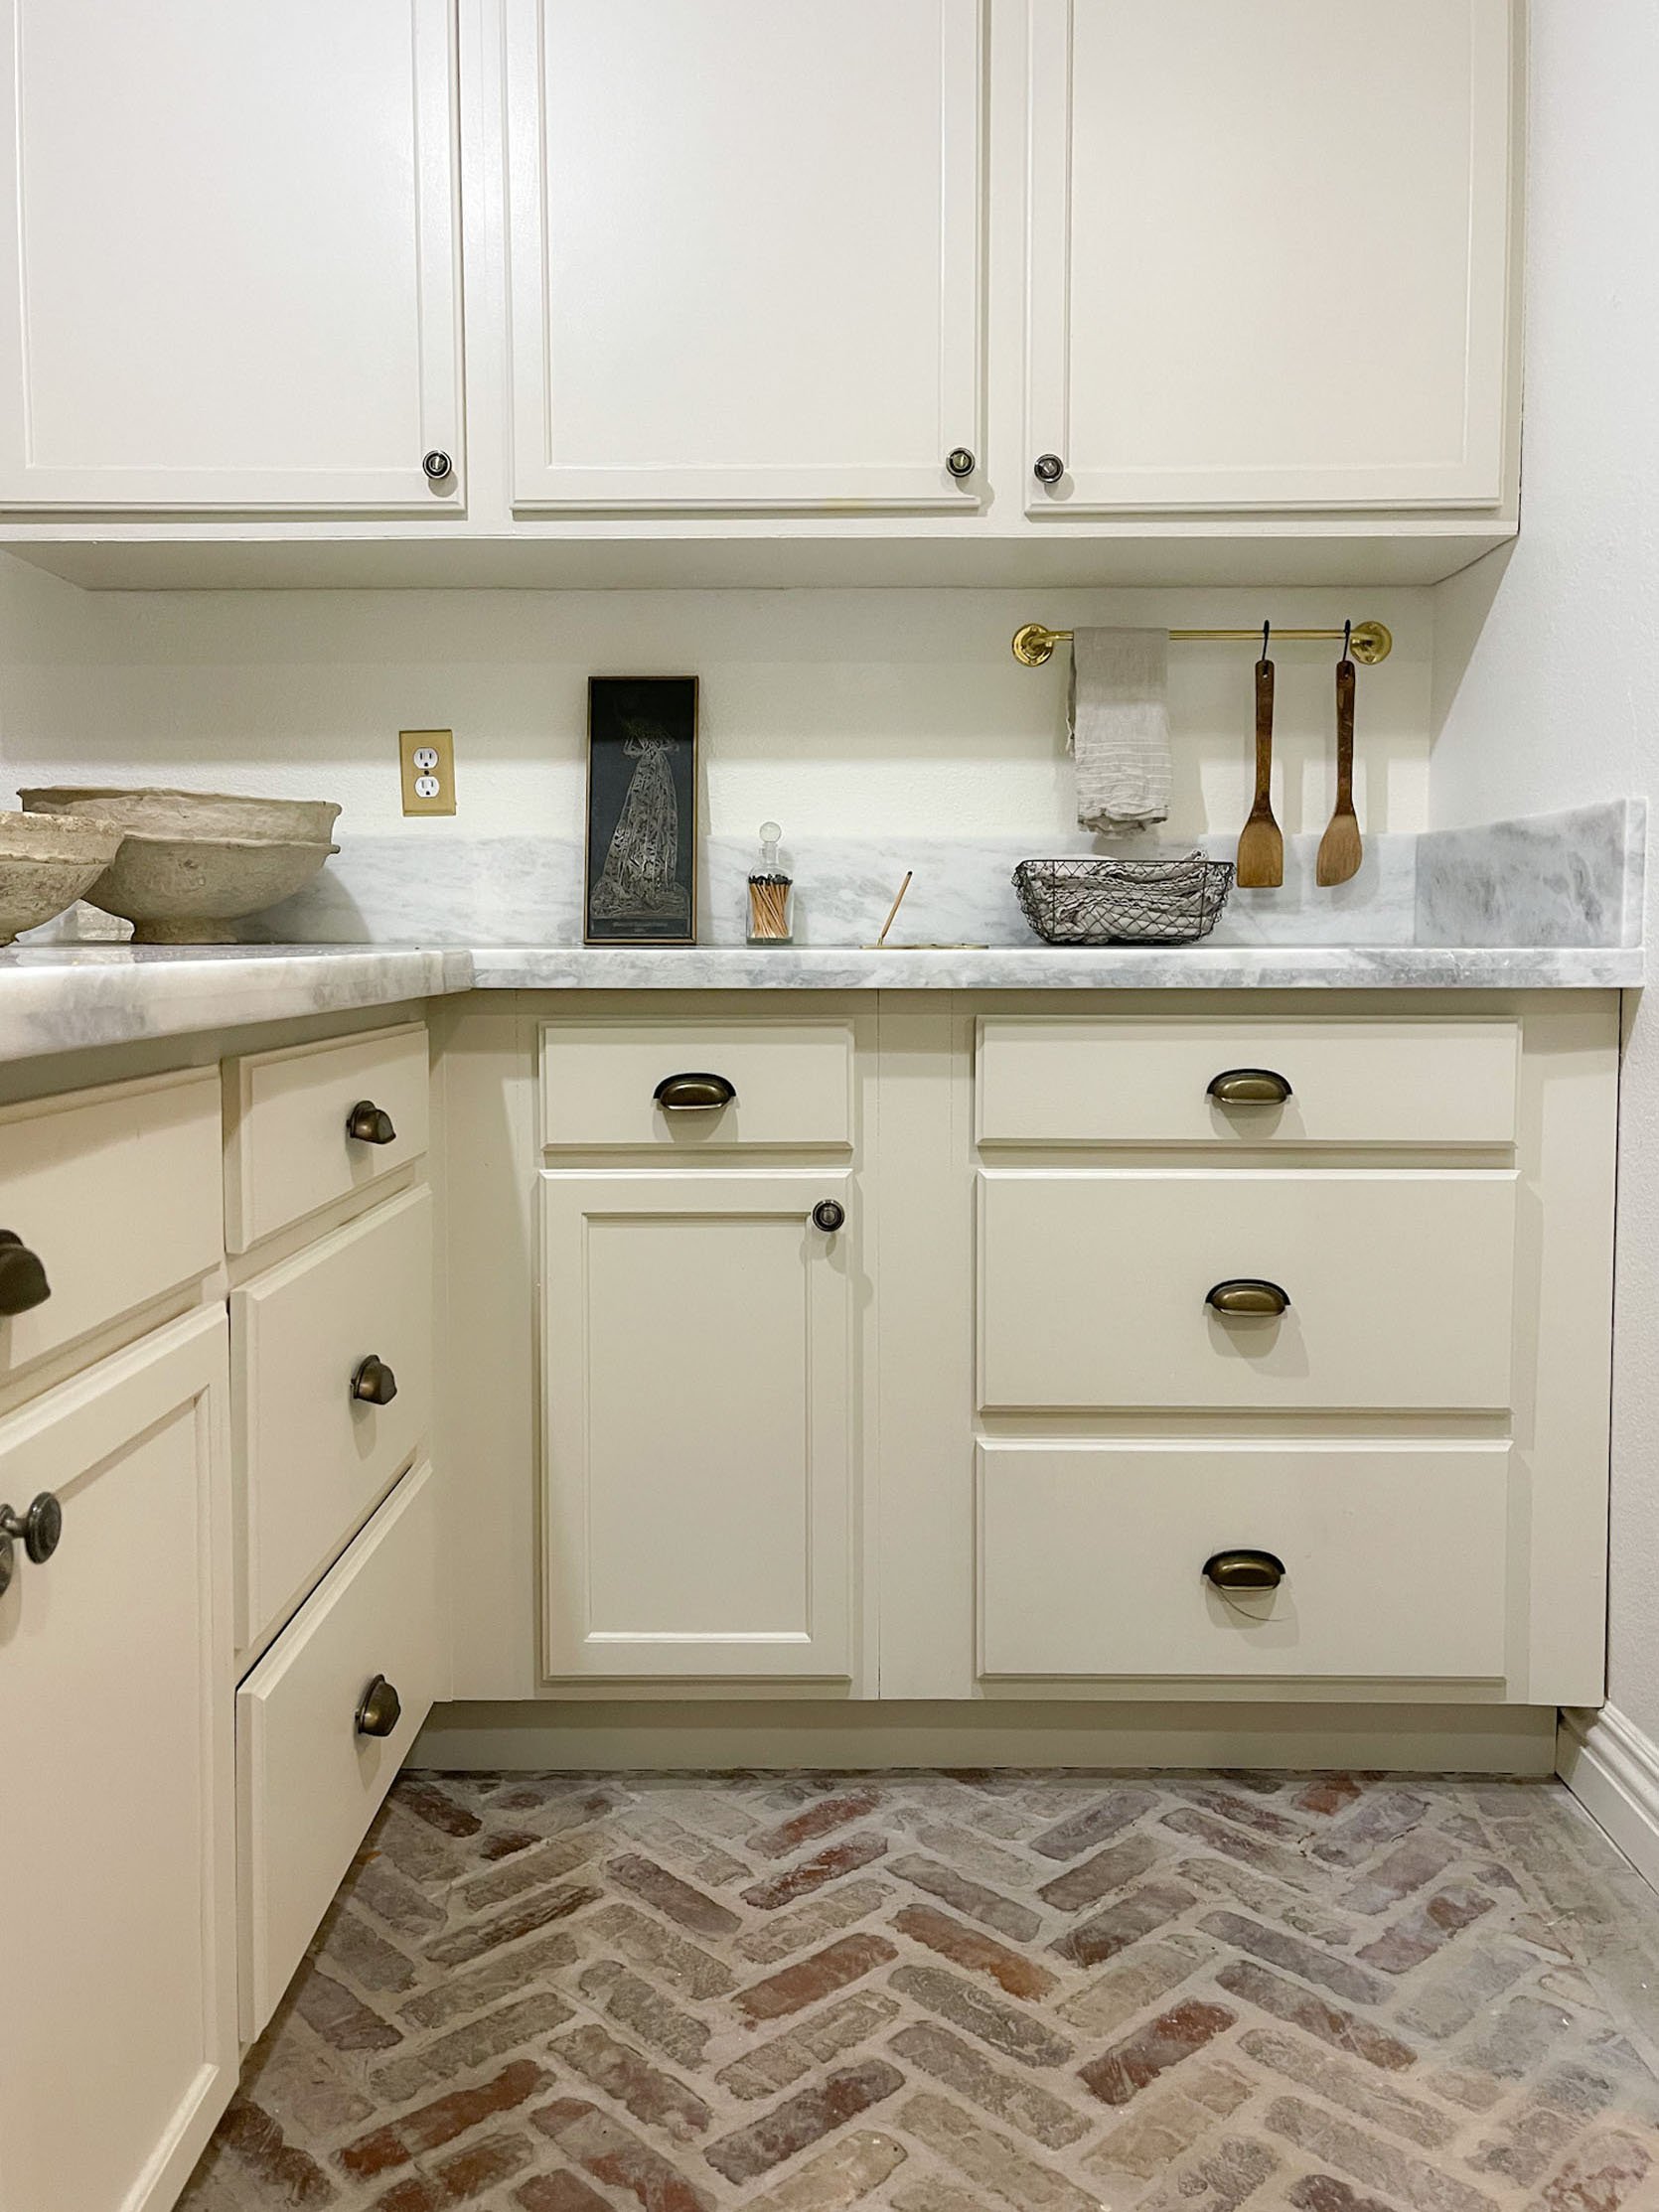
Kitchen Cabinets | Brick Flooring | Cabinet Paint Color | Pulls | Knobs | Outlet Covers | Wall Color
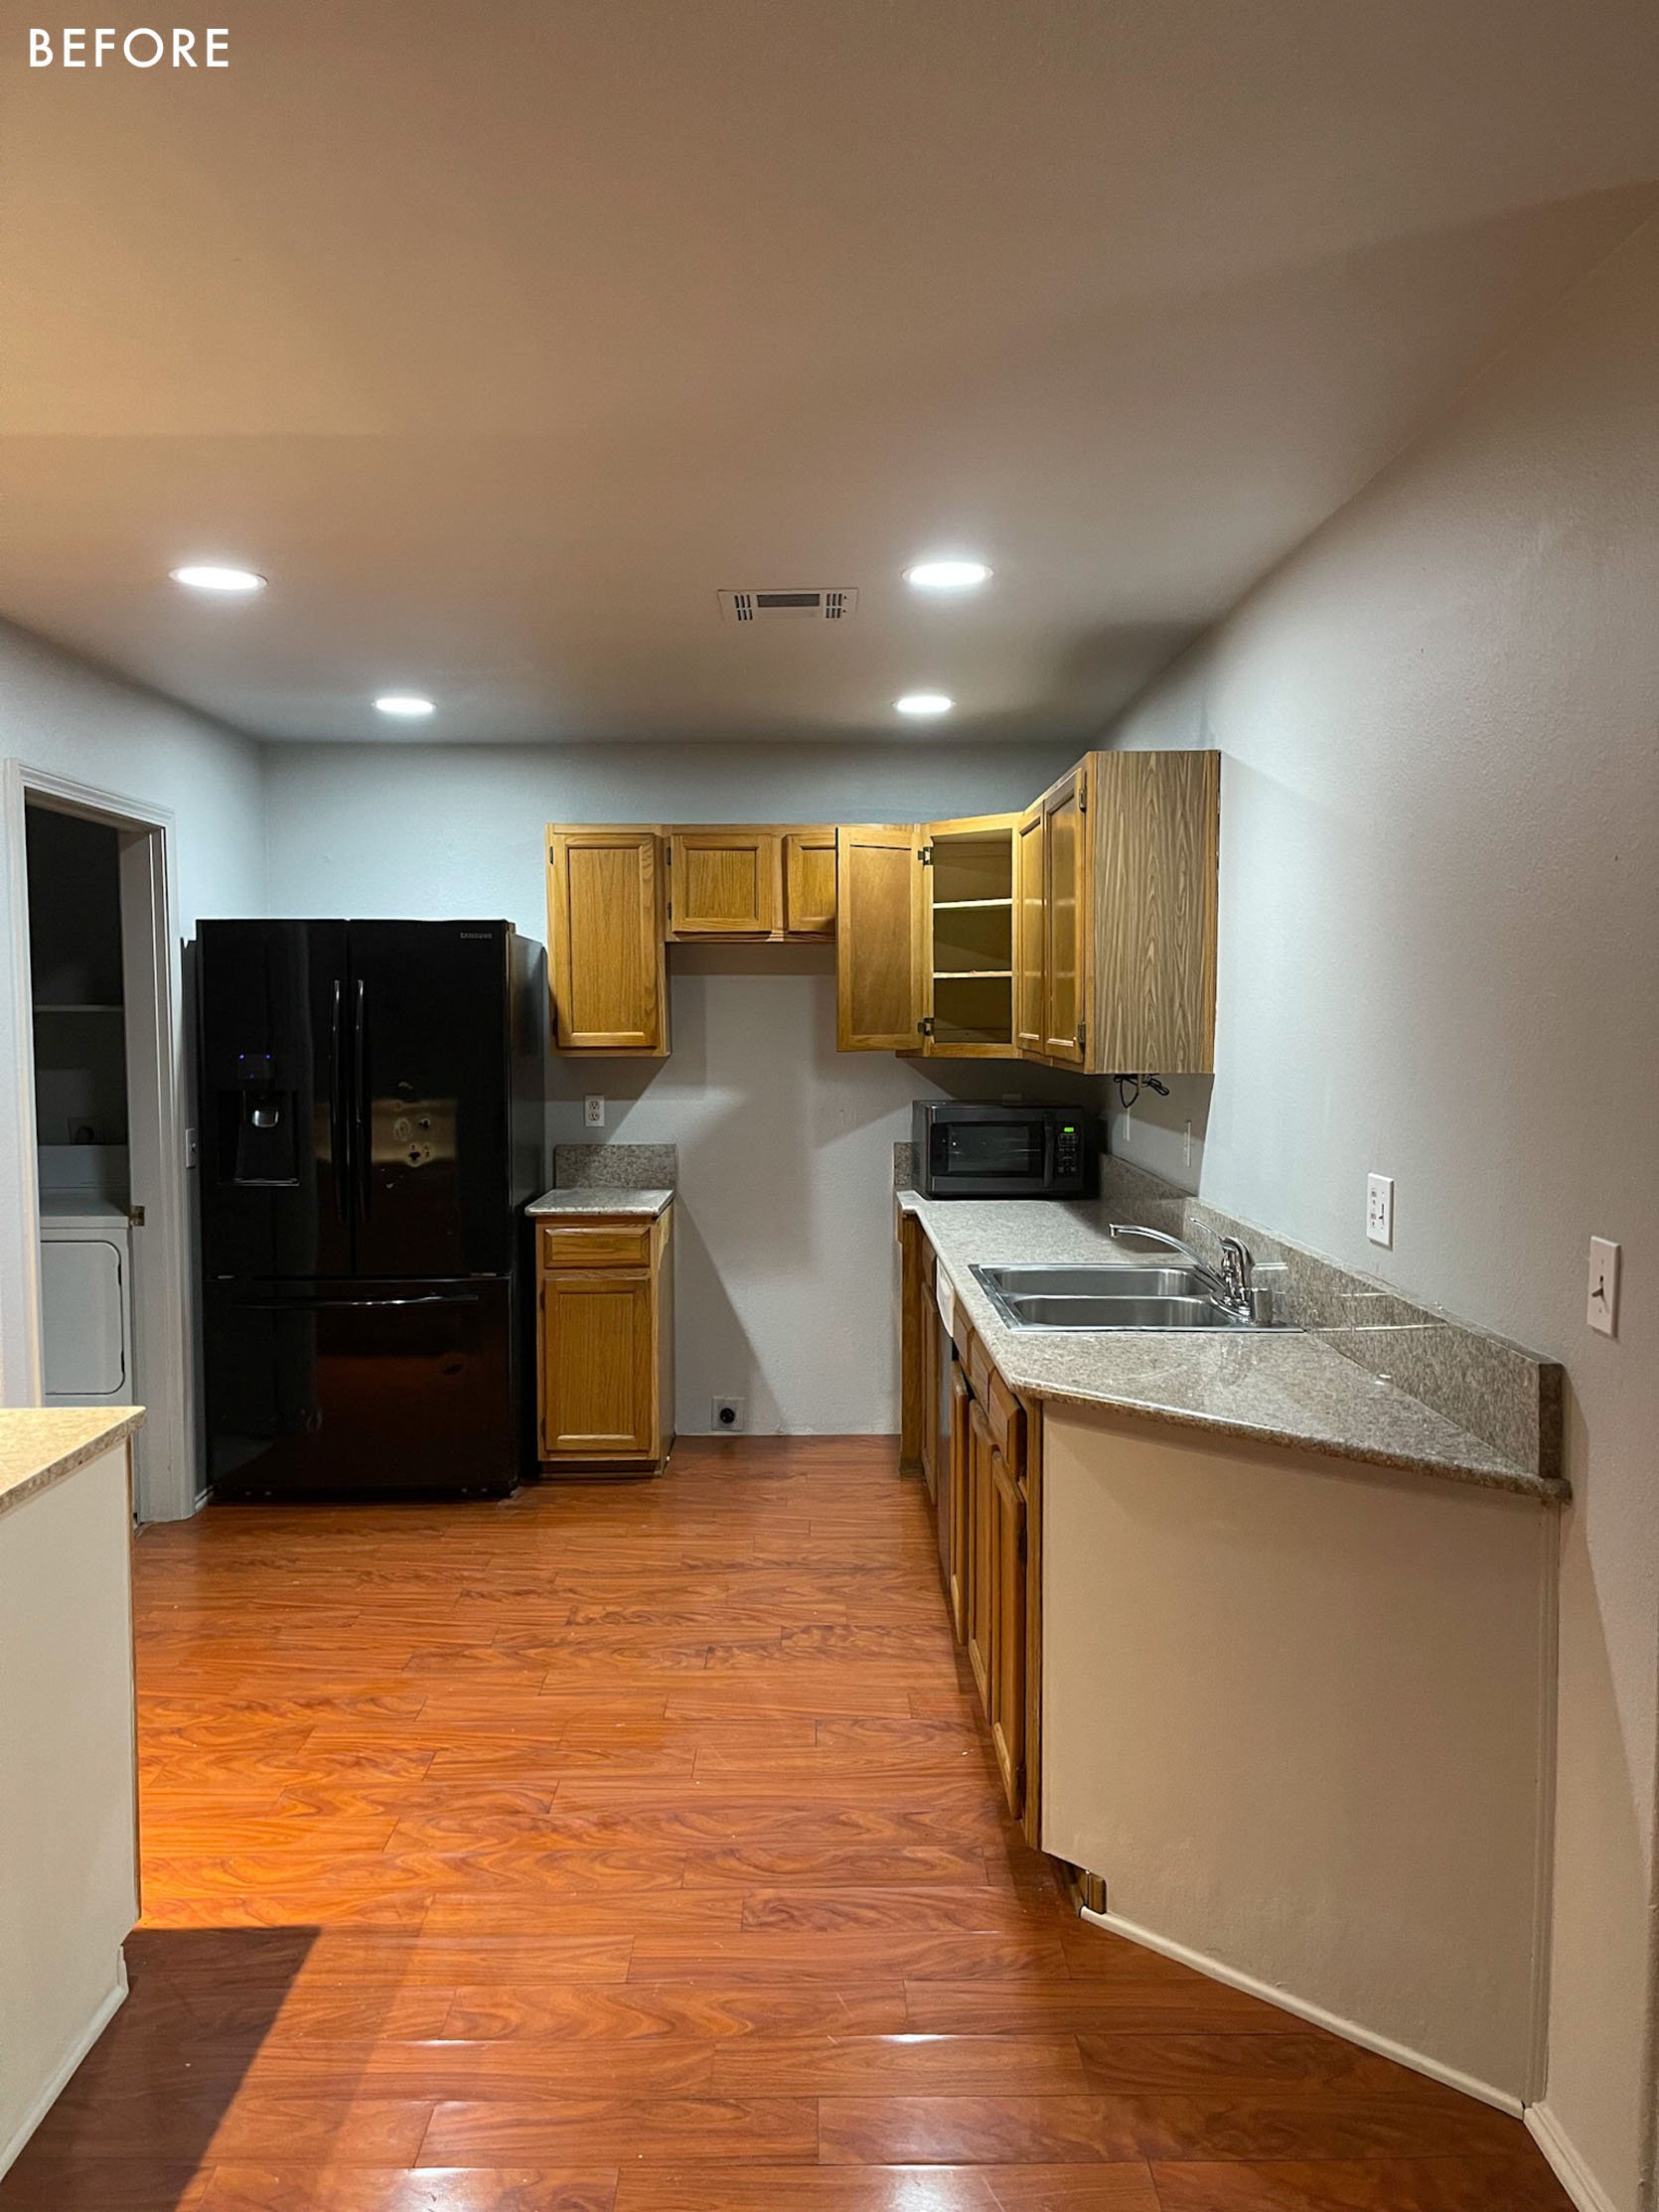
As was the case with the rest of the home, the floors in the kitchen had water damage and needed to go. The condition of the old kitchen floors also steered us towards a waterproof and durable material and we decided on brick. We considered some of the memories of traveling and distinctly the time we spent in Italy and our fondness for their use of brick in high-traffic areas. We wanted something that would last a long time and we felt the brick would match the aesthetic we had in mind for the kitchen while matching up to wear and tear.
We used a sealer that had good reviews – we found it at our nearest home supply store and will seal it every five years from here on. The brick floor cost us a few hundred dollars, but brick would typically be a bit on the expensive side. We saved lots, as we had quite a bit of this floor leftover from a previous design project. This floor has been the most asked-about thing on all my social media platforms. To be honest, the decision to get brick floors has been the most praised tenant-friendly design update I’ve received. When people find out we intend to rent this place out, they are putting themselves forward as future-potential-renters (and I haven’t even uploaded an application yet). It’s quite sweet and gives my husband and me a lot of hope as it pertains to finding a renter. If I can be candid, I’ll also share that this flooring is my most clicked and sold affiliate link/product. In a recent blog post, I shared how we installed and maintained the floors, and I’m happy to give a brief update and share that we are still loving and enjoying our brick floors.
Upgraded Lighting
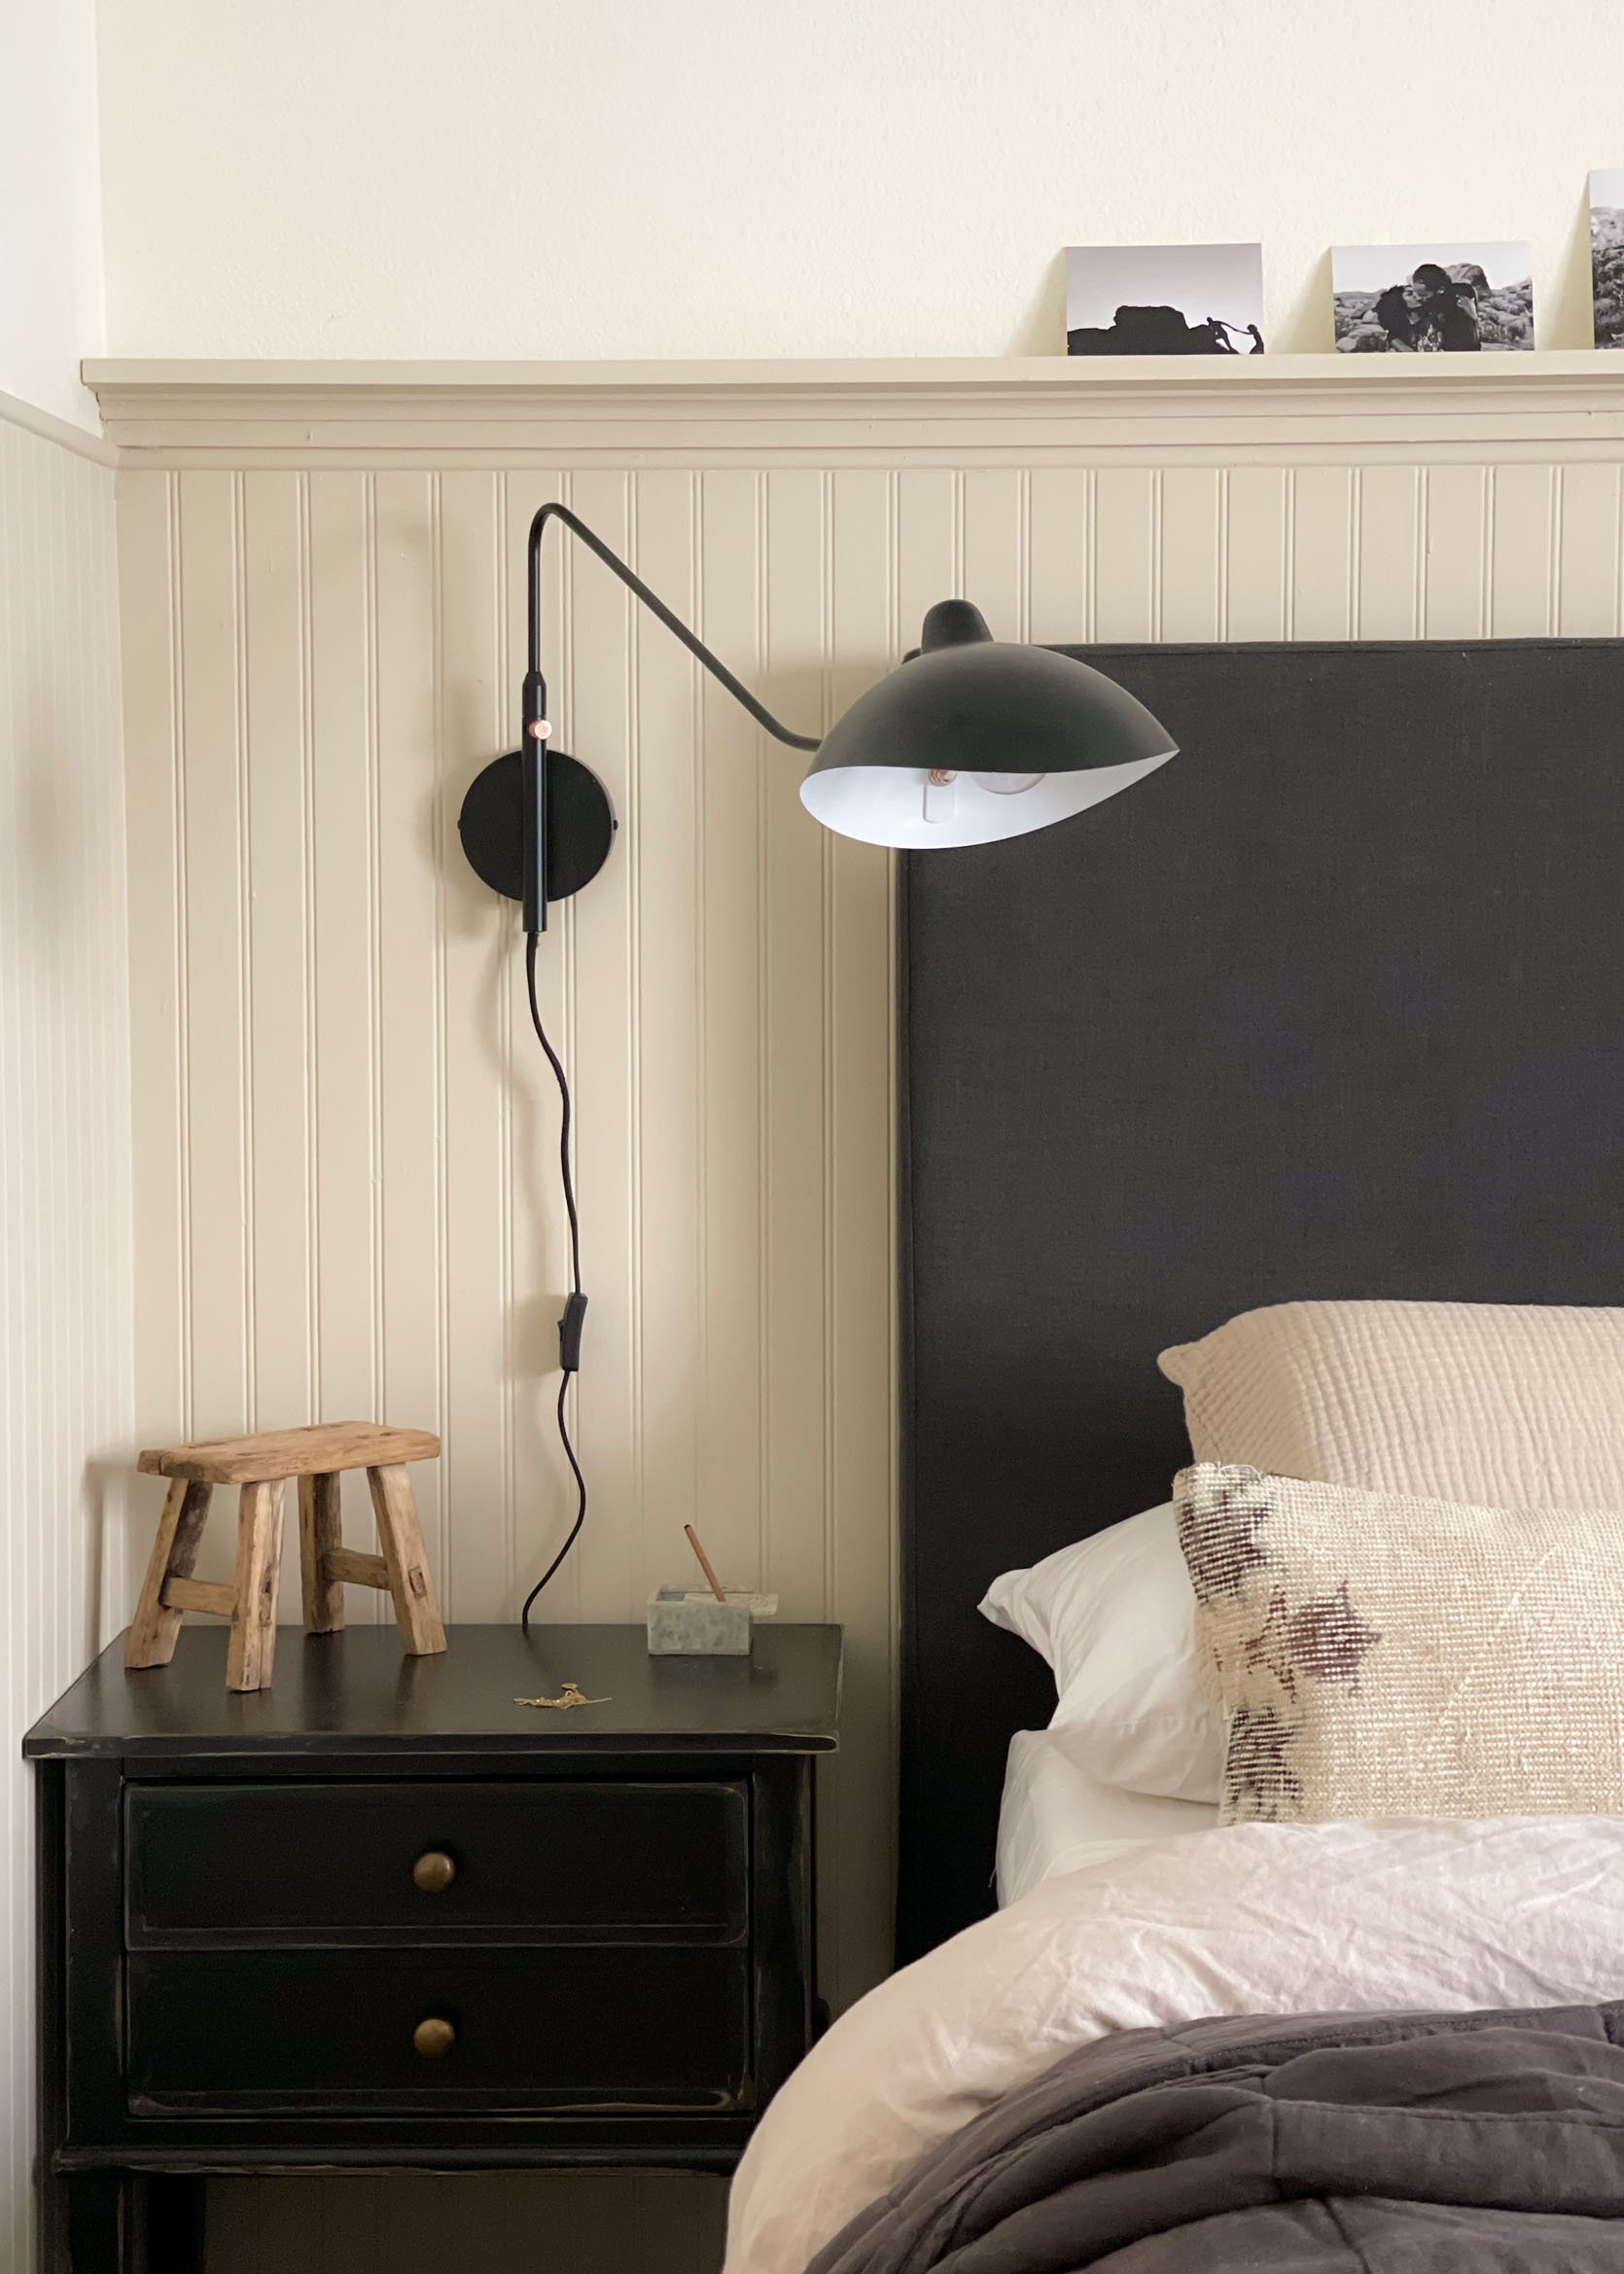
Black Sconce | Sofa Pillows | Knit Throw (unavailable)
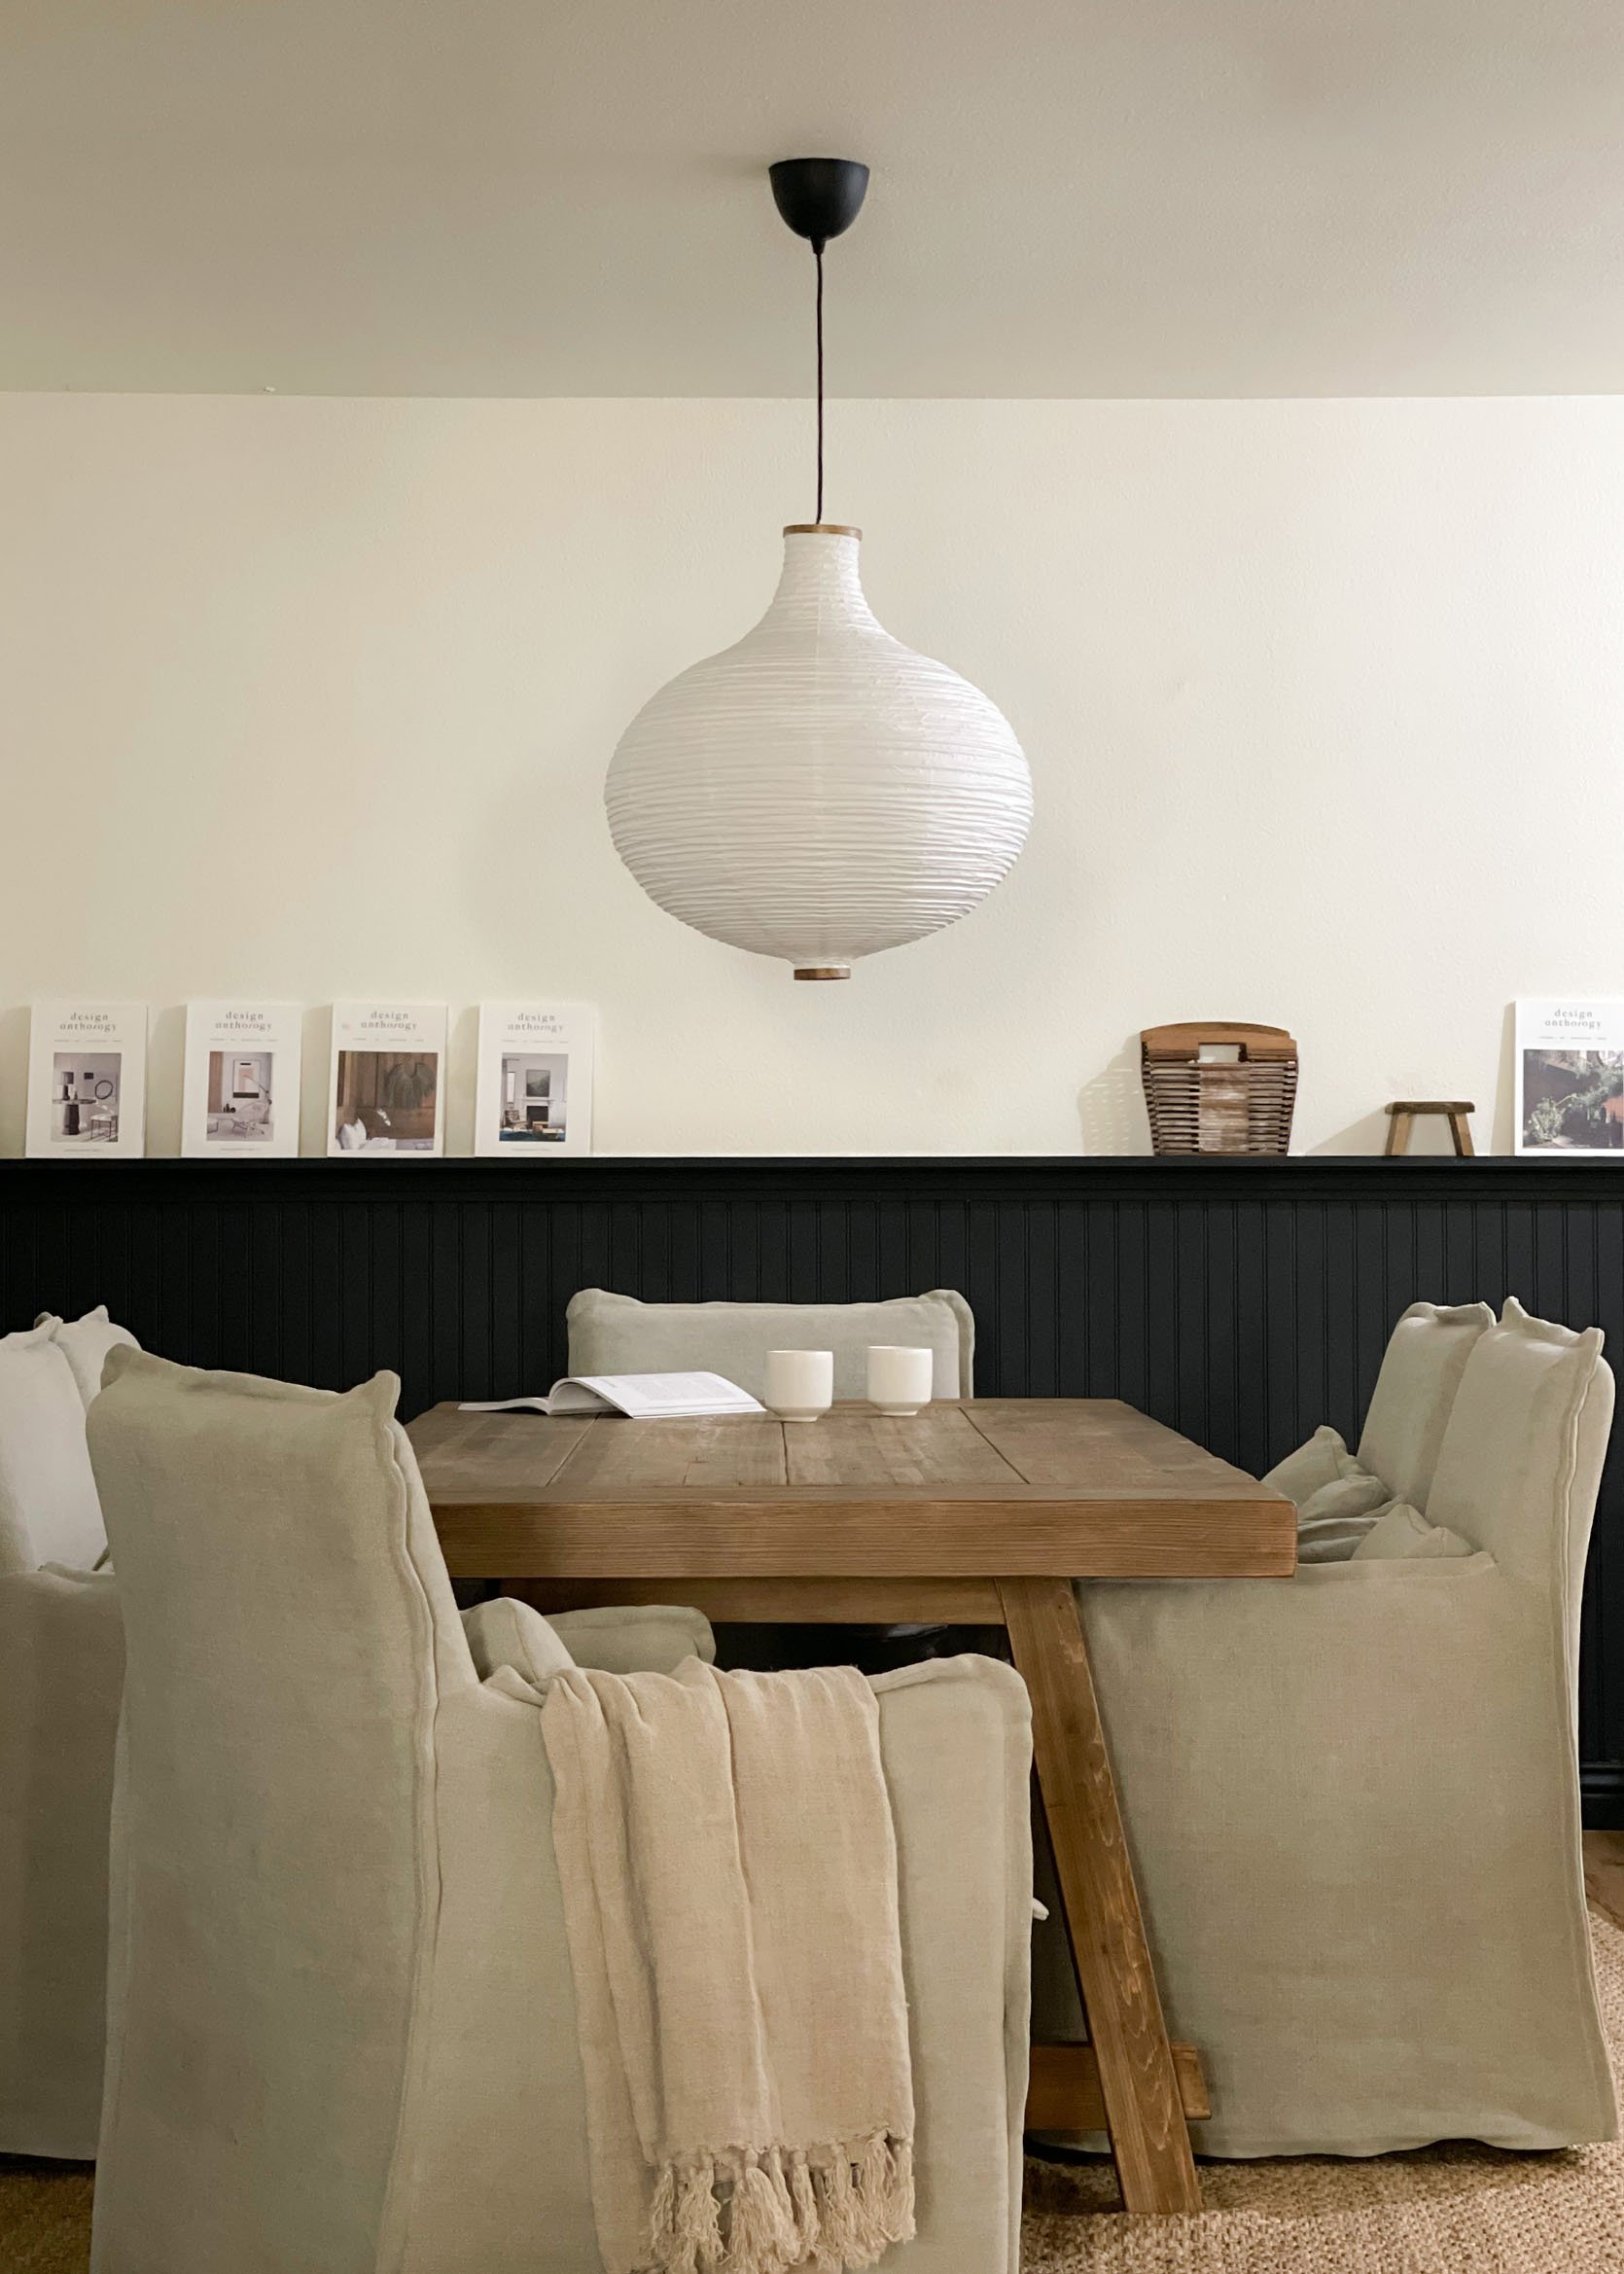
Pendant Light | Dining Table | Dining Chairs | Design Anthology Books
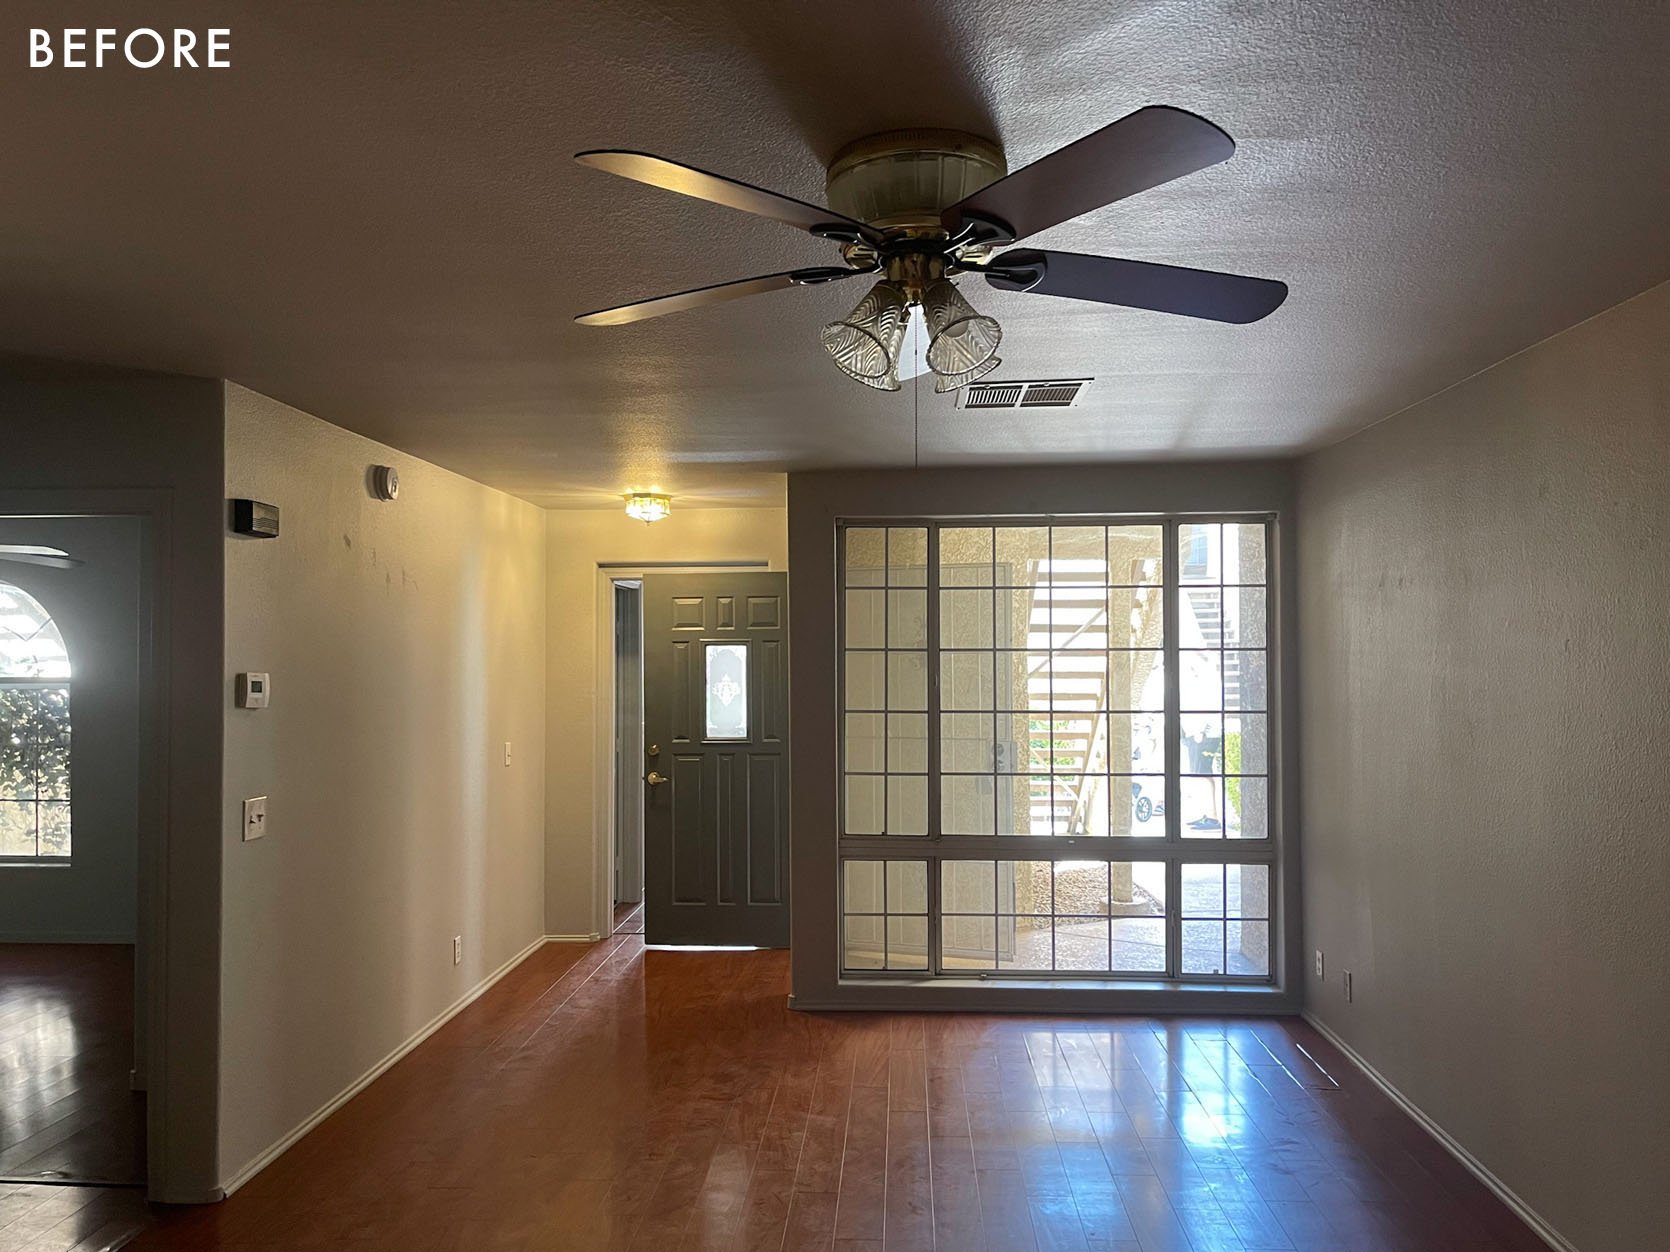
The original lighting was dated and in desperate need of replacing. The goal was to update the lighting with timeless options that were inexpensive – keeping in mind that these may have to be replaced again at some point (if a tenant gets a bit rough with them). We love the lighting we chose and believe it adds character to each space, without us having to break the bank to do so. Because the lighting was inexpensive, we are also comfortable replacing it if and when that time should come. I also turned to social media for their opinions on lighting and found that most renters gravitate towards brass fixtures more than any other finish. Black was runner-up to the brass. That said, I chose to do brass in the bathroom and kitchen areas, and went for a black matte option in the higher-traffic areas. I believe black is timeless and people won’t get sick of it, but I still wanted to adhere to the majority, adding brass to a couple of spaces. The total cost of materials to replace lighting throughout was around $300. This was made possible as I participated in a few partnerships where I’ve been blessed enough to receive most of our lighting as a gift when working on these campaigns. Nonetheless, I will say these lights are still very affordable options. Another characterizing feature we chose to add to a couple of spaces was beadboard.
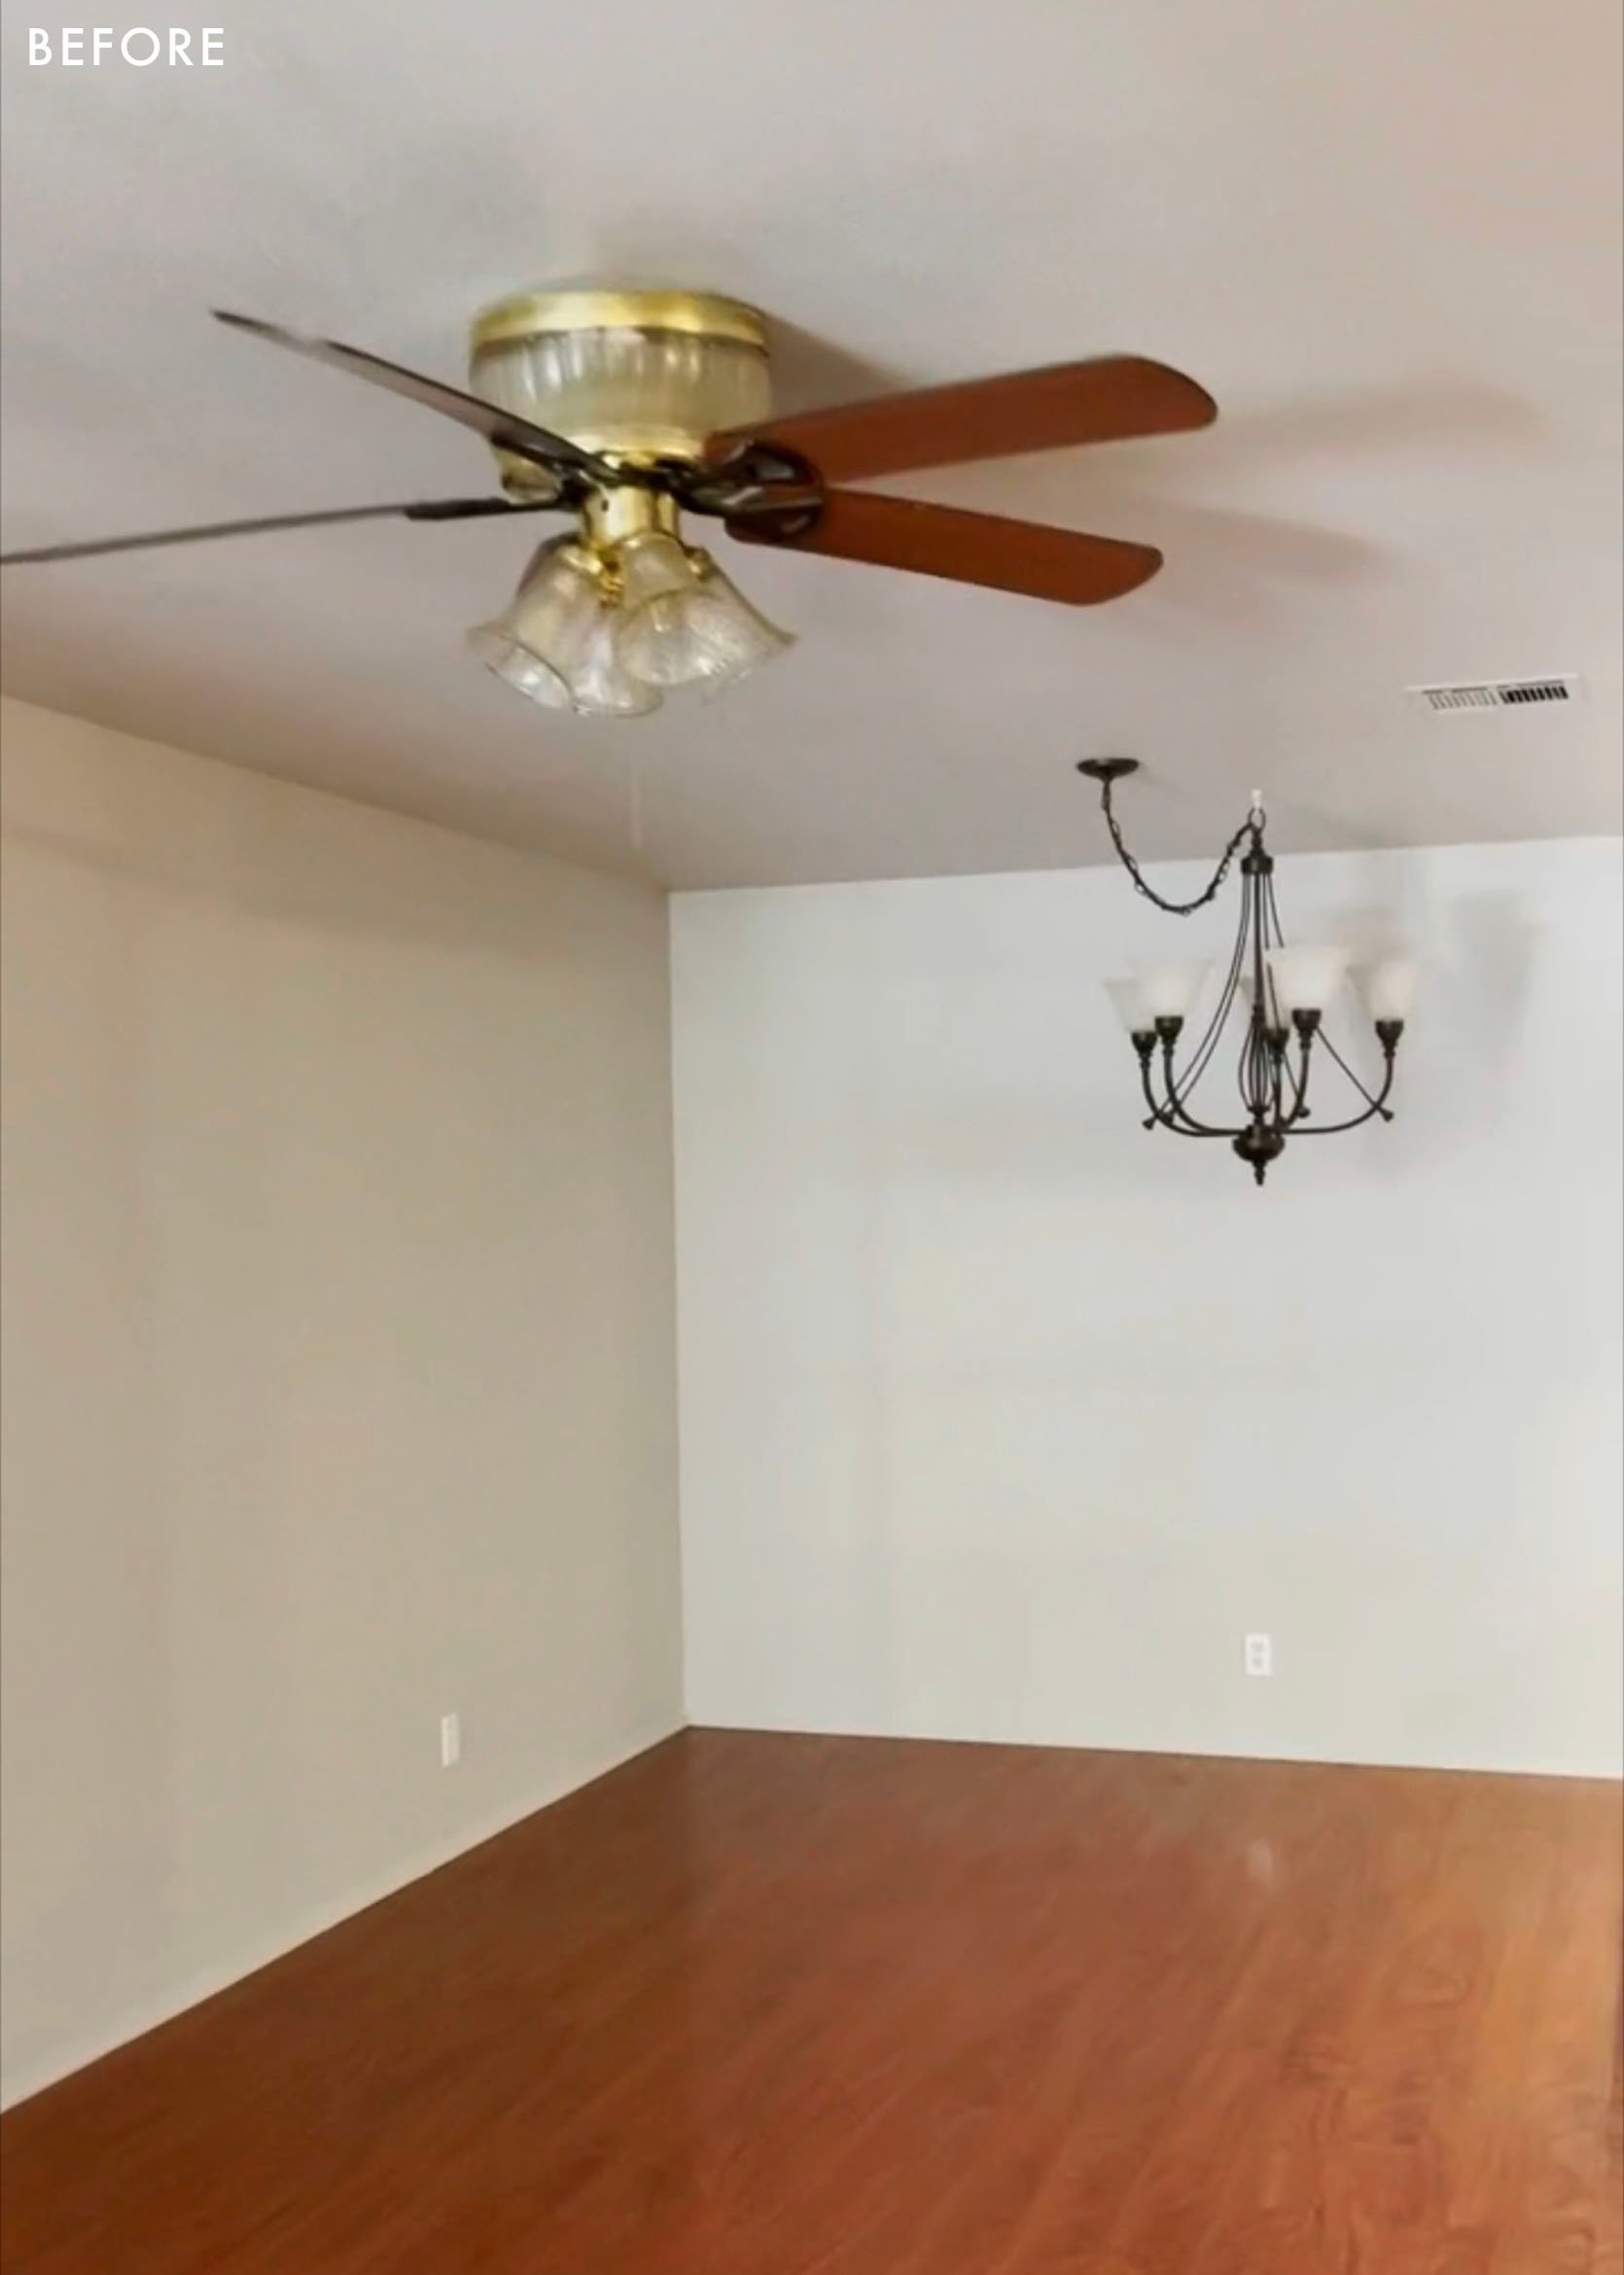
Added Beadboard In The Living Room And Dining Room
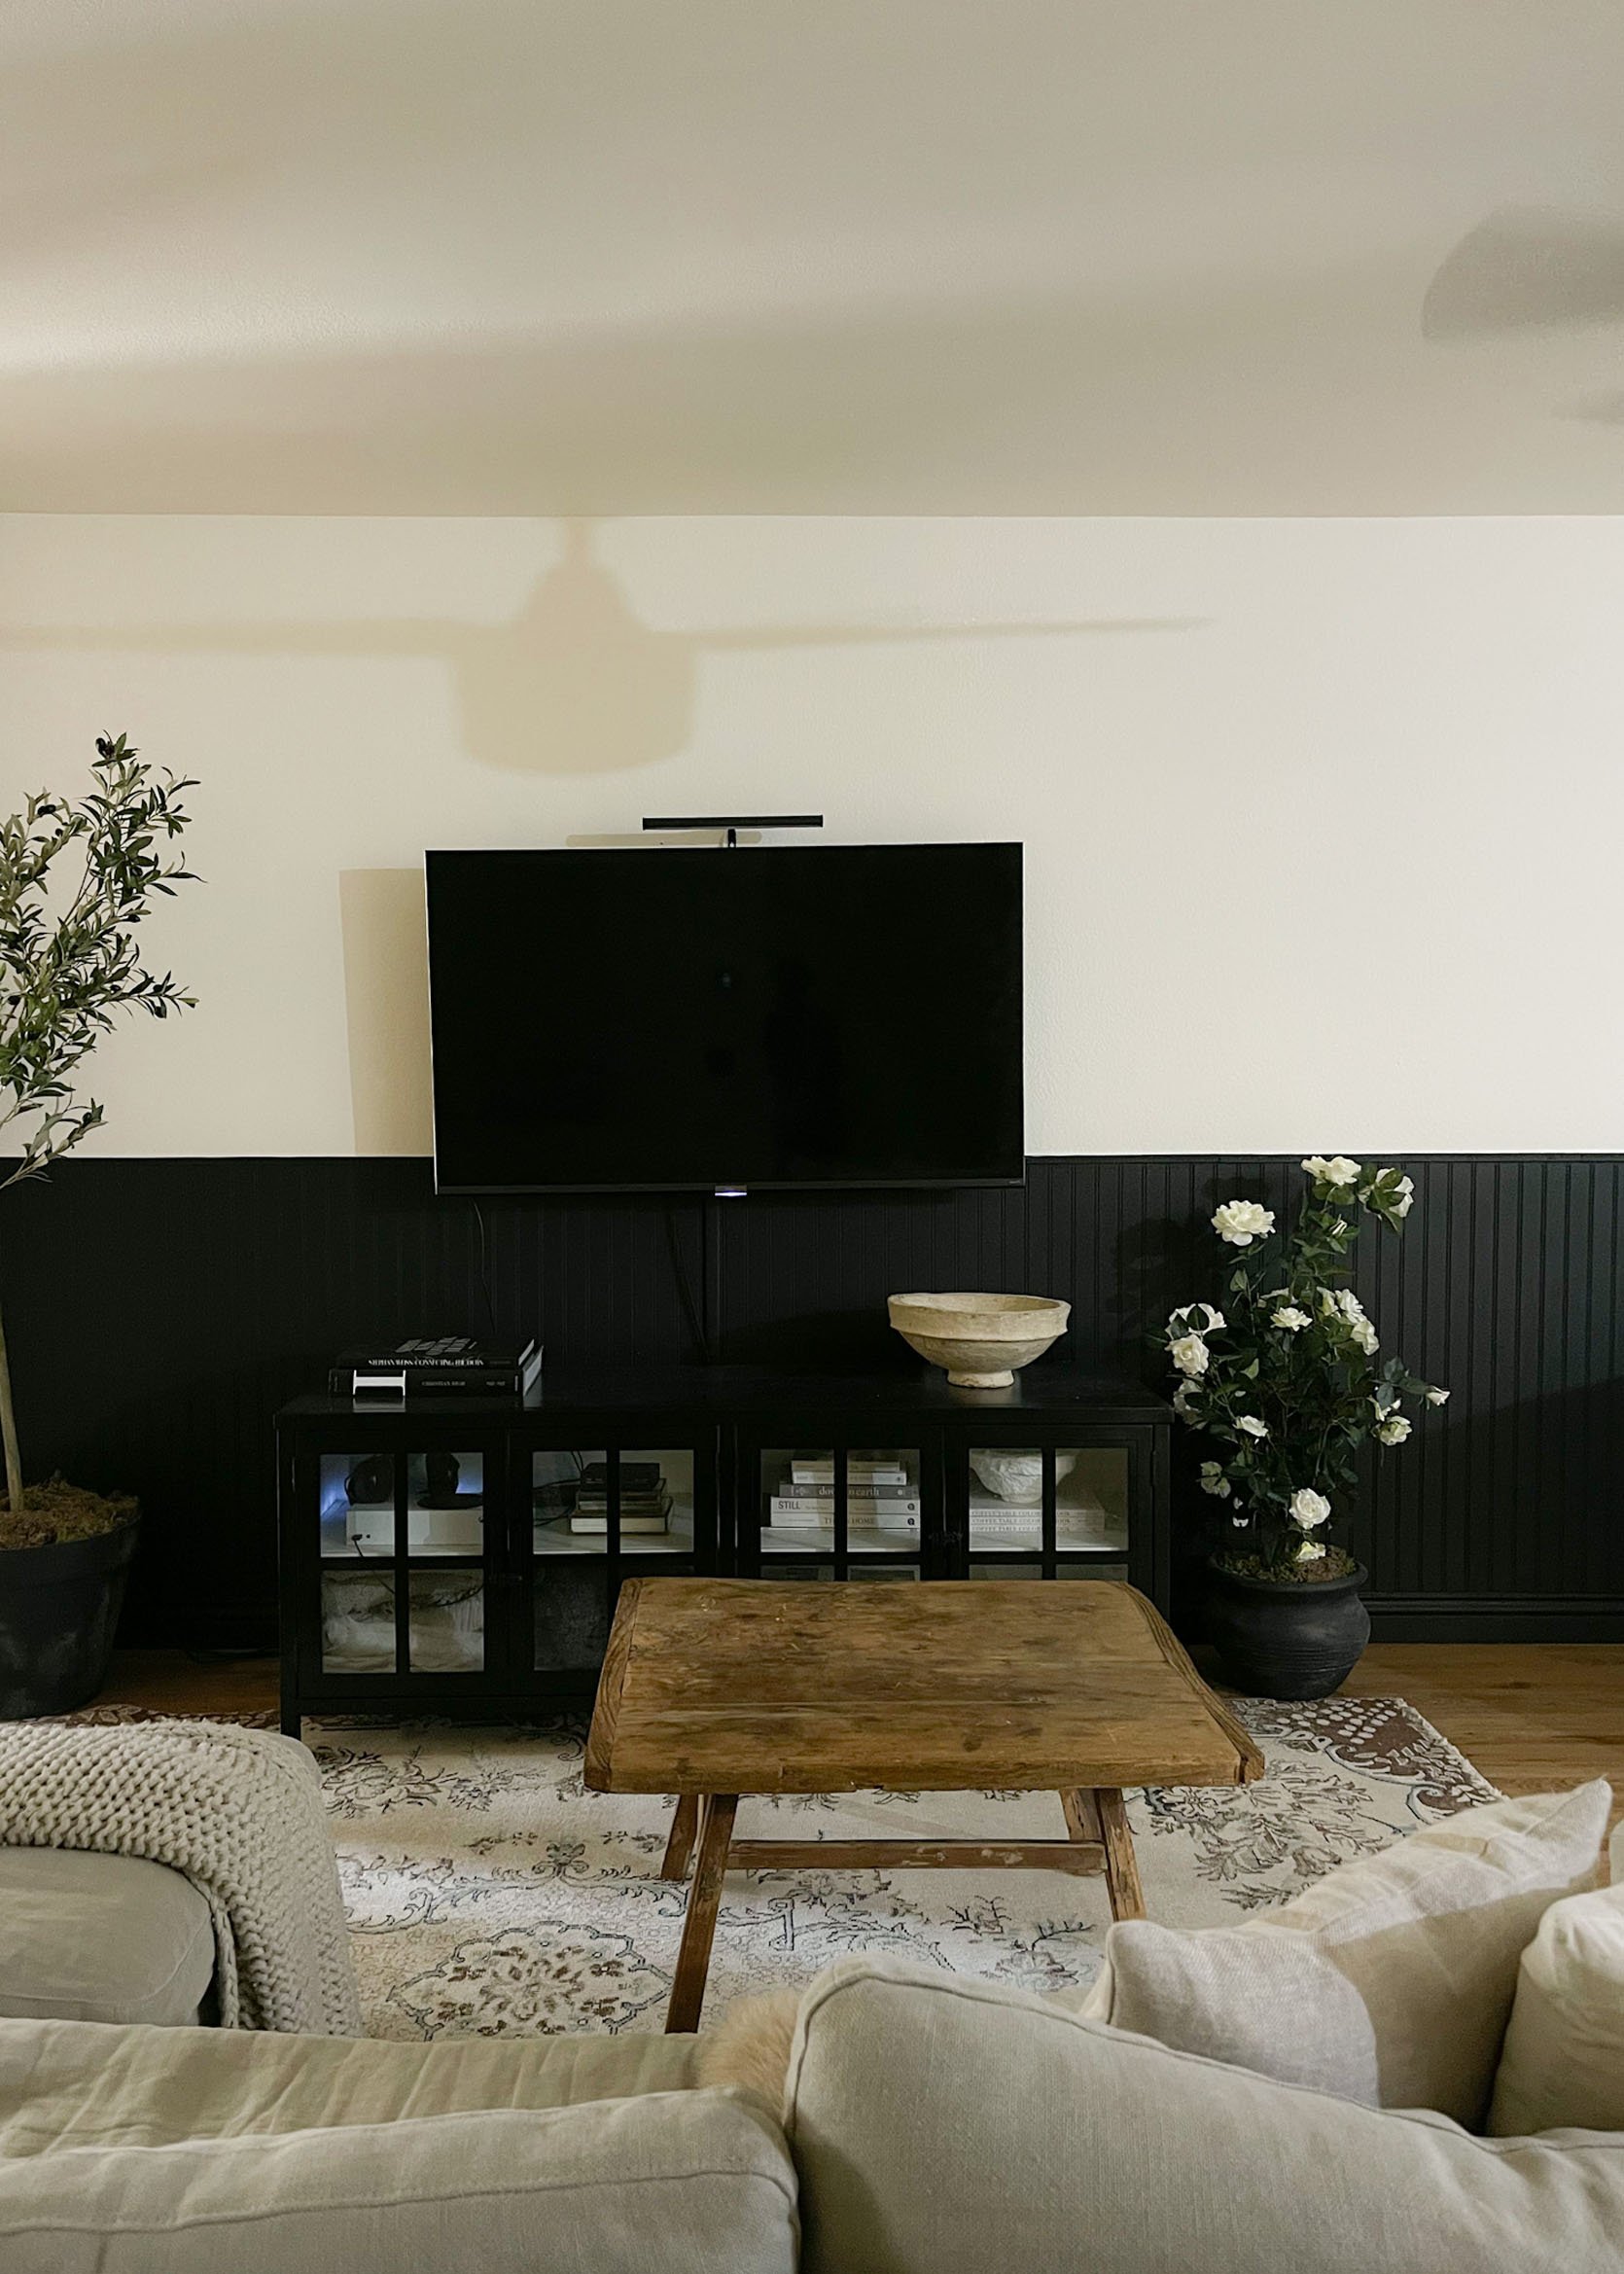
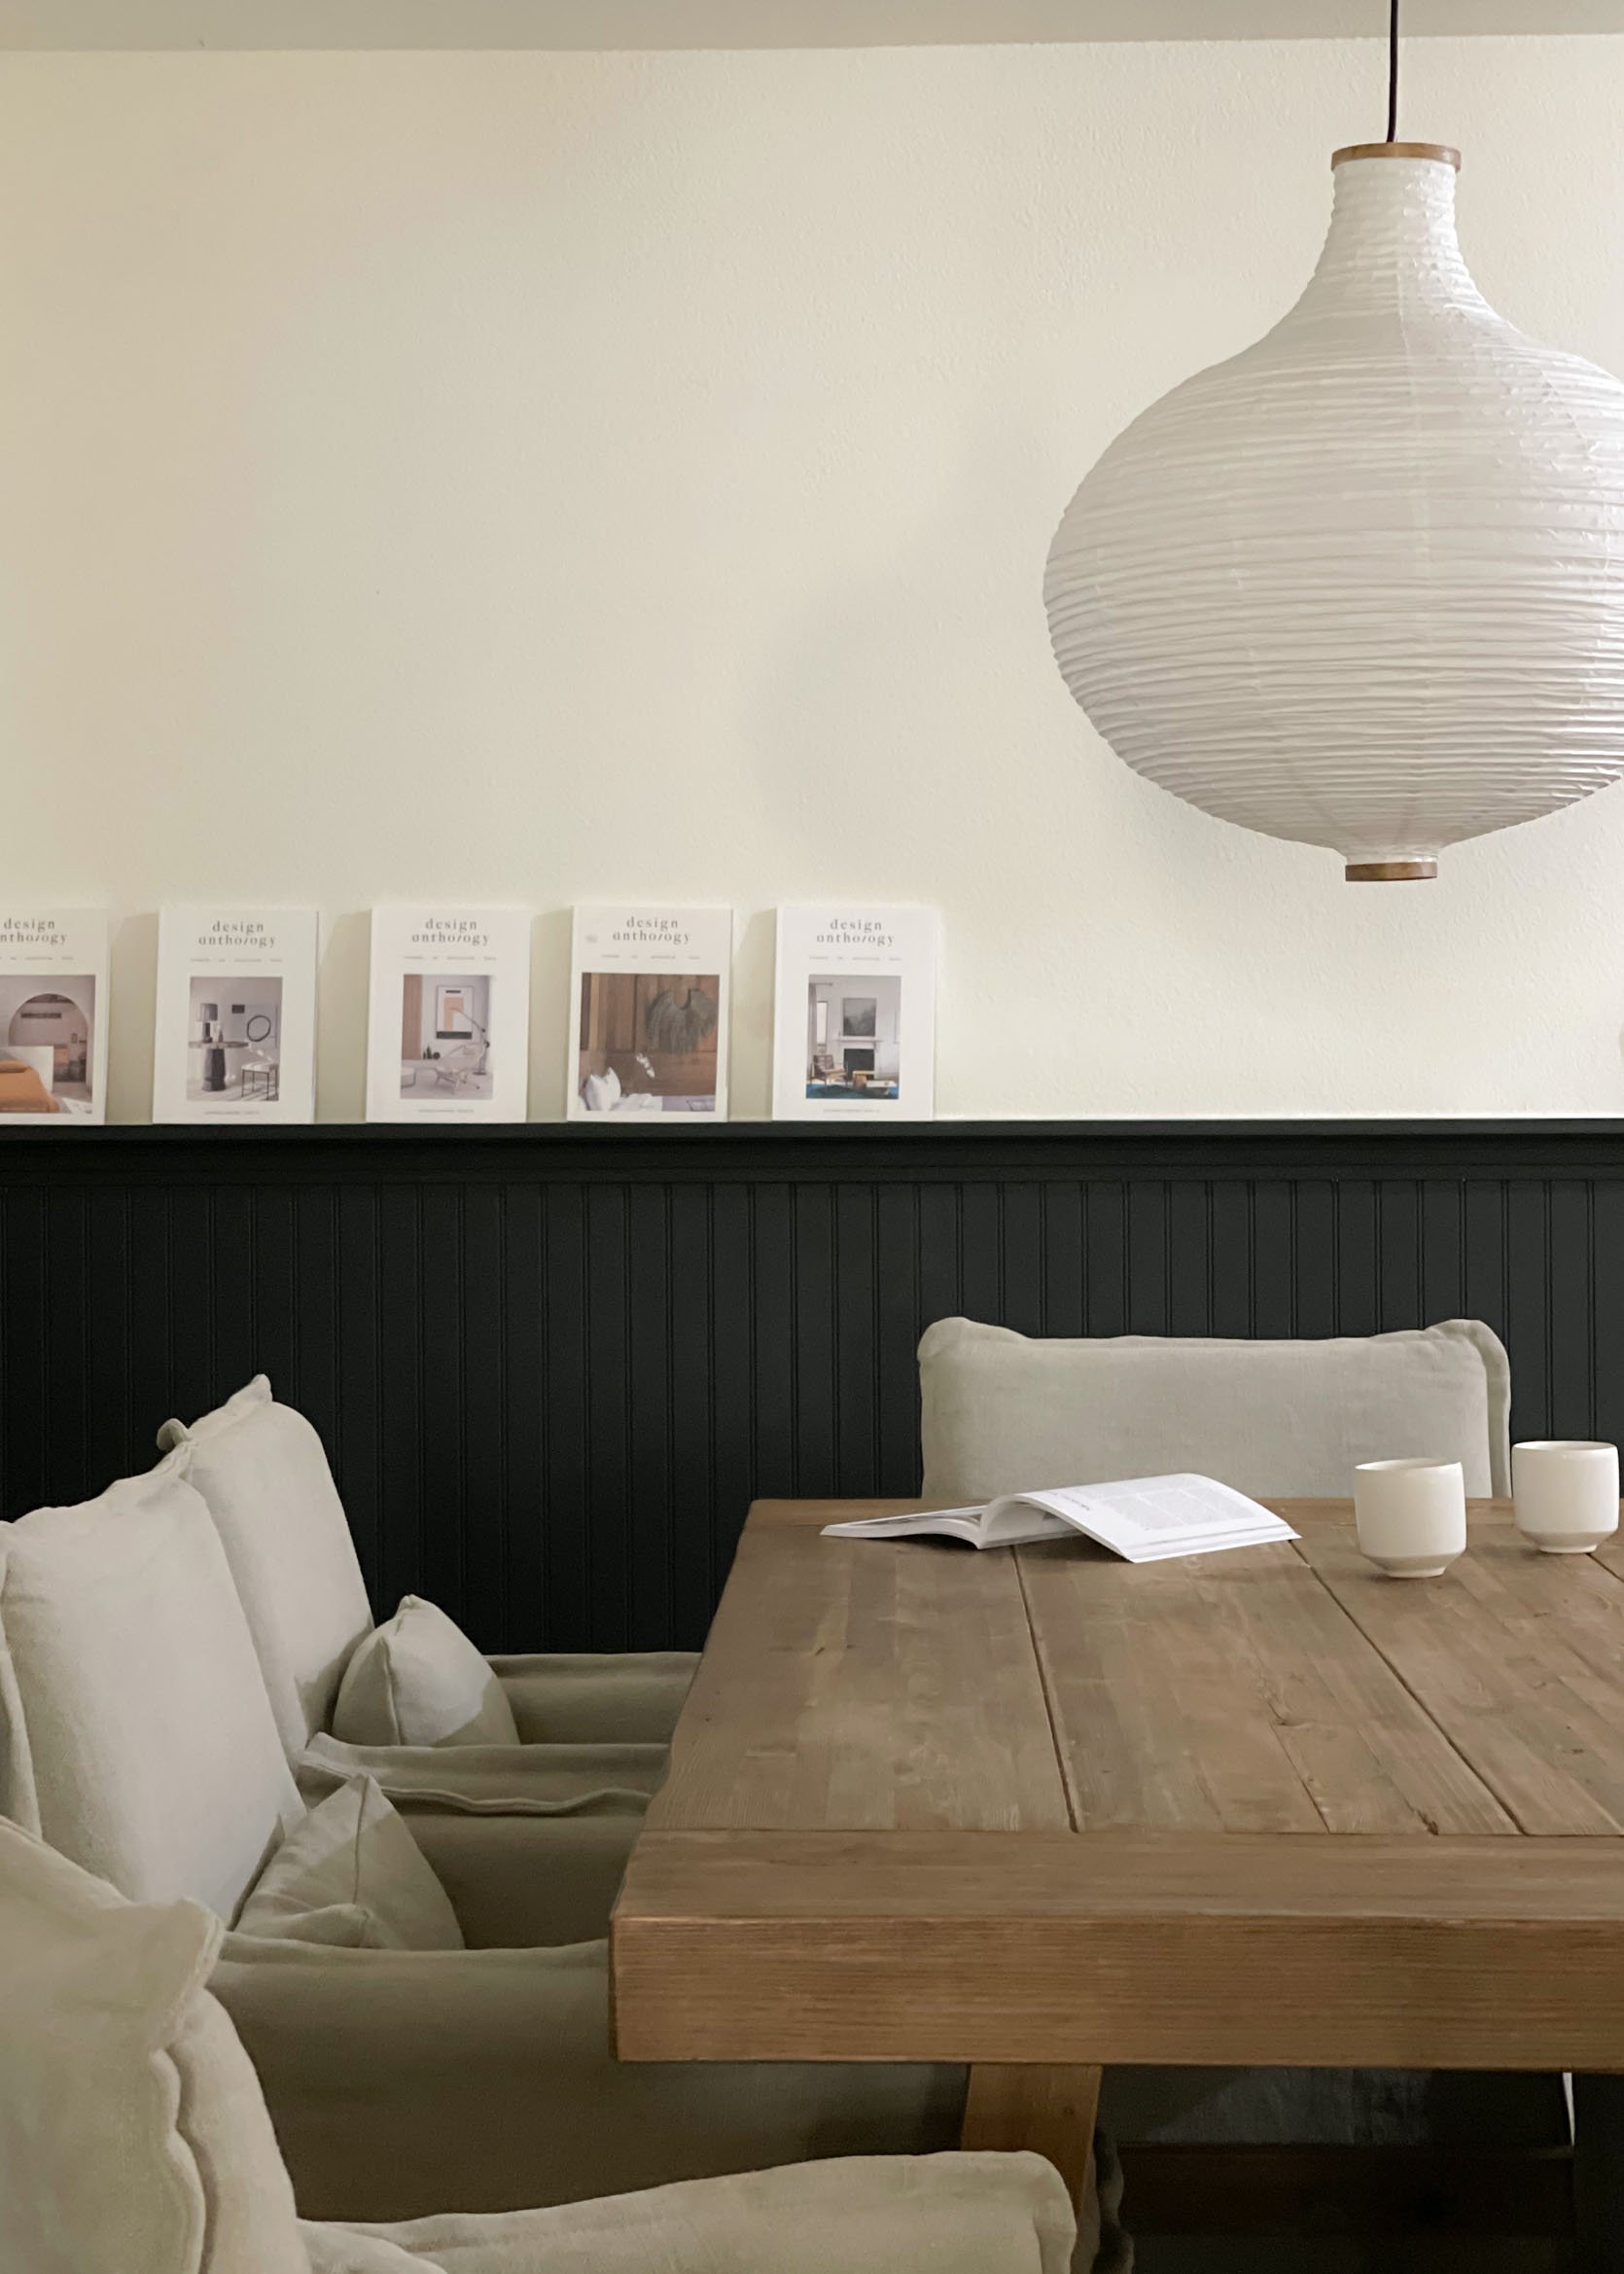
I wanted to bring character to the living and dining room without forcing my way of design on any future tenant. This means I’d have to find a simple way to make each space aesthetically unique and not too overwhelming. We decided to add beadboard to the living and dining room. This turned out to be a fun weekend project. We cut and installed the beadboard Friday, caulked Saturday, and painted Sunday. We also made a custom picture ledge in the dining room space. The picture ledge is a custom and subtle way for our tenant to display keepsakes, pictures, and picture galleries, without having to make too many holes in the walls. We believe the picture ledge will encourage our tenants to be creative and decorate to their liking.
We chose to paint the beadboard in these spaces black, as they are the high-traffic areas of the home. The kitchen opens up to the dining area nicely, and we wanted these two spaces to transition well, so we opted for the black color-blocked beadboard to run throughout. There are no windows in the kitchen or dining room areas, so leaving the dining room white just wasn’t working for us. The white simply reminded me how open and dark the area was (it was quite sad) so I decided to play on that darkness and paint the lower part of the wall black. The black makes it feel moody, cozy, and intentional. This design update also made a positive impact via social media. I would say this was more of an aesthetic update but can help with protecting the lower levels of the wall, acting as another protective barrier. The beadboard gives the house a more stylish and elegant appearance and I’ve learned (from selling our last home) that updates like this can add quite a few dollars when an appraiser walks through the house. The total cost to add beadboard to our living room, dining room, guest bathroom room, and main bedroom cost $450.
Black Paint In The Kitchen And The Living Room
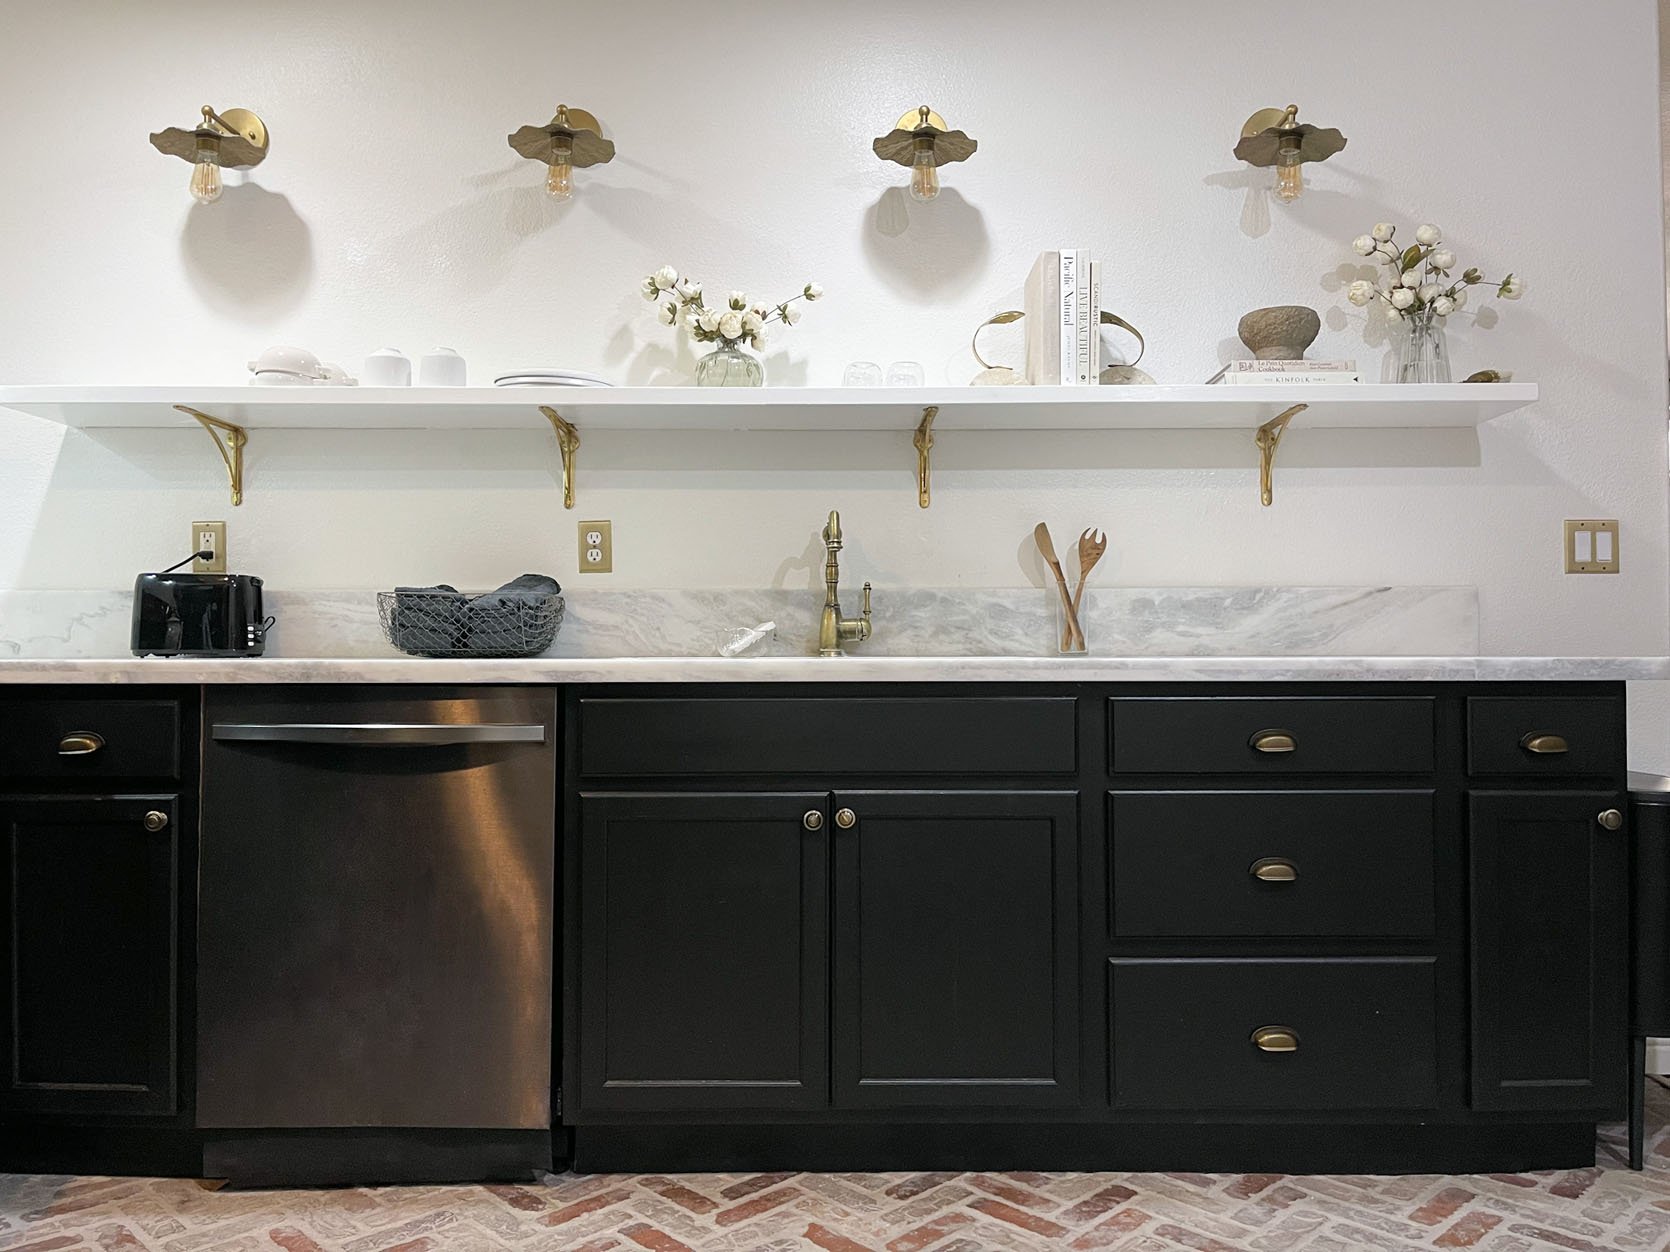
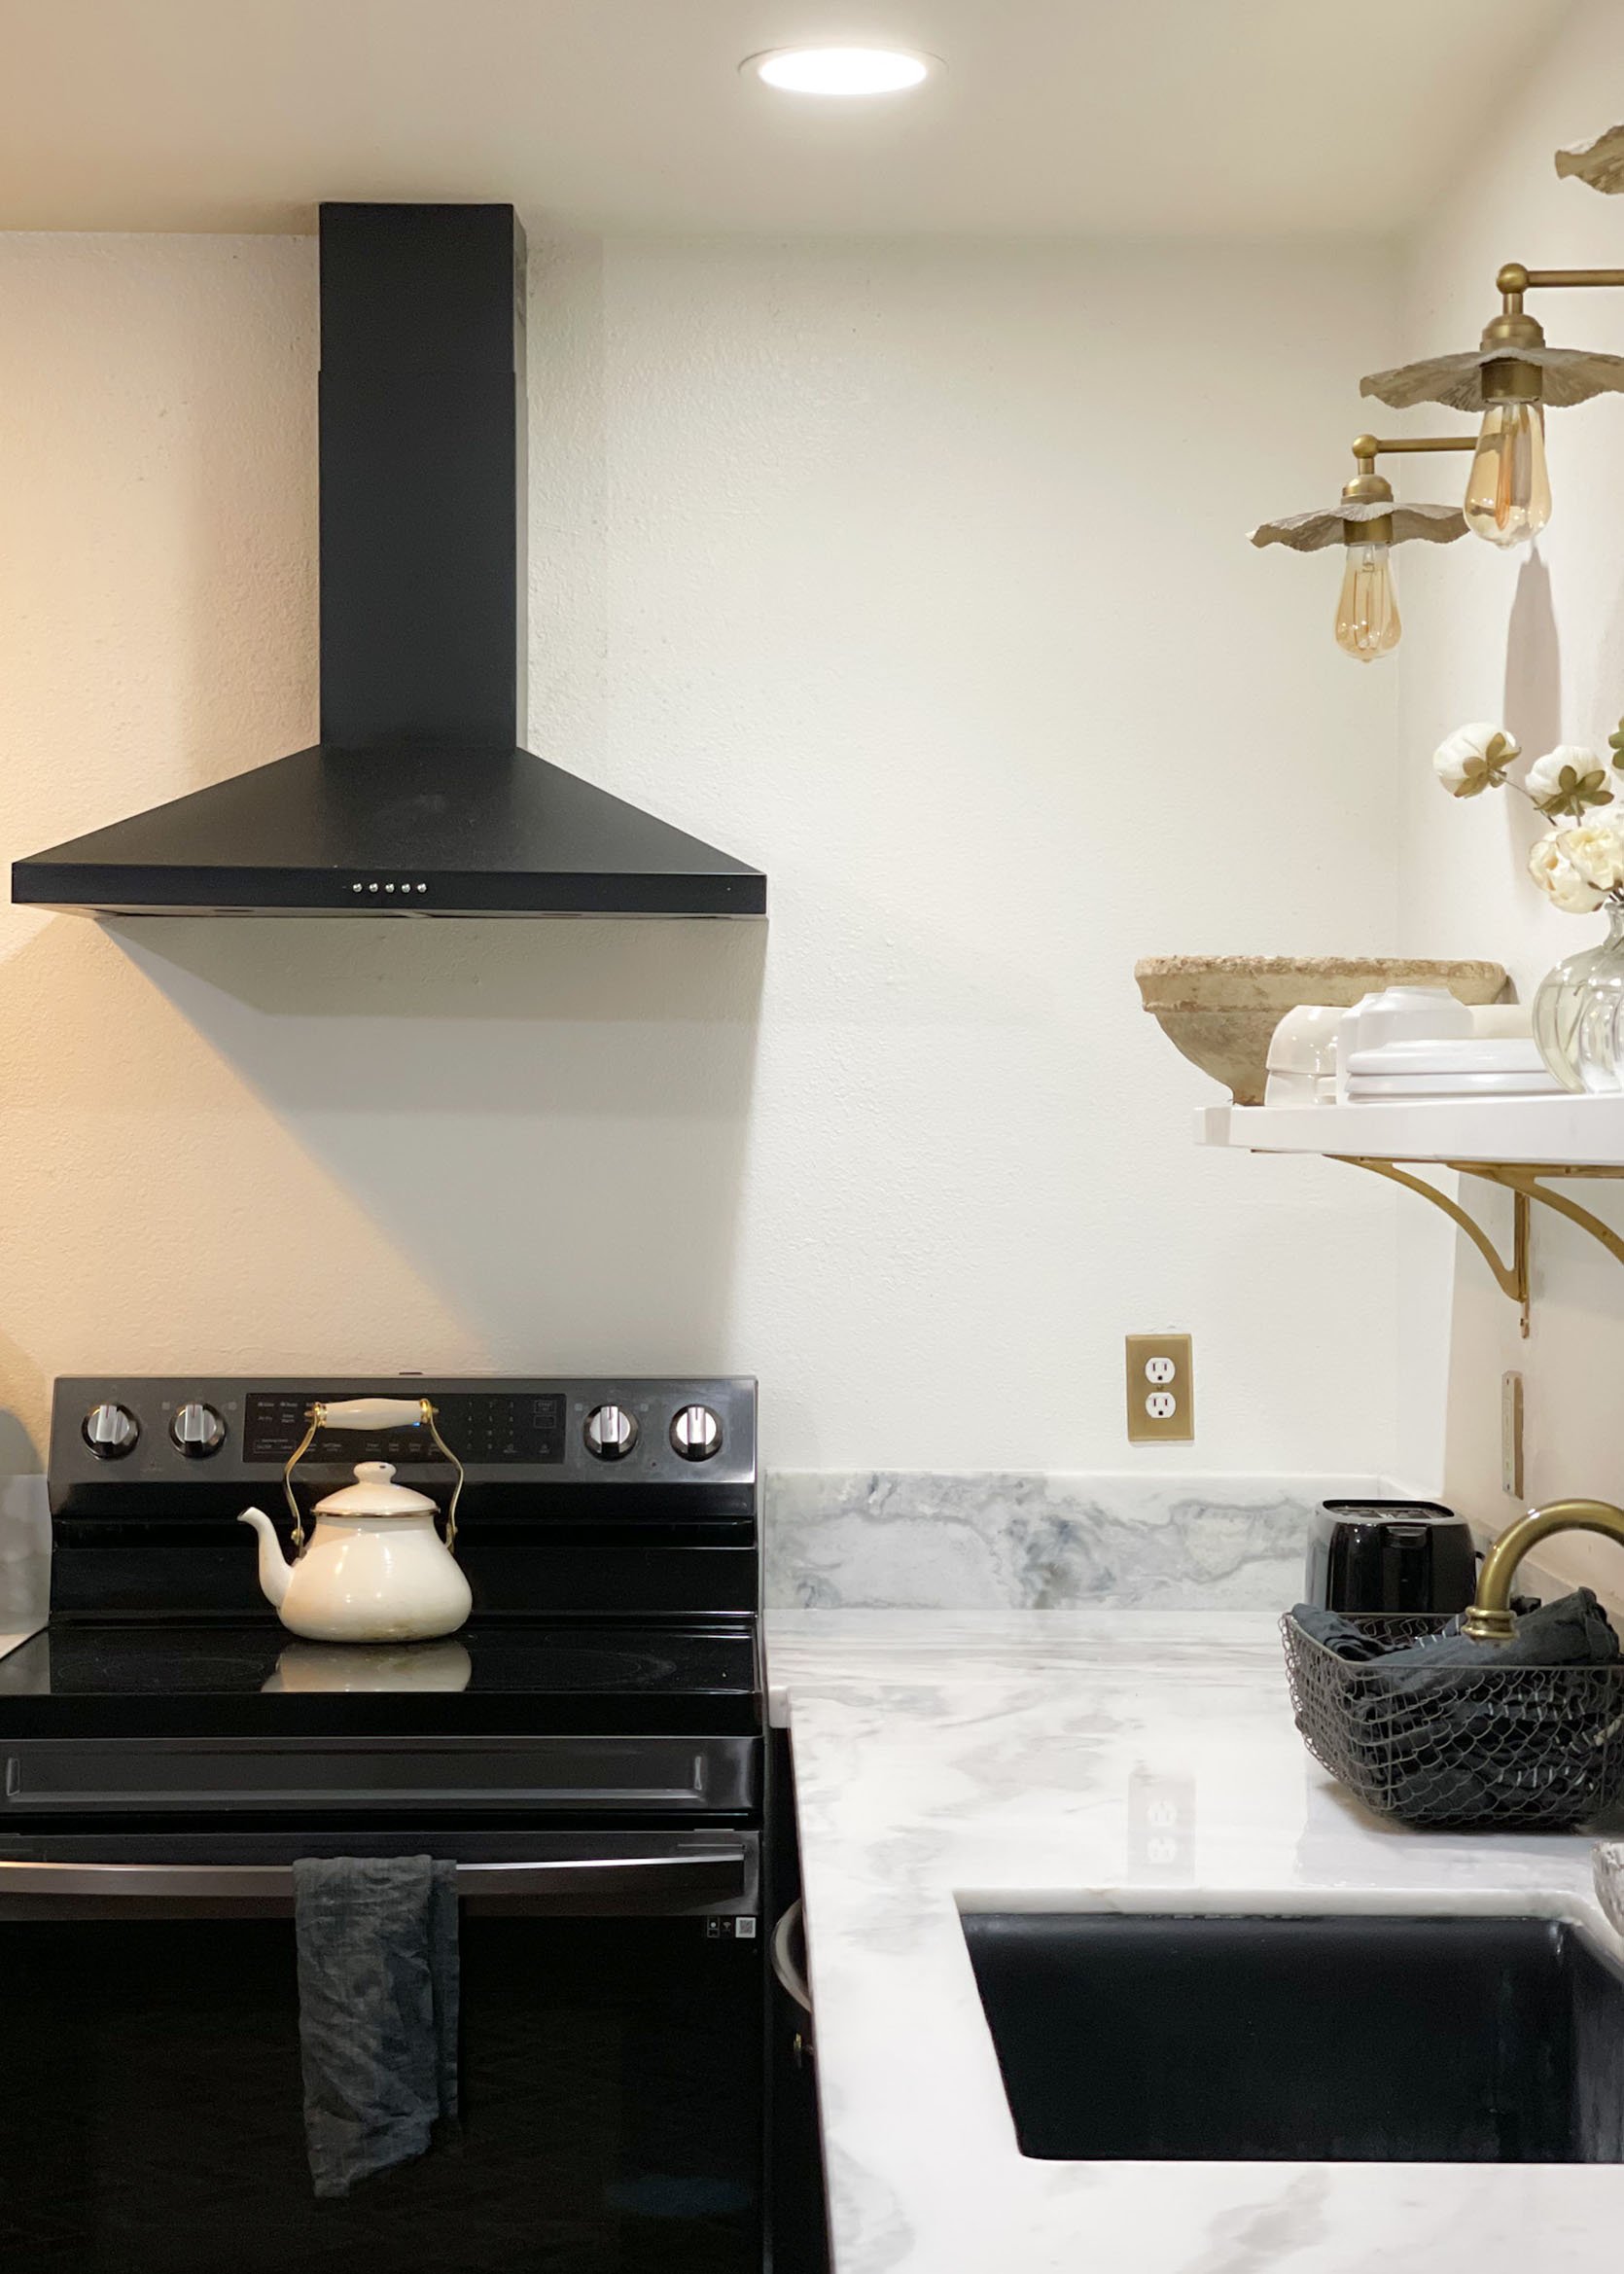
Black Cabinet Color | Sconces | Brass Brackets | Dishwasher | Faucet | Sink
In addition to the living and dining spaces, we decided to paint half of the kitchen cabinets black for a few different reasons, one being to aid in the prevention of any unwanted stains on the cabinetry. Some of the aesthetic reasons come from a desire to play off of the fact the kitchen also has no windows. Trying to brighten up the entire space using white, cream, or taupe throughout would have left us wanting more from the space. So, we embraced the windowless kitchen and went for a sultry and sophisticated vibe akin to a Parisian cabaret. The brackets, lighting, marble countertops, and faucet all tie together with the black cabinets and brick floors in the kitchen to provide the aesthetic we were seeking.


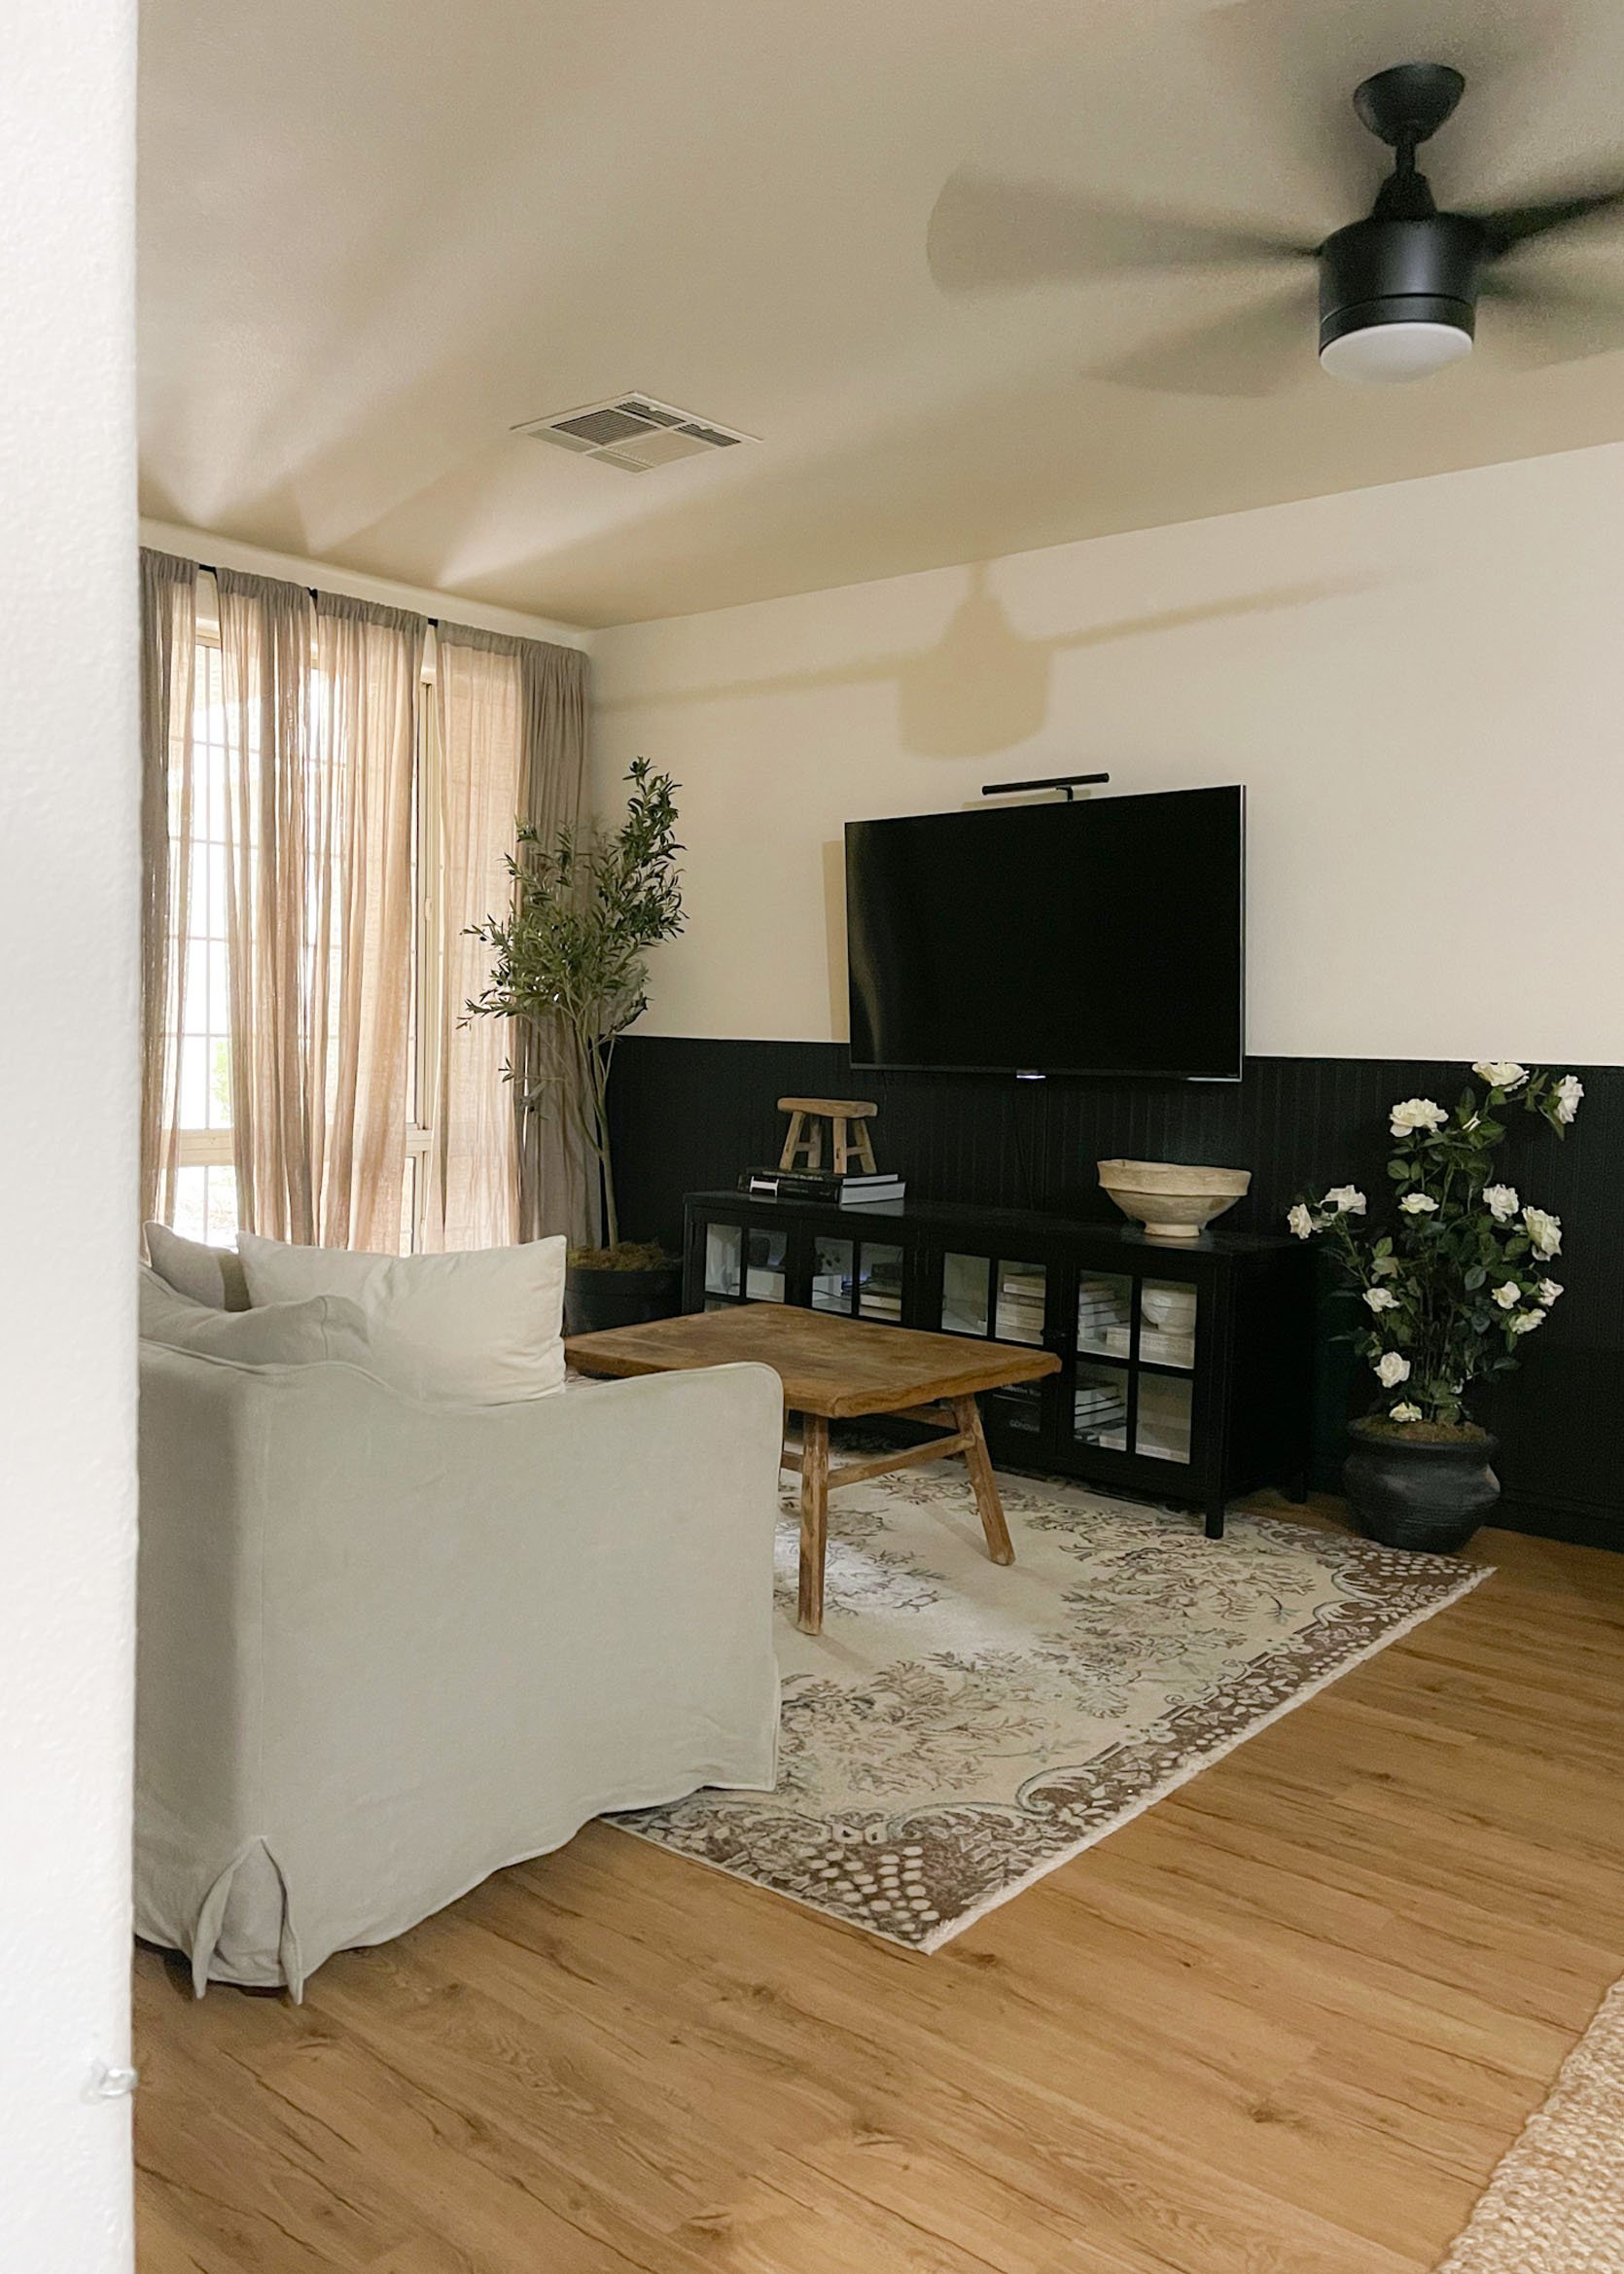
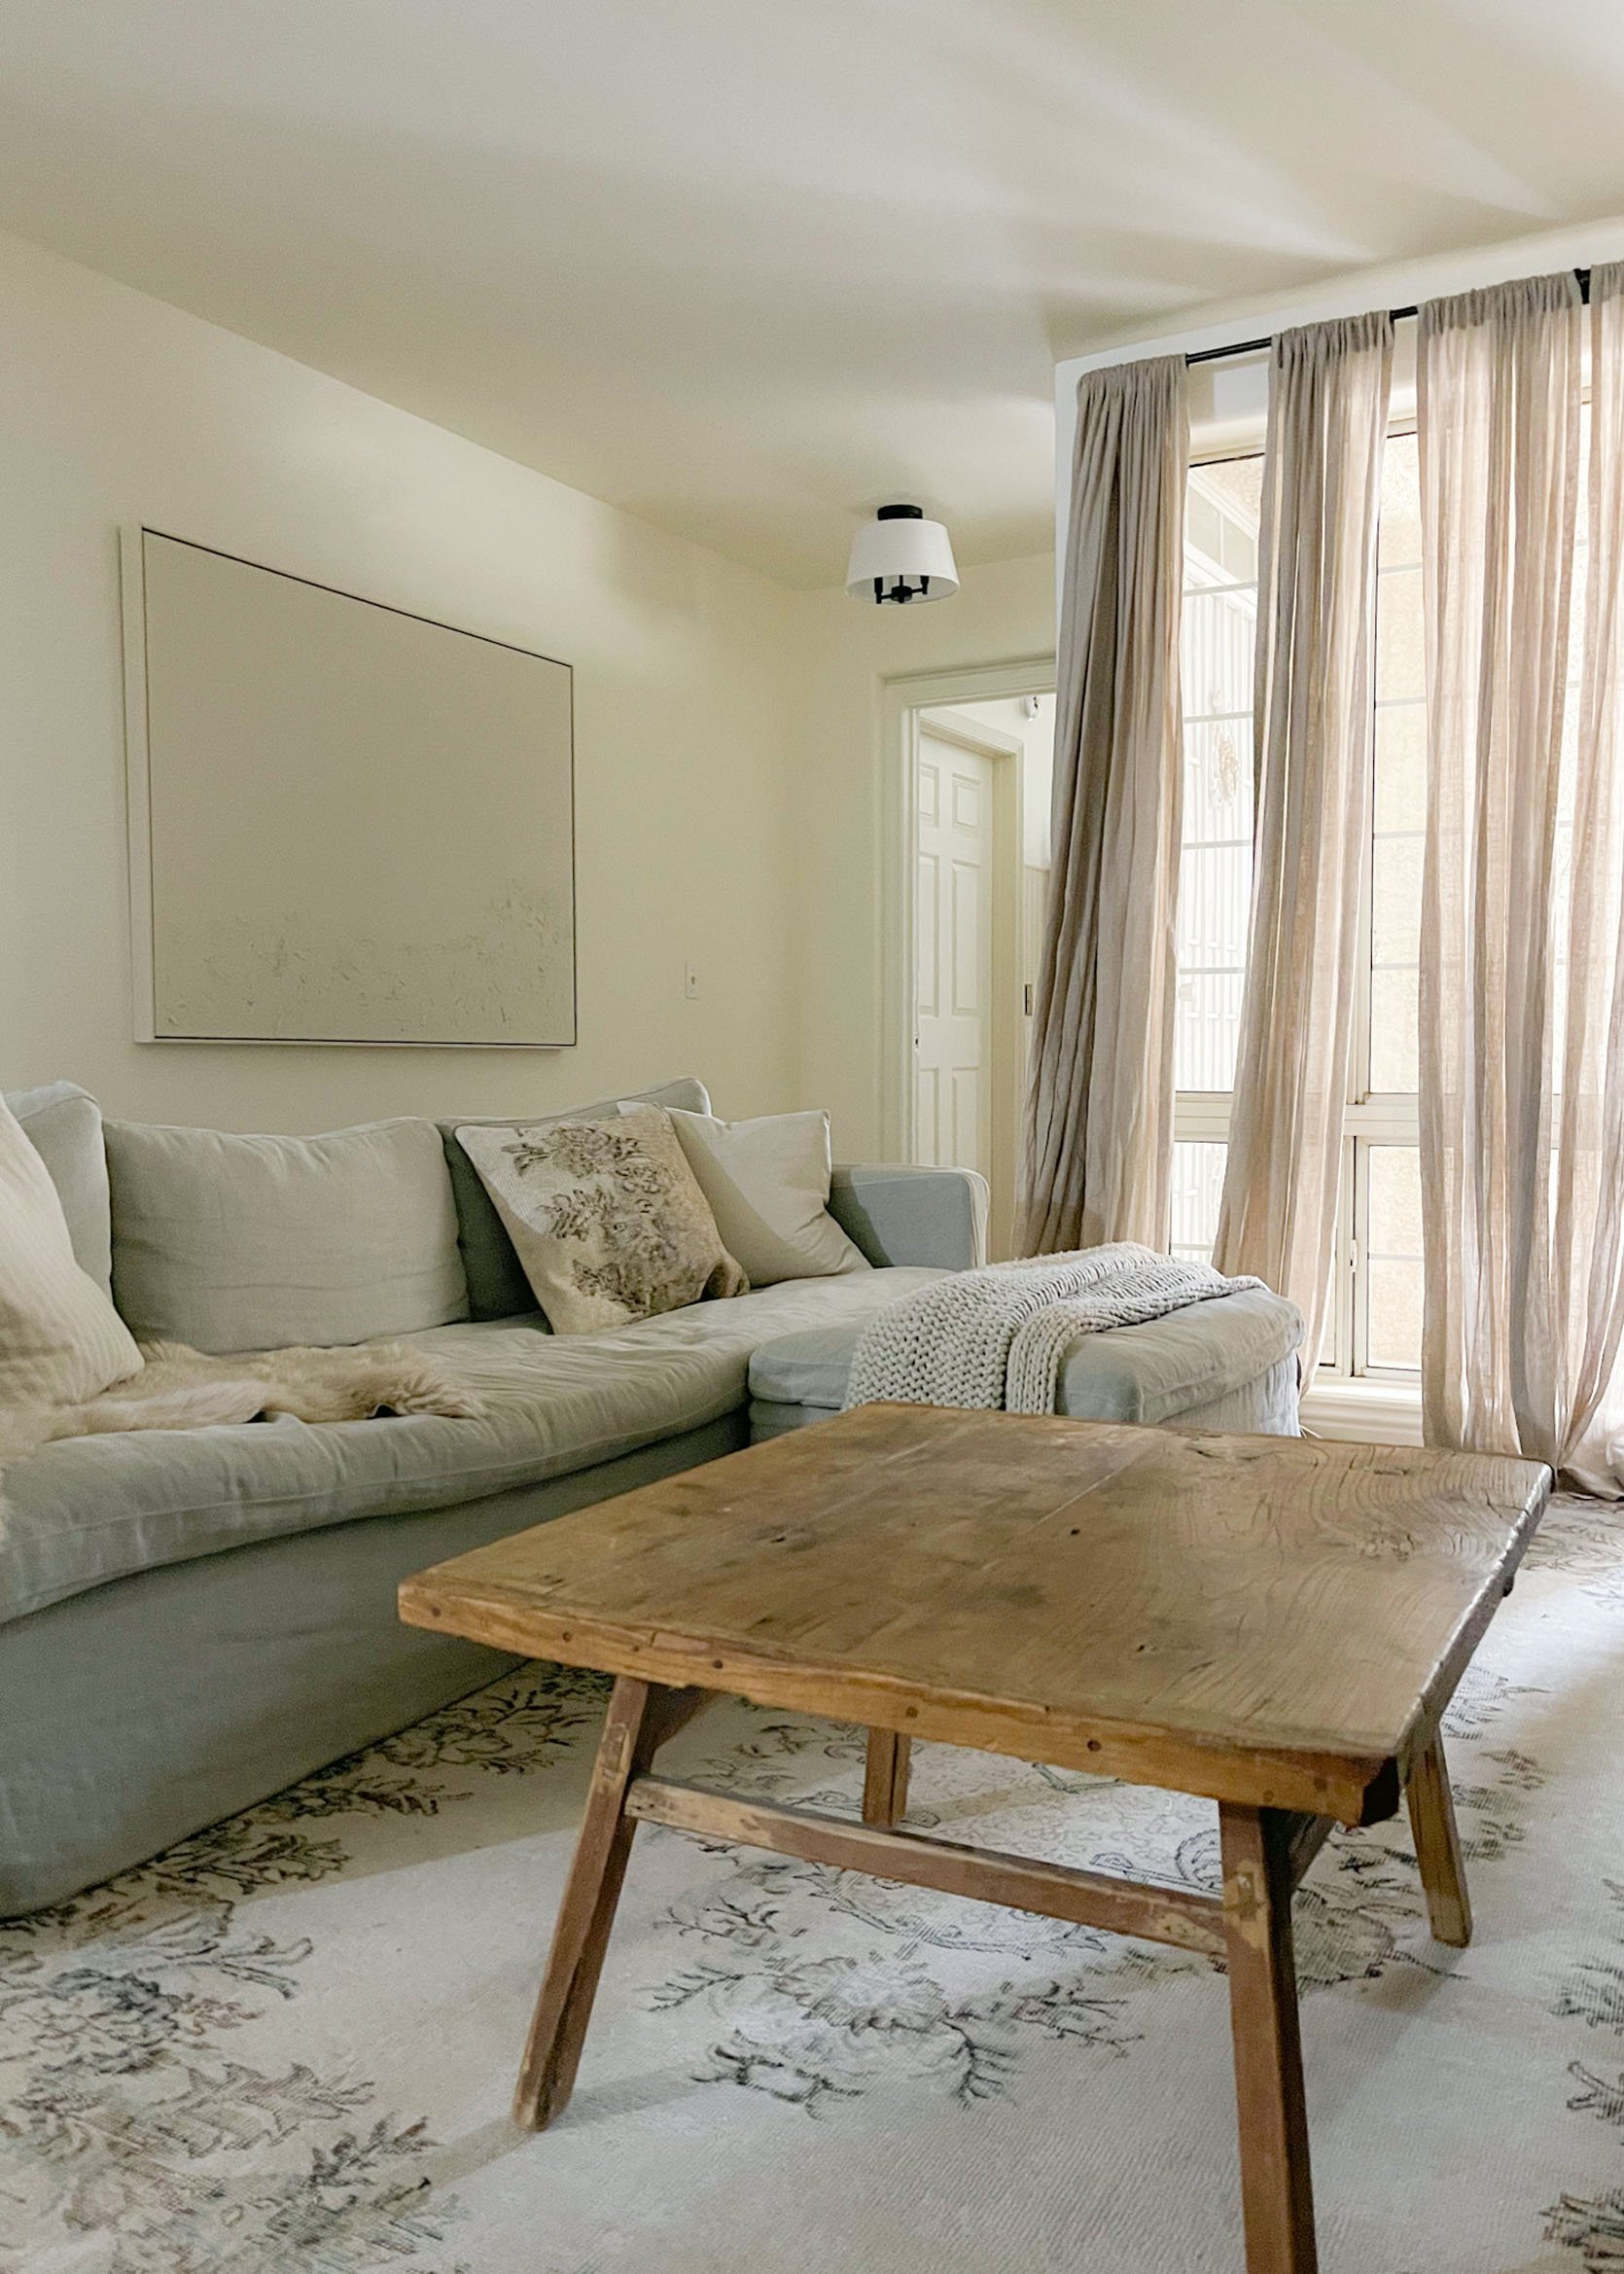
Sofa | Black Color | Wall Color | Media Console | Wooden Stool (unavailable) | Picture Light | Ceiling Fan (unavailable) | Rug (vintage) | Coffee Table (unavailable) | Faux Olive Tree | Plant Vase | Curtains
Now, whenever we do the dishes or cook, we are reminded of some of our favorite lounges and taverns from our travels. While I love the black cabinets, in an effort to provide a balance and not make the kitchen feel too heavy, we decided to paint the peninsula and the breakfast bar cabinets cream. We believe the kitchen will provide a nice balance for our tenant to cook, host, and relax – that will also stand the test of time. We opted for a lighter color in the main bedroom as well. I was quite surprised by the feedback I received from choosing to paint the one side of the kitchen and the beadboard black. I’ve learned that renters prefer white spaces. They’ve stated that white makes them feel like they have a fresh palette/canvas to work with, but when I asked if I should go black, so many renters were on board. After painting the lower cabinets black and the dining room beadboard black, my videos actually went viral (in a good way) – people loved it! The black paint was around $30 per gallon and I needed two gallons to get the job done.
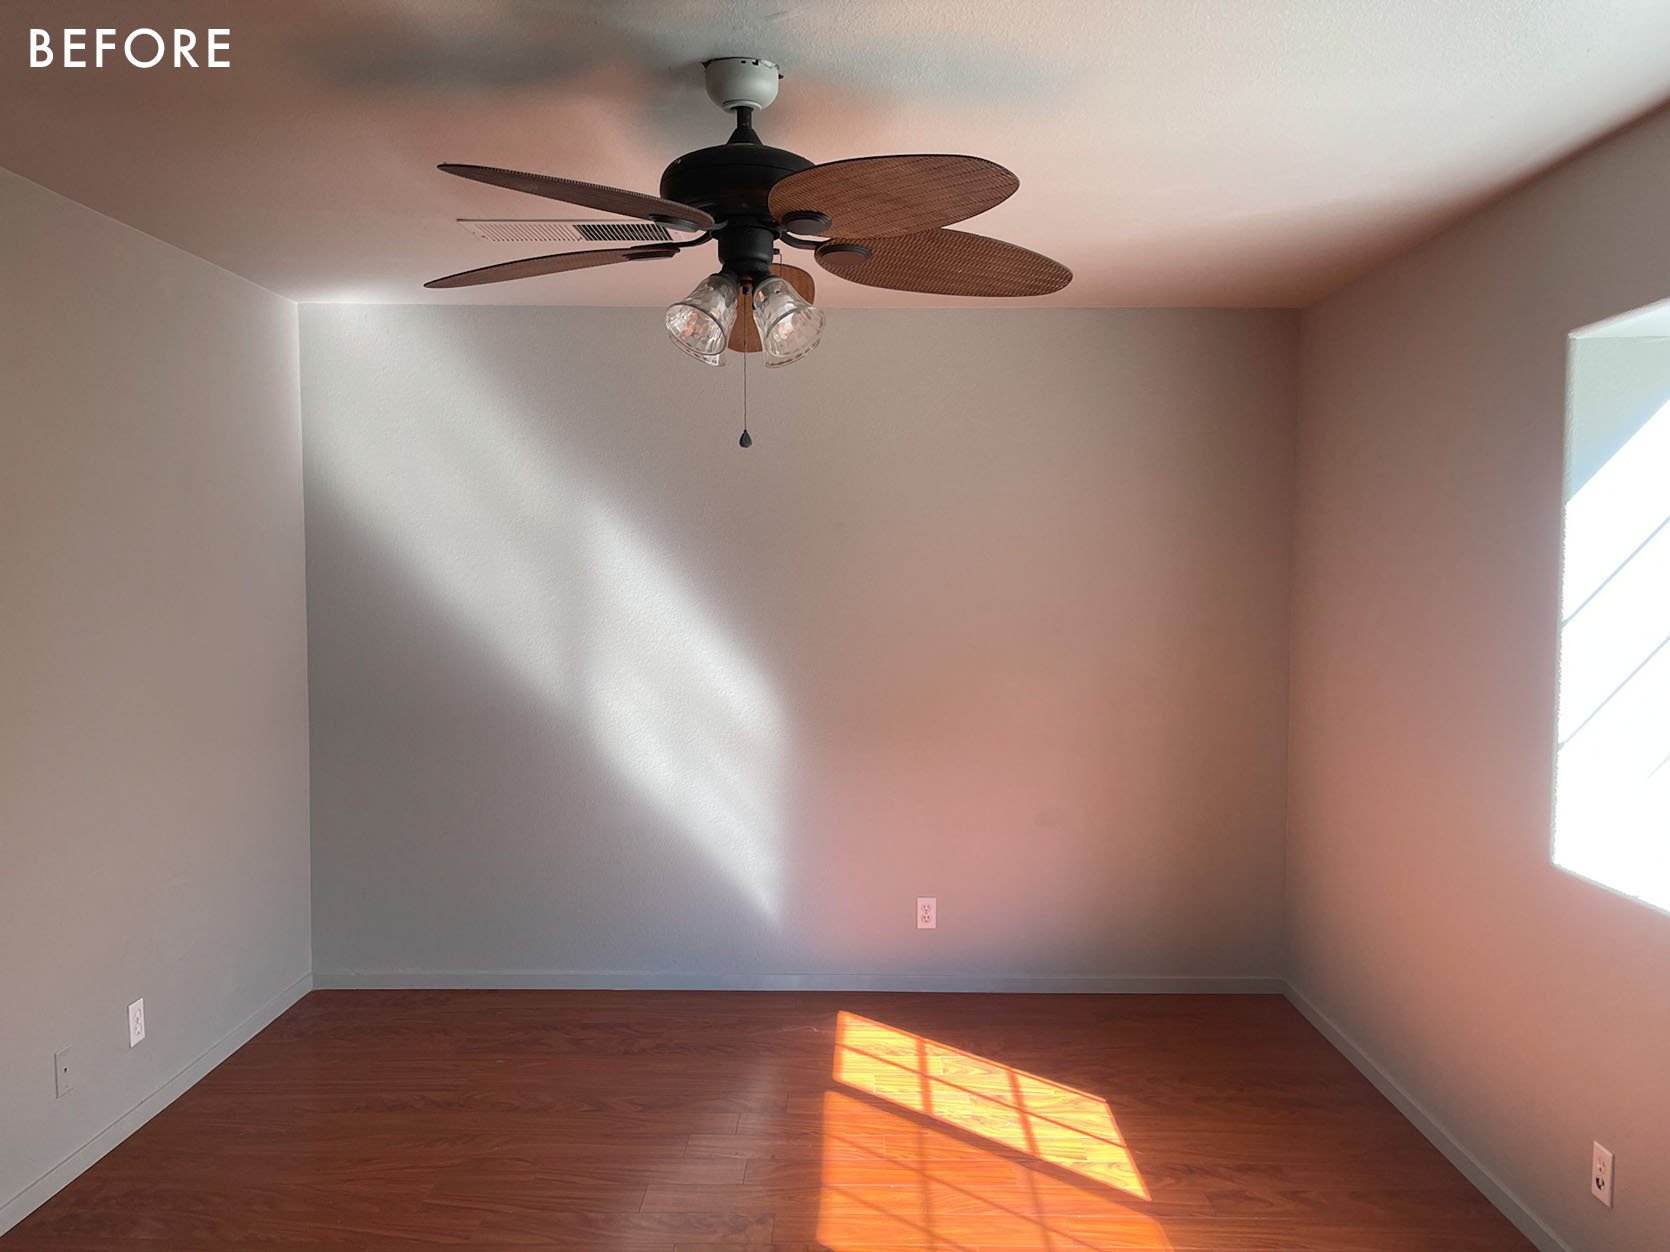
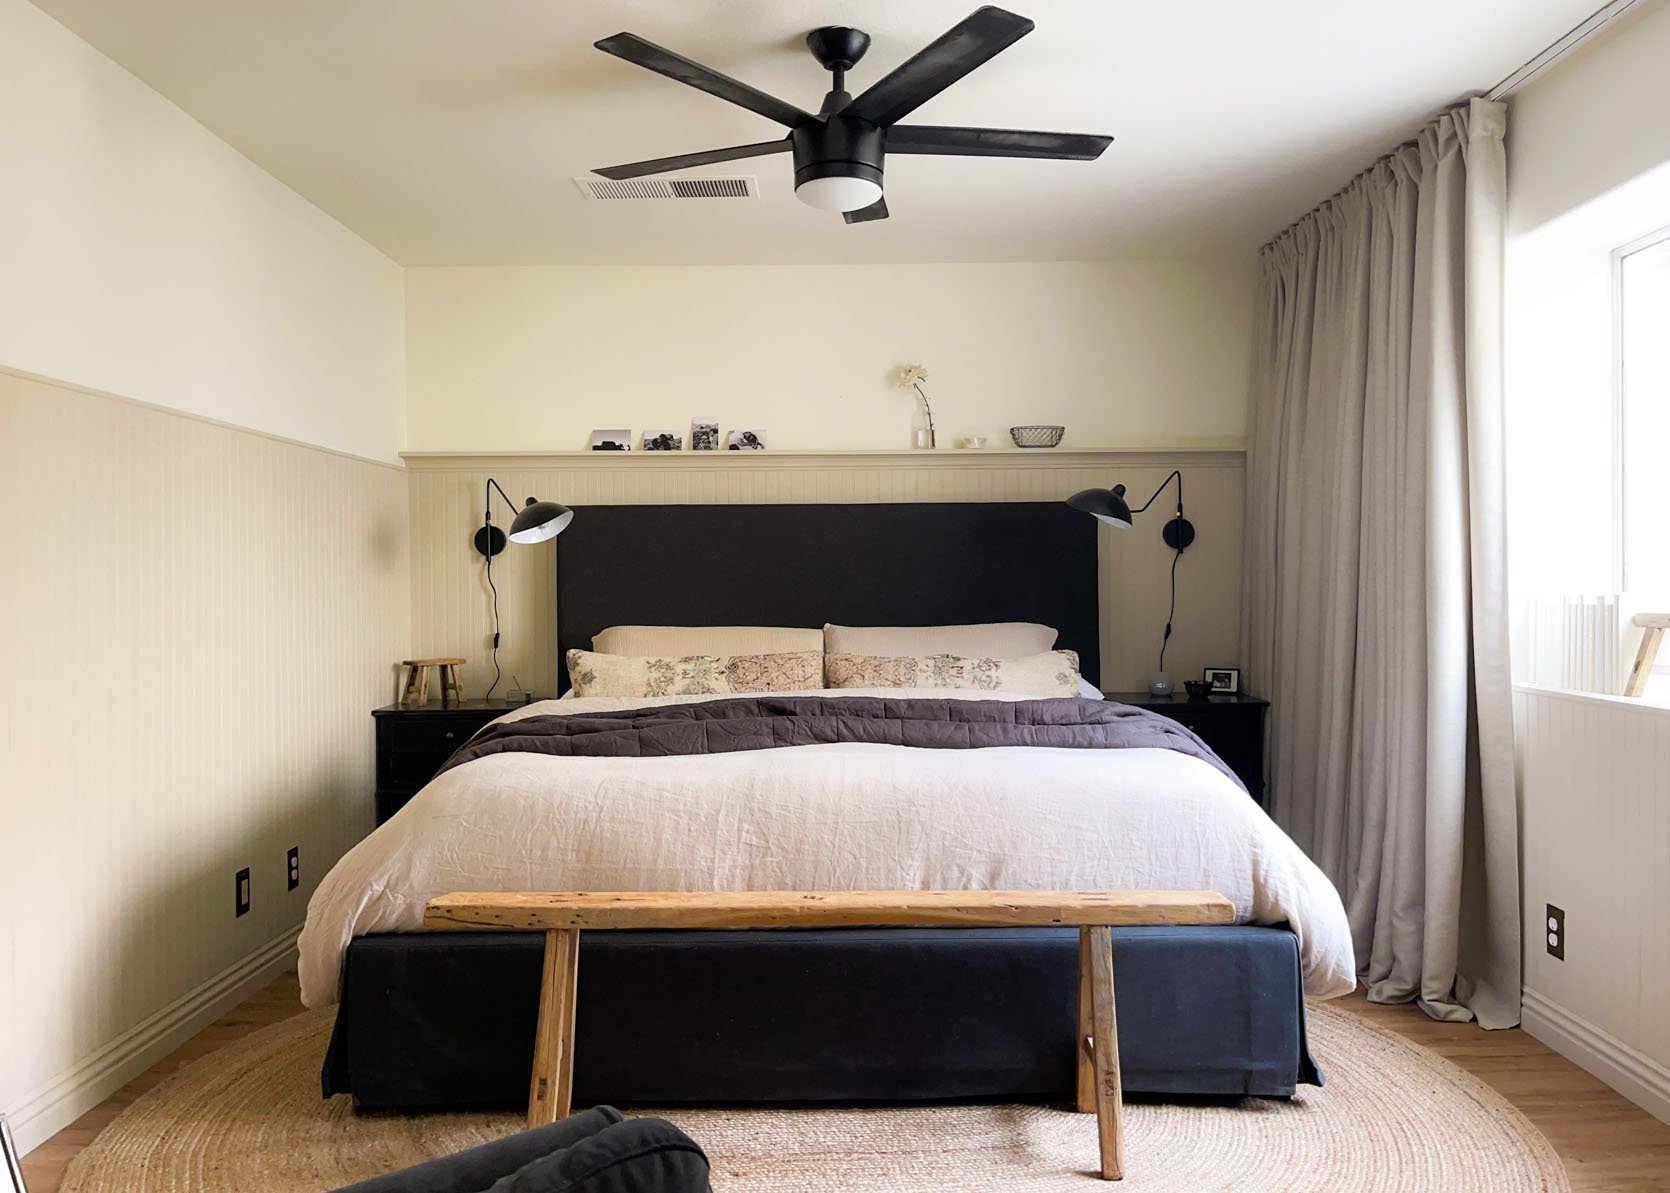
Beadboard And Spanish Sand Paint In The Bedroom
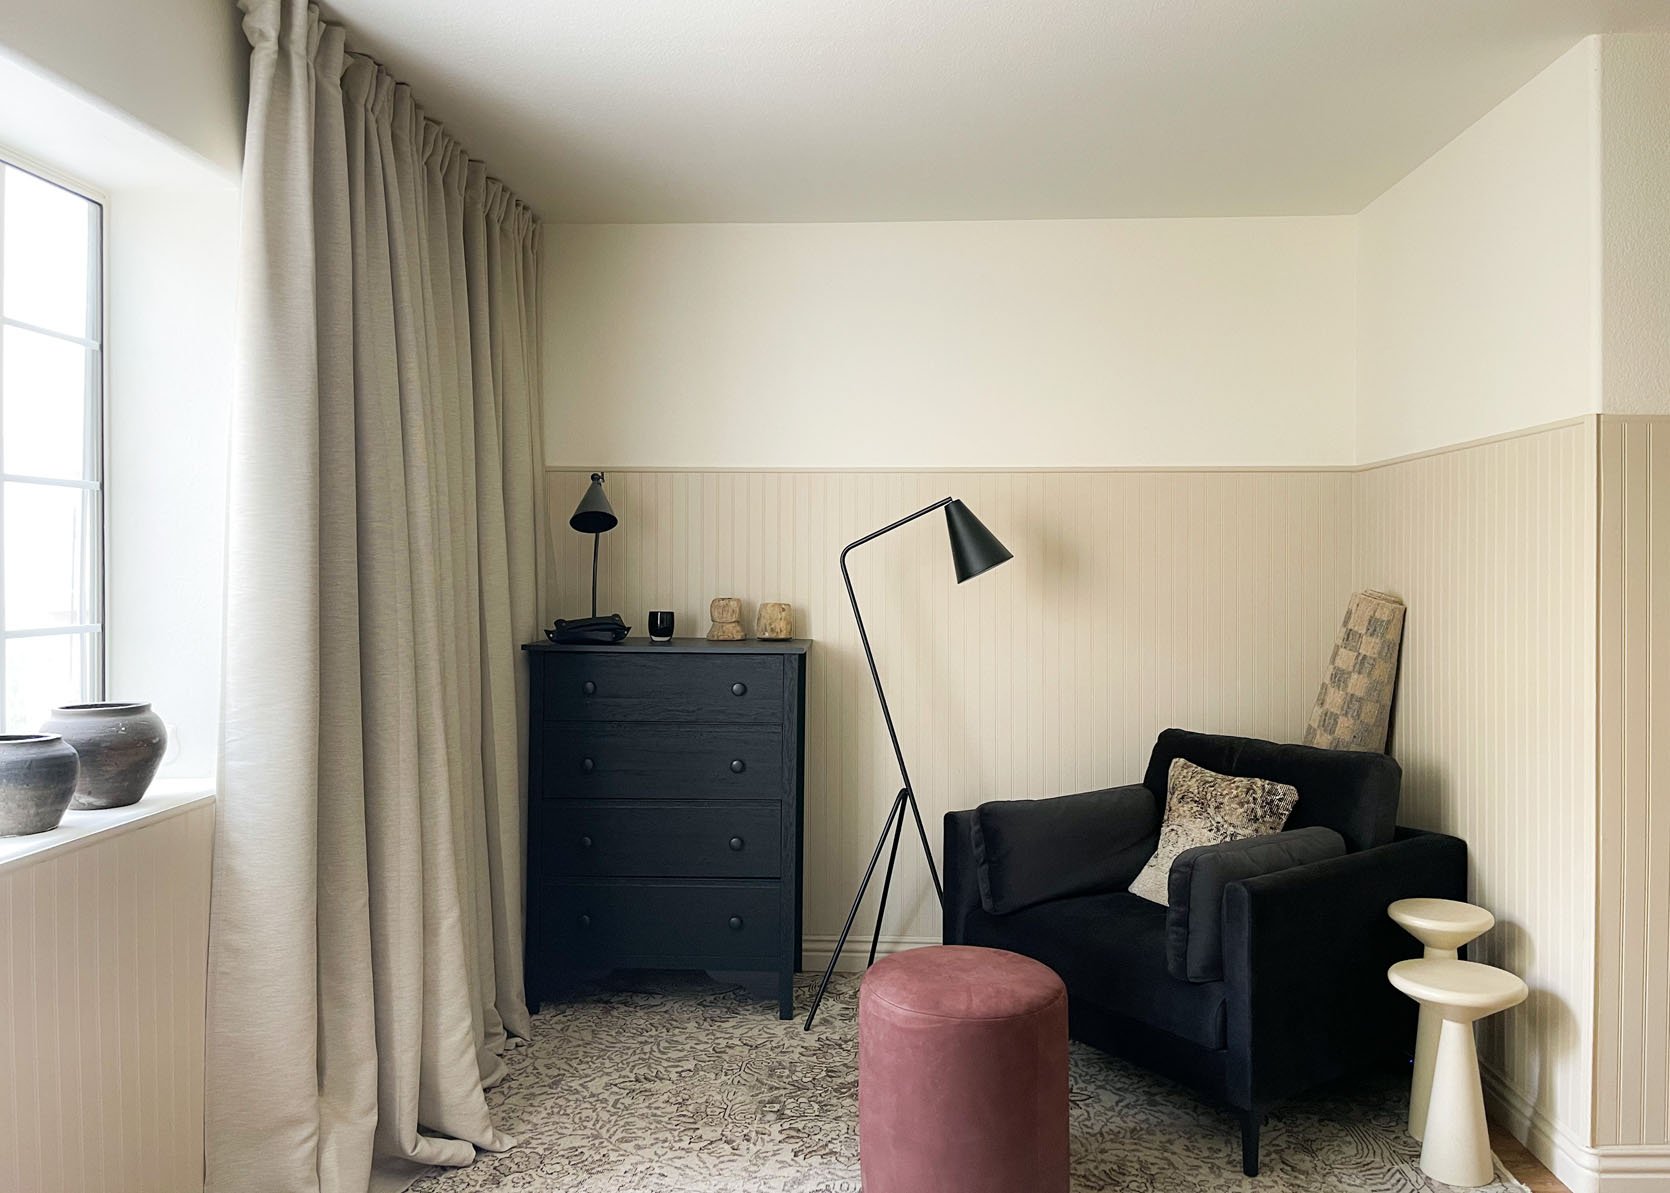
Bed | Nightstands (distressed diy) | Black Sconces | Bedding Bundle | Oval Jute Rug | Dresser | Ottoman | Armchair | Patterned Area Rug (vintage) | Floor Lamp | Table Lamp
The main bedroom is another area we chose to add beadboard (another weekend project). This was actually the first room we worked on, which gave us the option to cover more wall (length-wise) with beadboard (we used the leftover beadboard from this project in the living and dining rooms). In the main bedroom, we swapped out all of the outlet plates, the ceiling fan, and added a custom picture ledge. The picture ledge in this room is the reason we decided to cover more area of the wall with the beadboard. We wanted any bed to clear the height of the picture ledge, giving tenants the option of putting their bed on this wall as well. Our headboard is a bit on the tall side, so I’m positive any other bed would fit under the picture ledge just fine. Because the bedroom is not a high-traffic area, we thought a lighter color would complement this room well. I’m big on the bedroom being a tranquil space, so opting for lighter palettes here is what I typically gravitate toward. There were so many positive responses regarding our choice to paint the bedroom Spanish Sand, but I’m not surprised, as I’ve learned that many renters prefer neutral colors, as it gives them the option to add their own colors/personal touches to a space. We used one gallon of paint for this space and this cost around $40. Lastly, we decided to replace the current ceiling fan with a new one, fighting the temptation to add a chandelier. It can get very hot in Las Vegas, so having a ceiling fan in each room is more ideal. This topic got pretty heated via social media, but the general consensus around having a ceiling fan over a chandelier was that function beats out aesthetics.
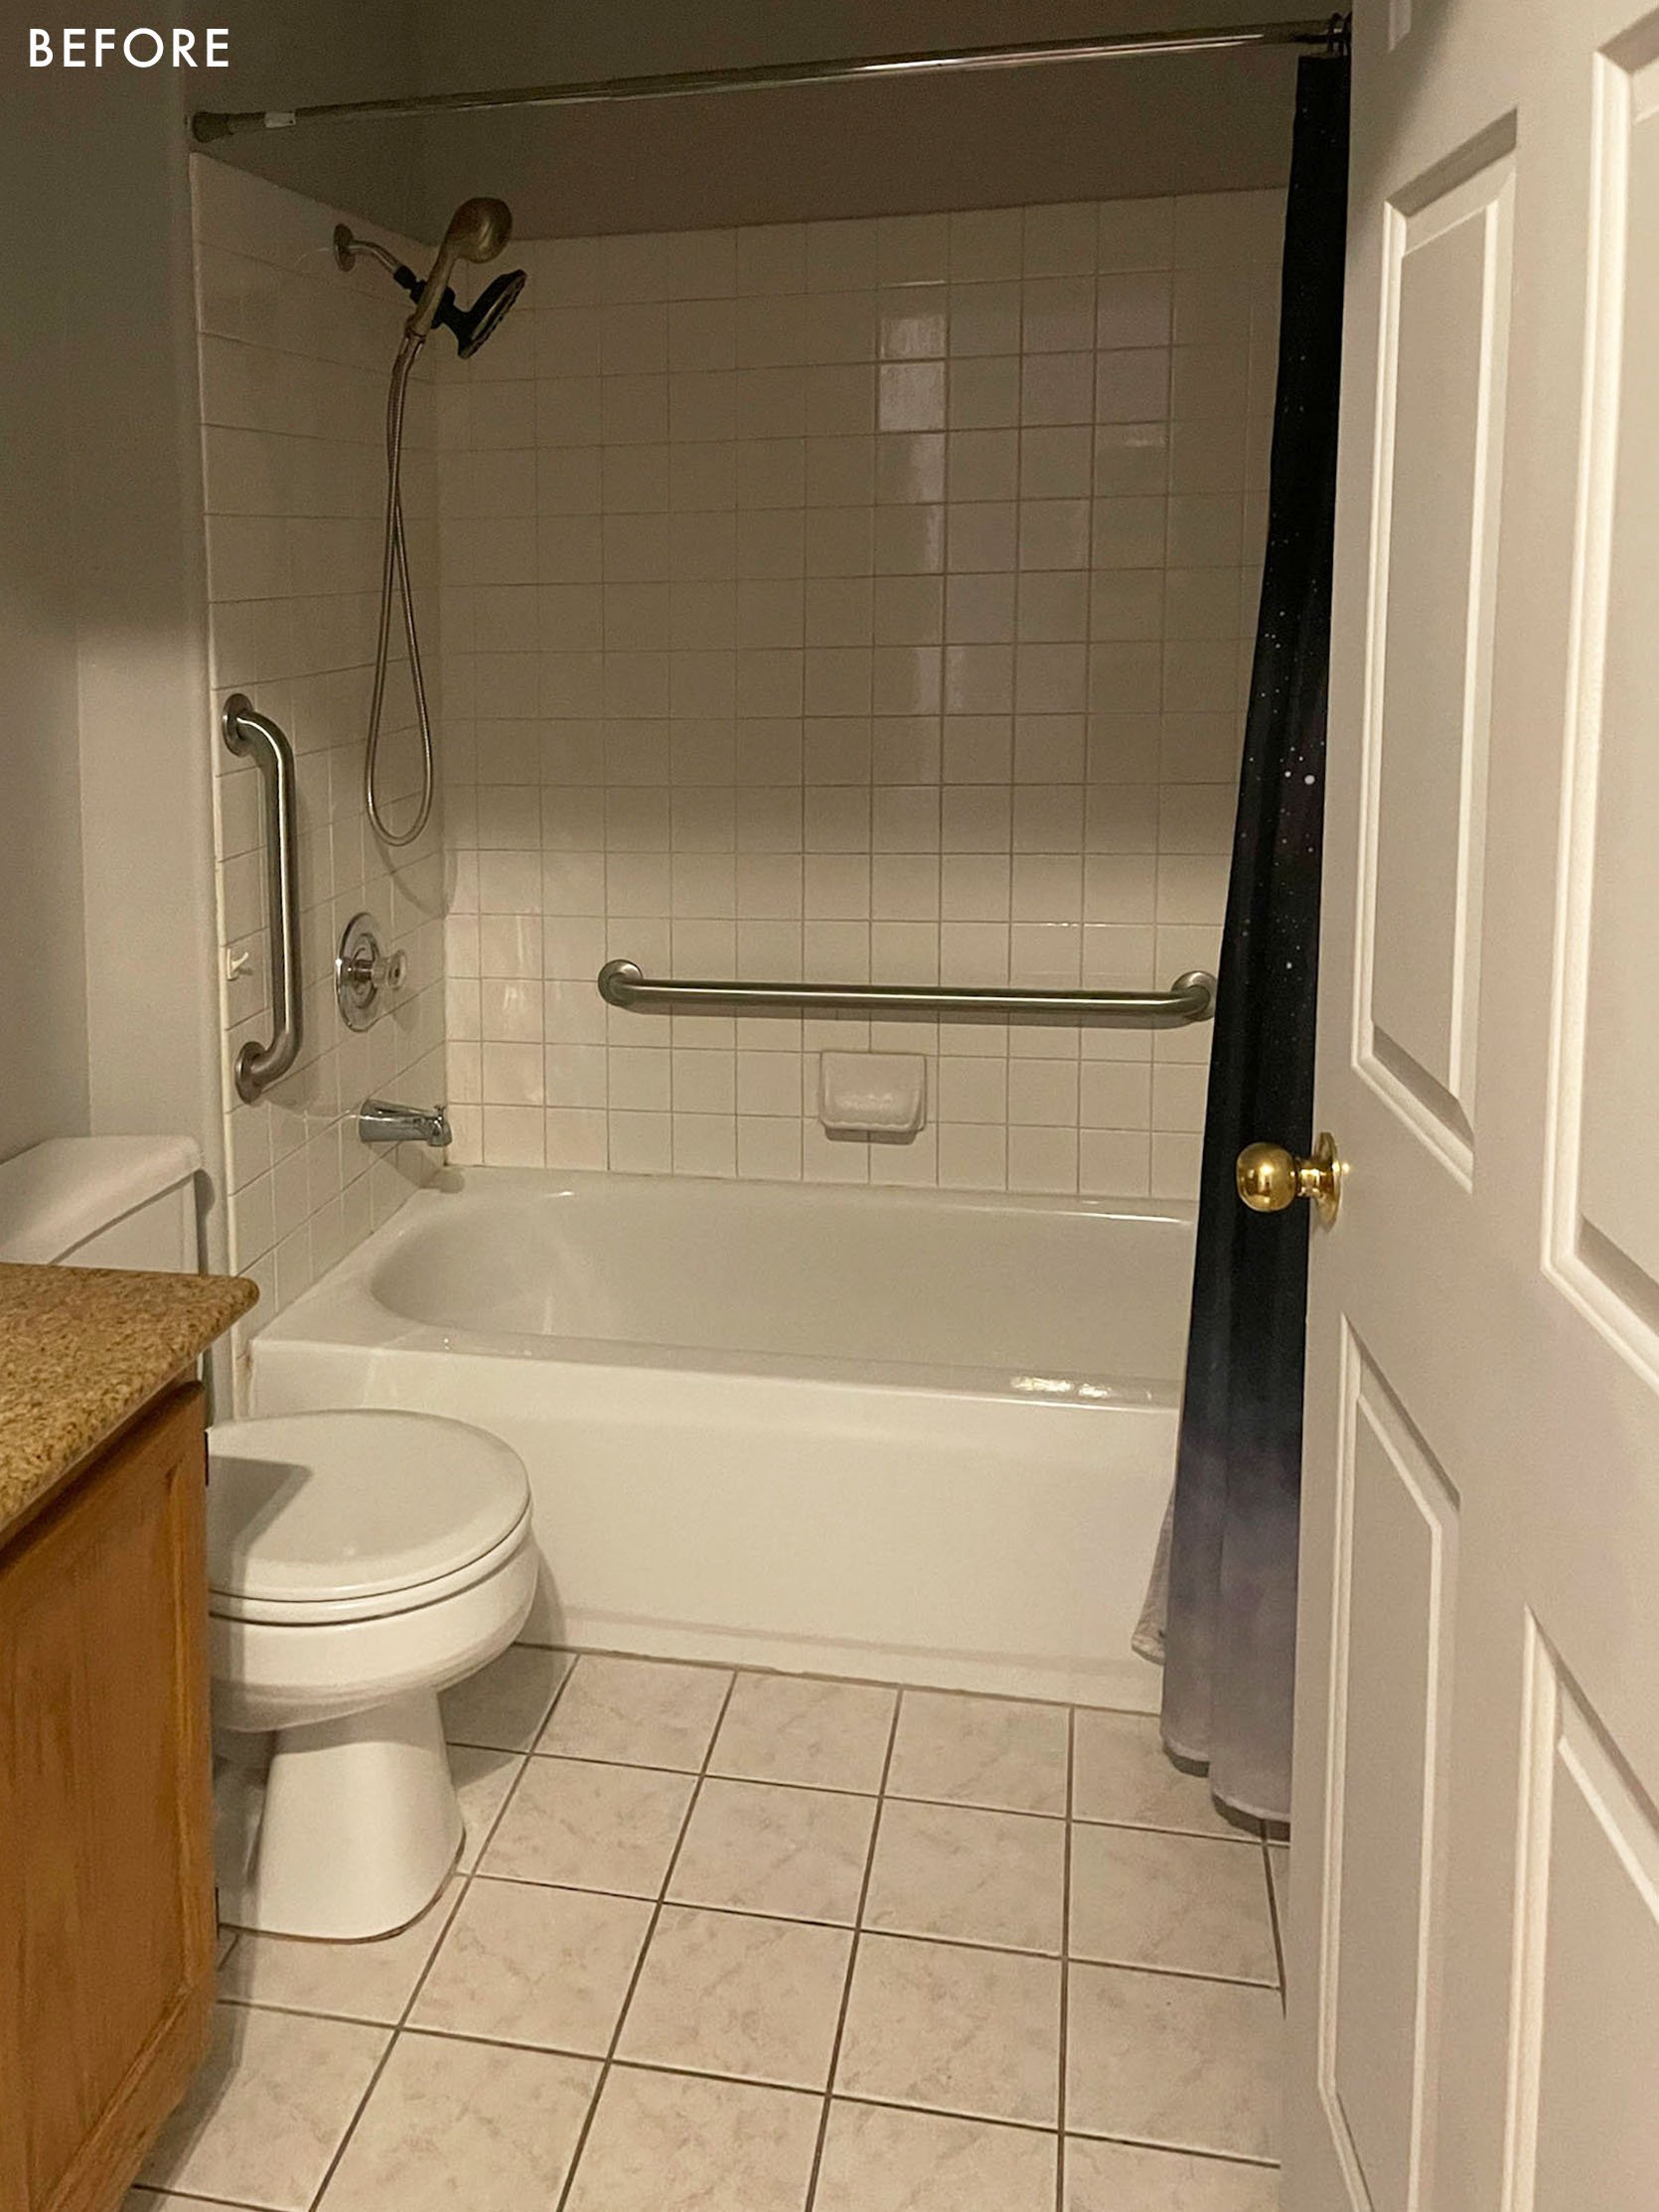
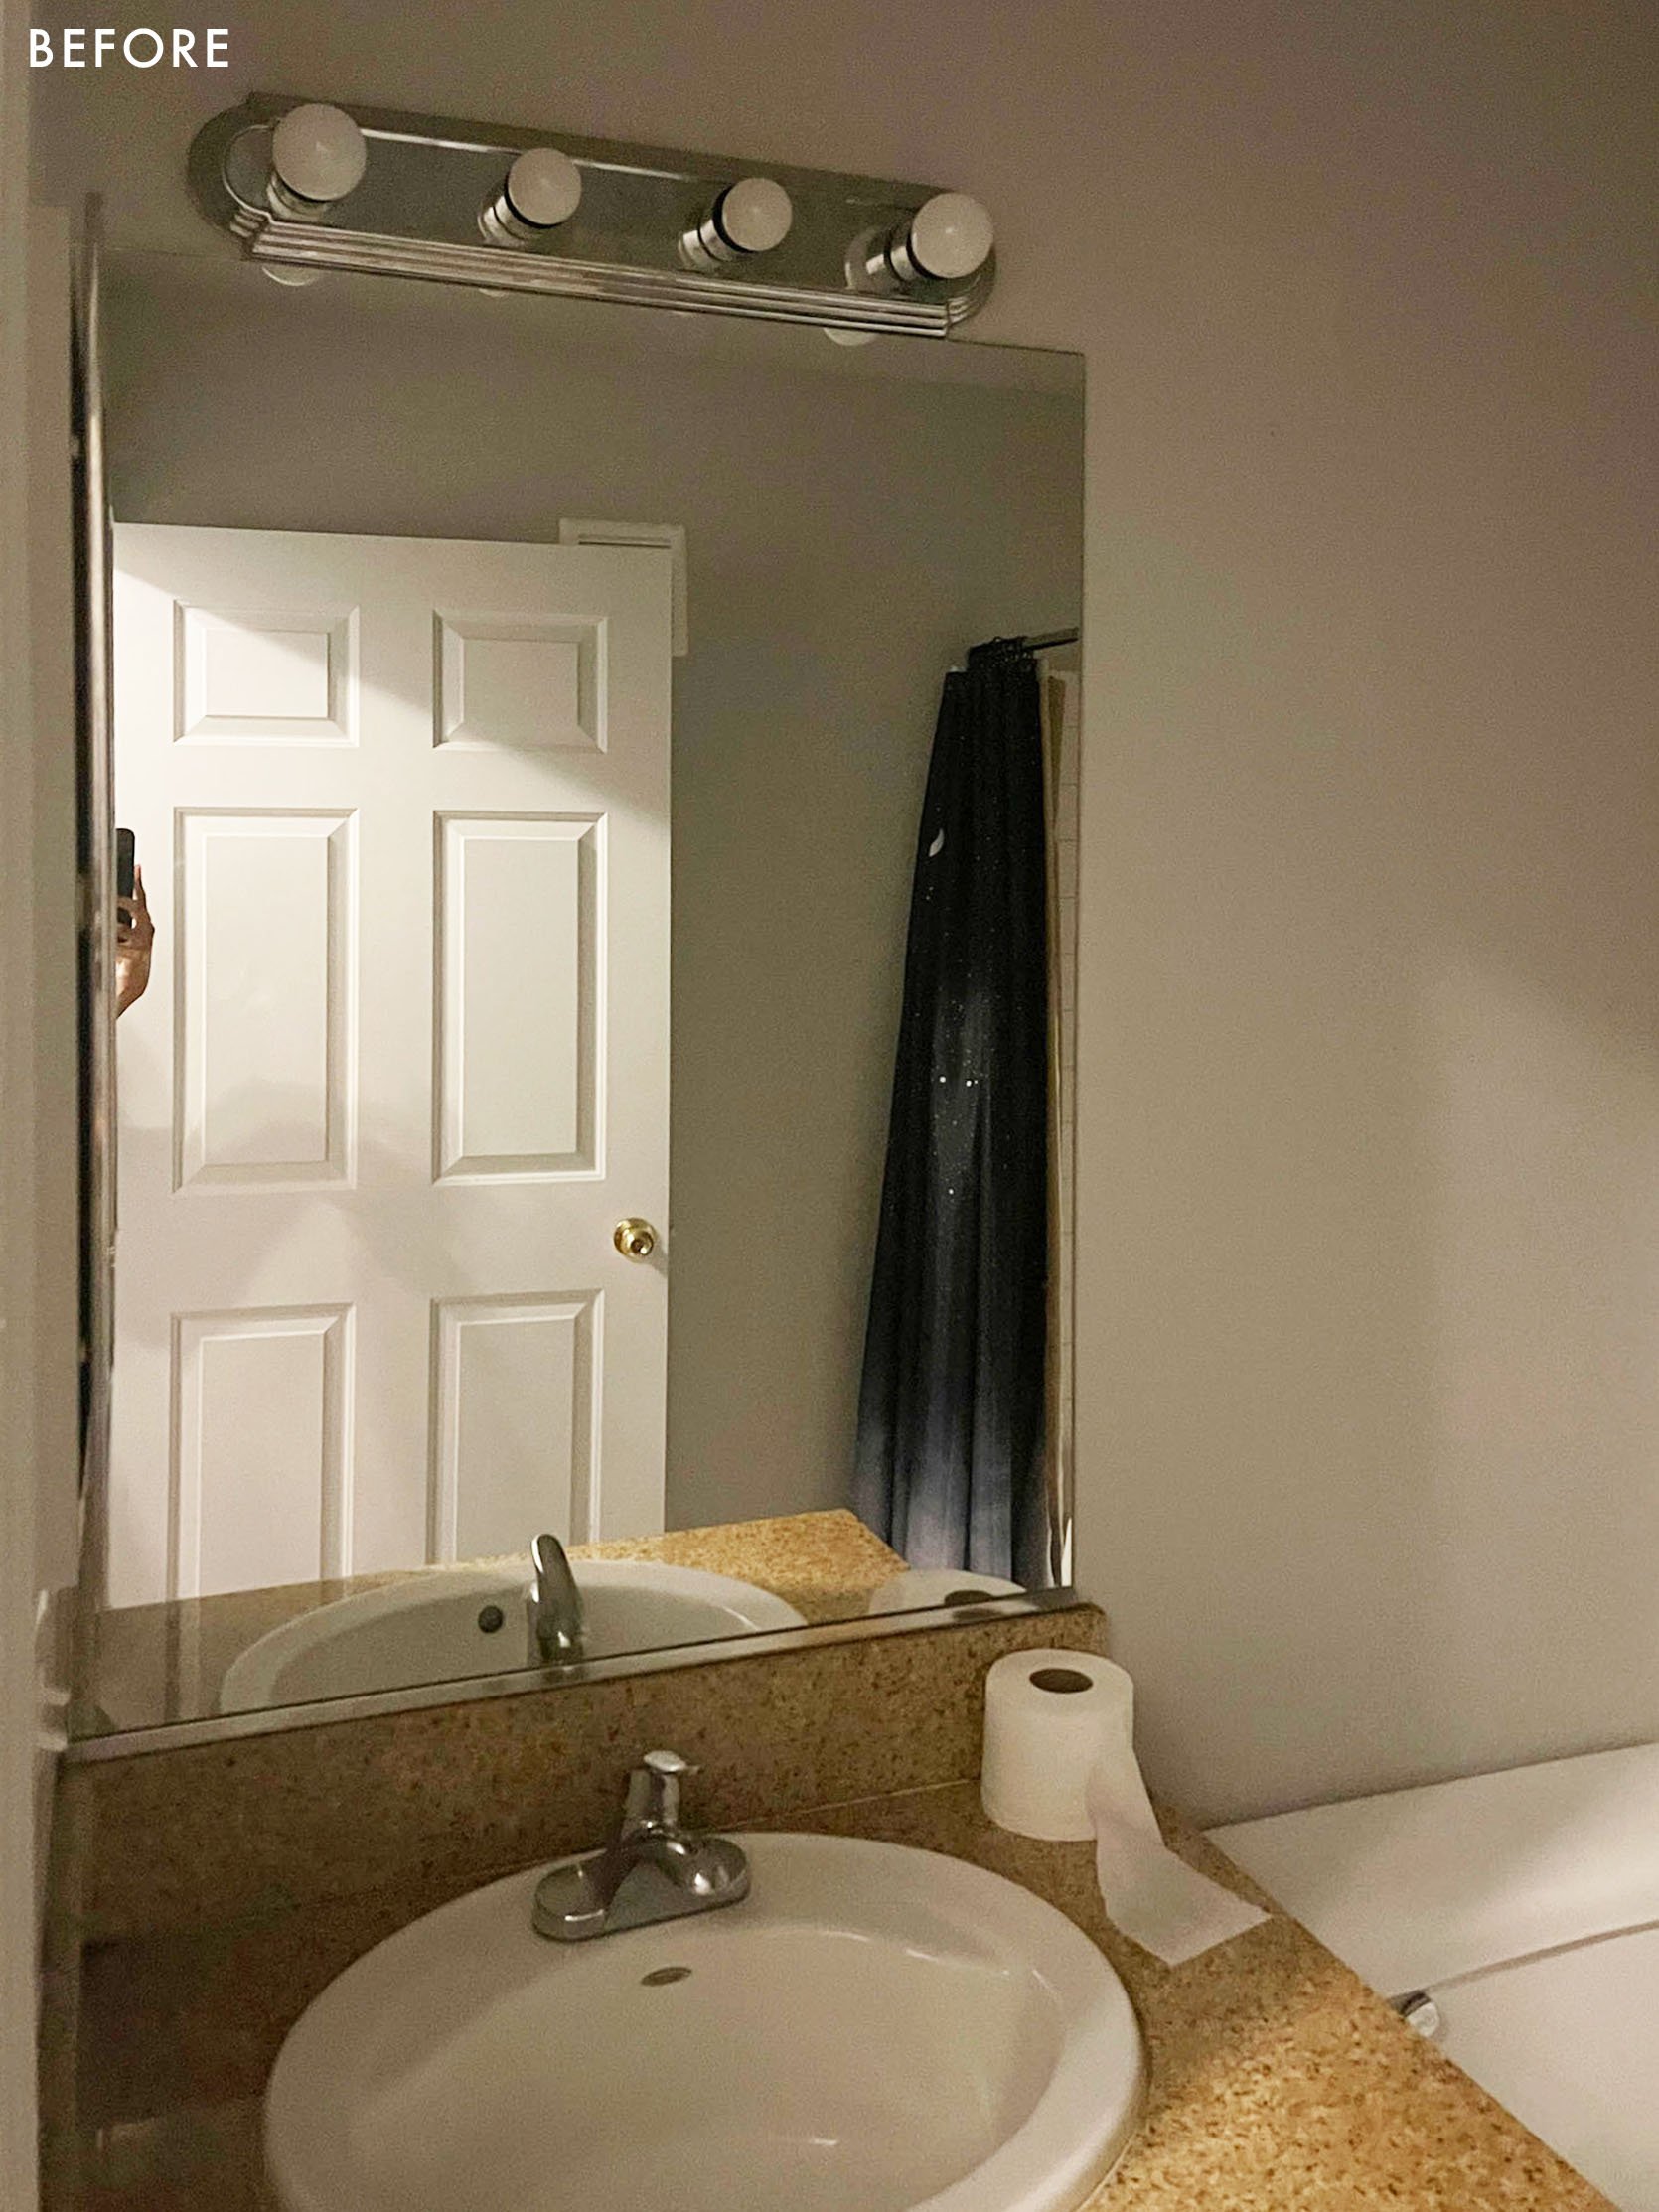
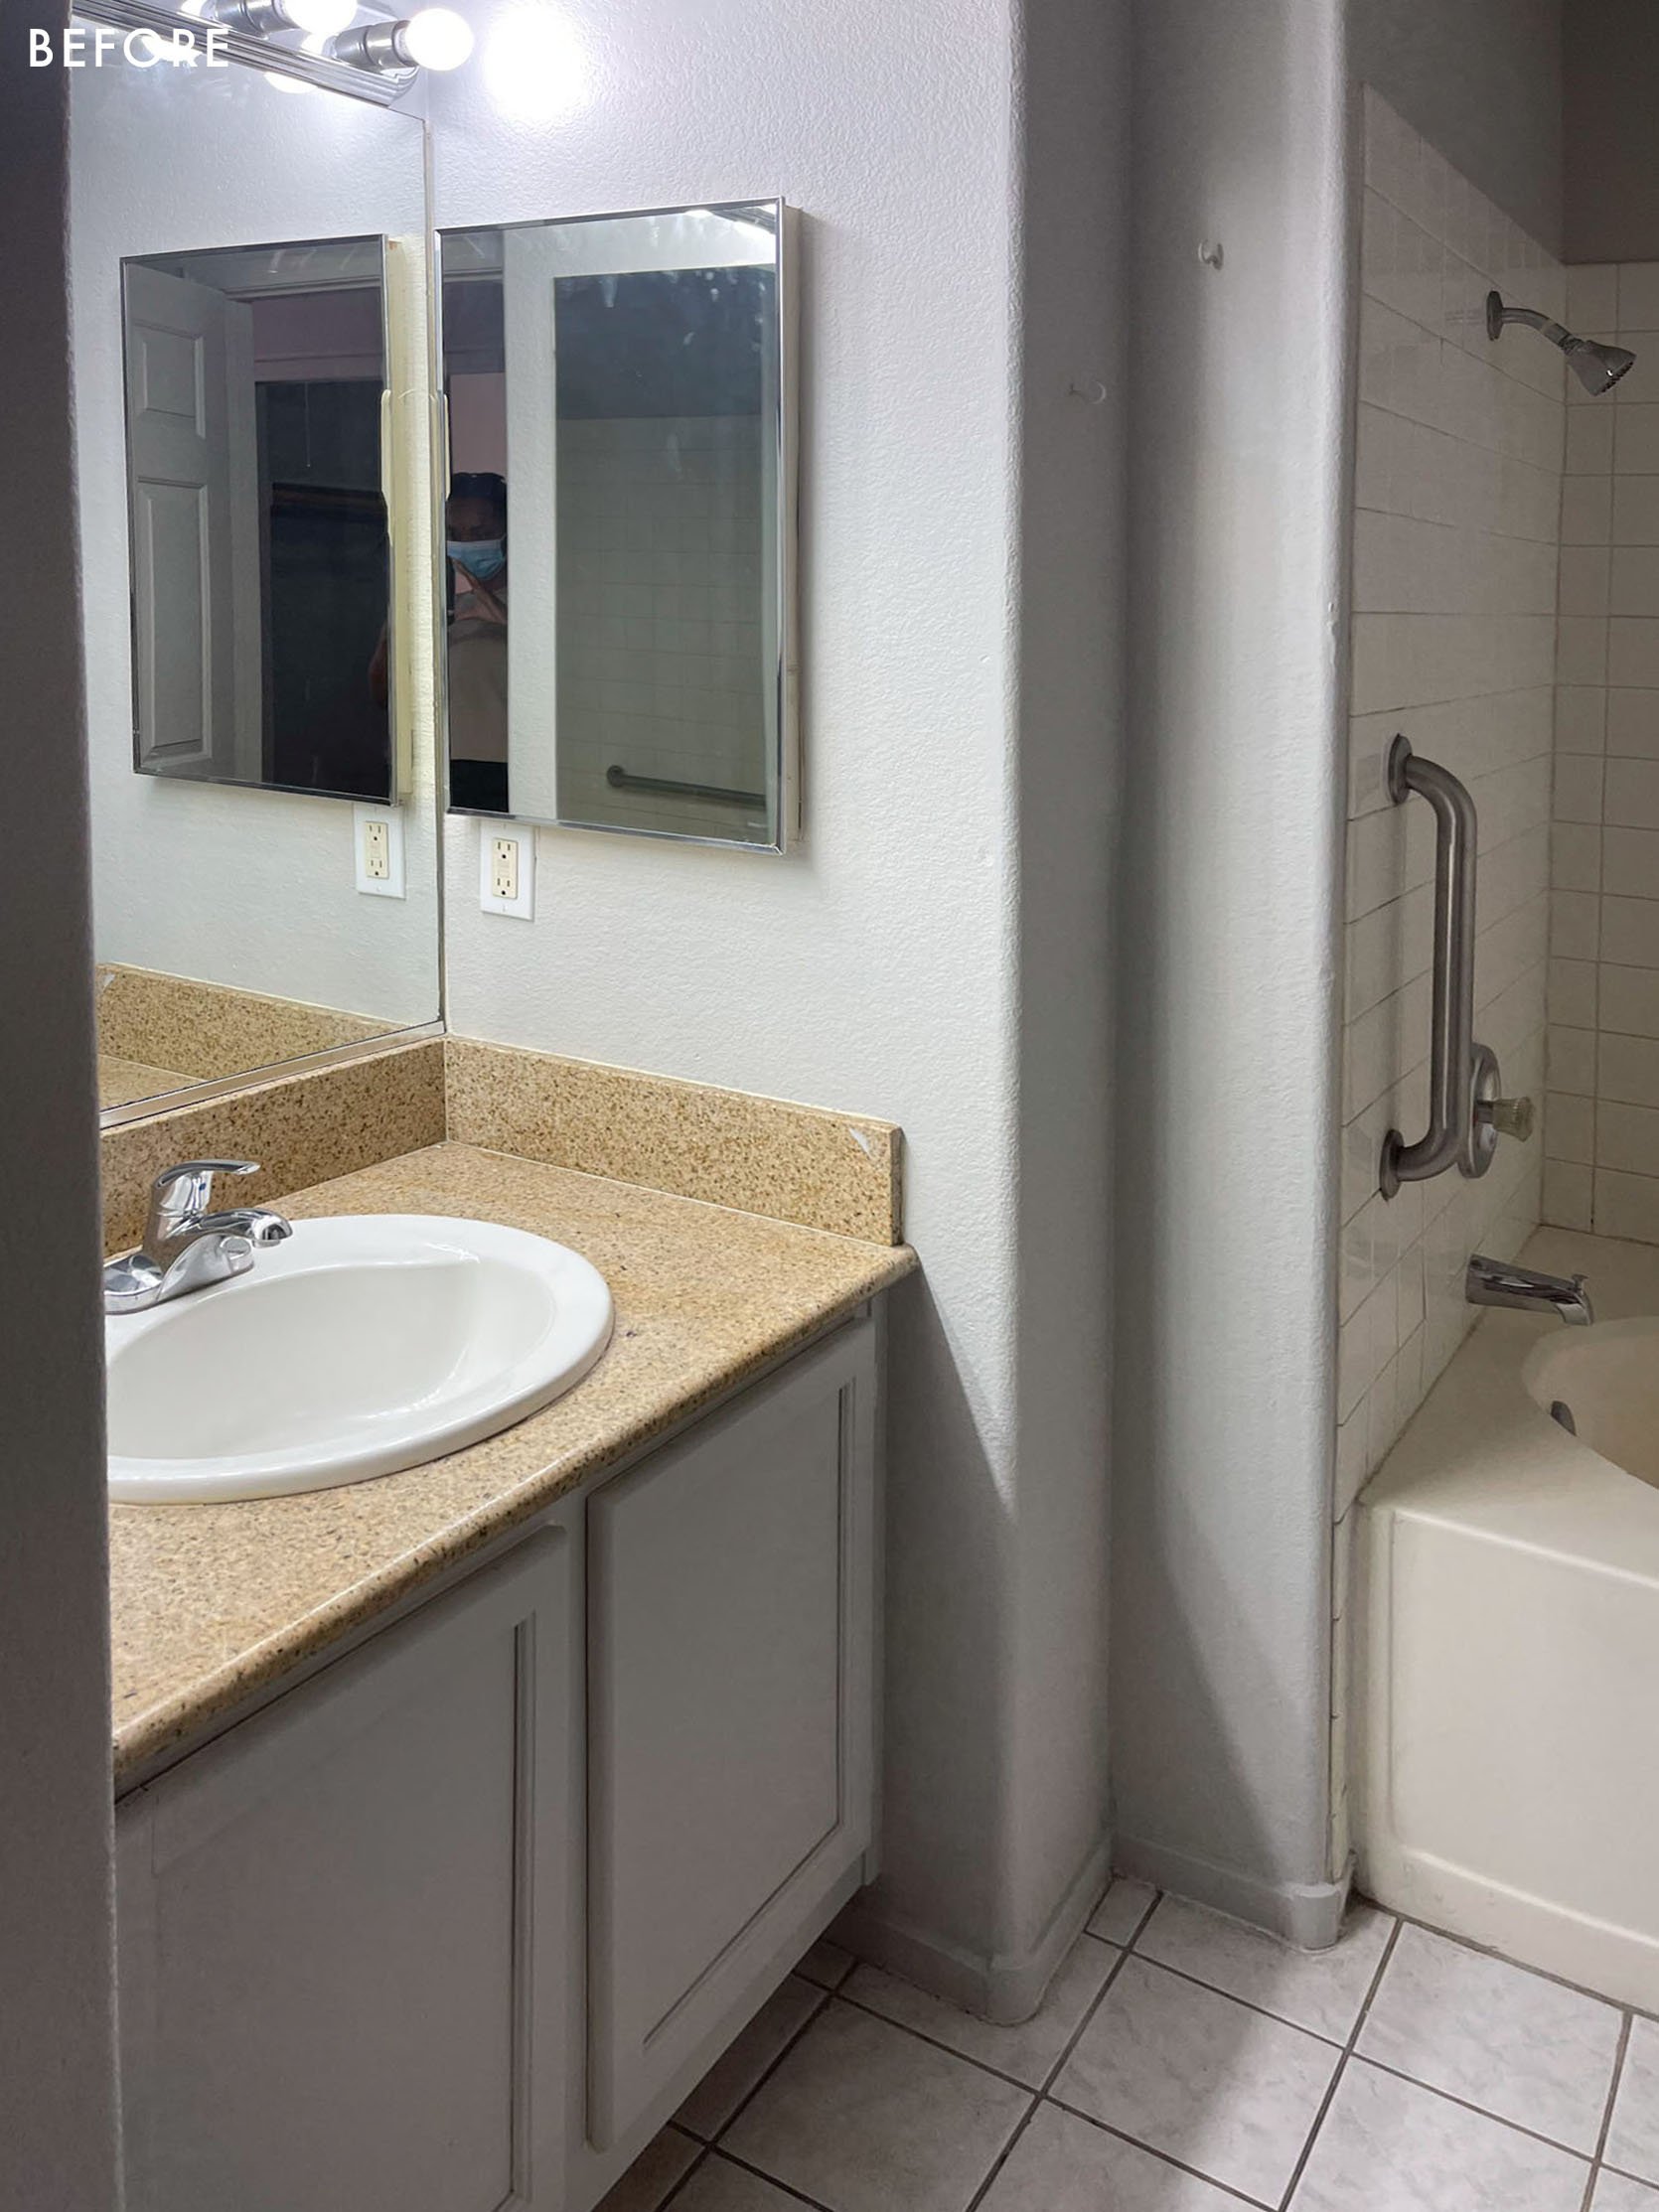
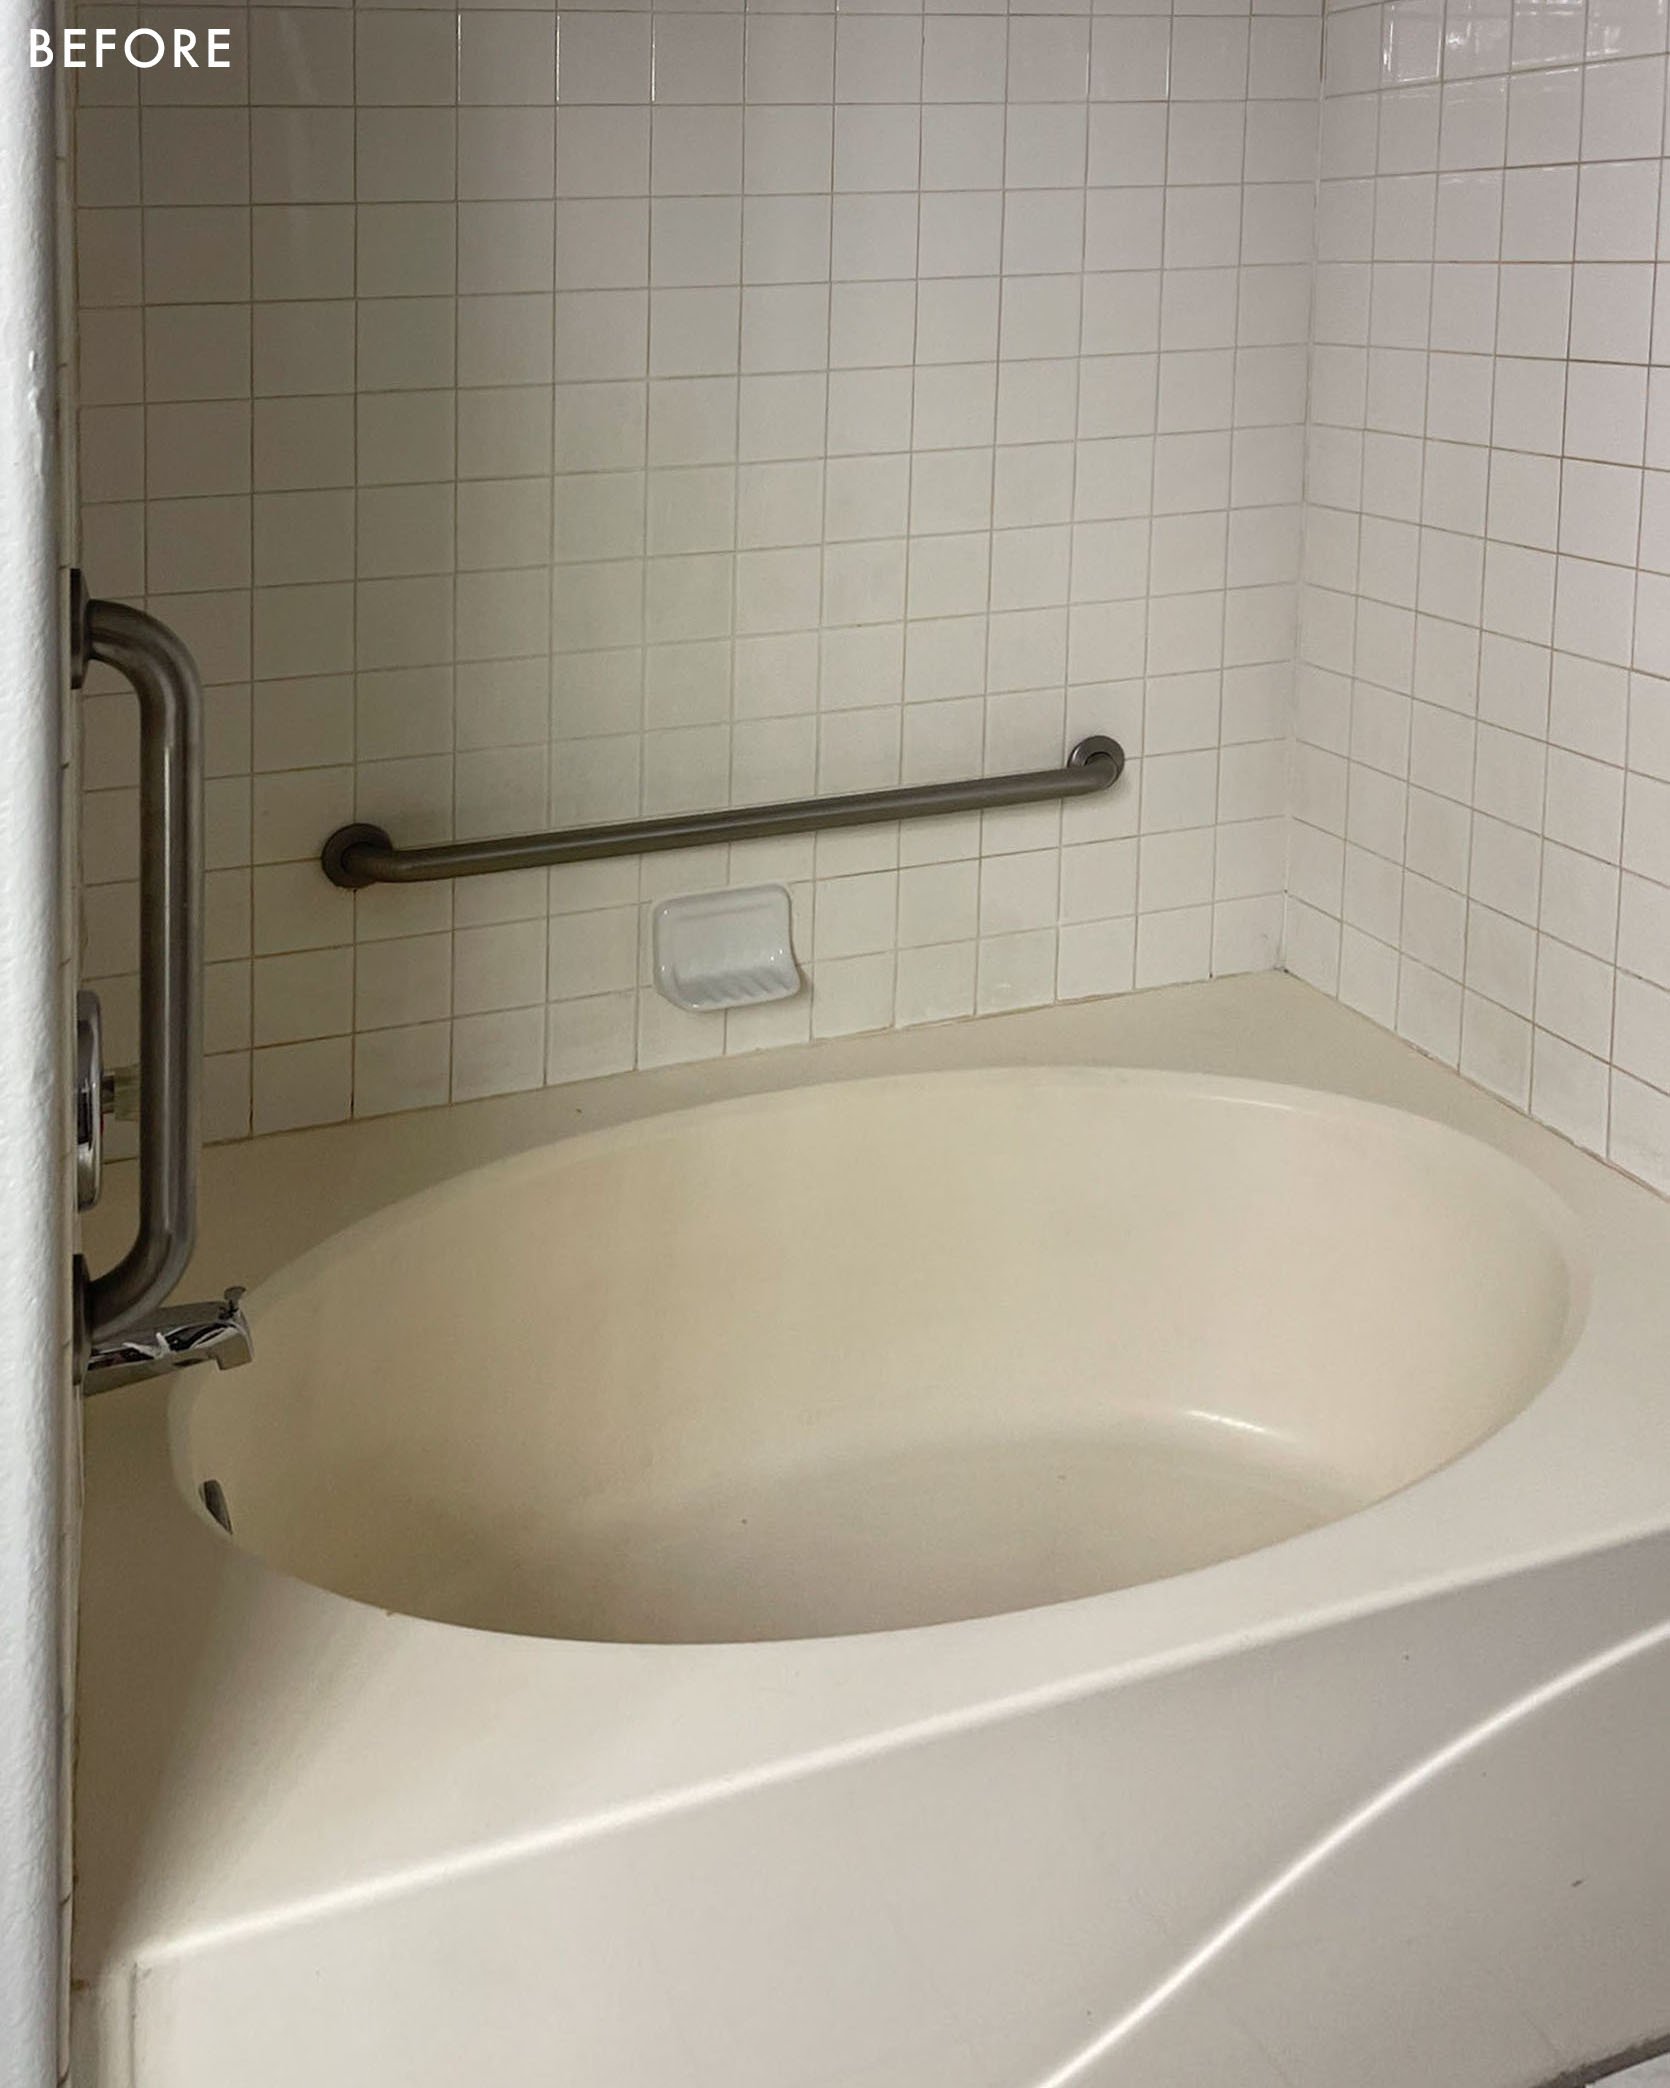
Reglazed Bathtubs And Swapped Out Hardware Instead Of Buying New Tubs
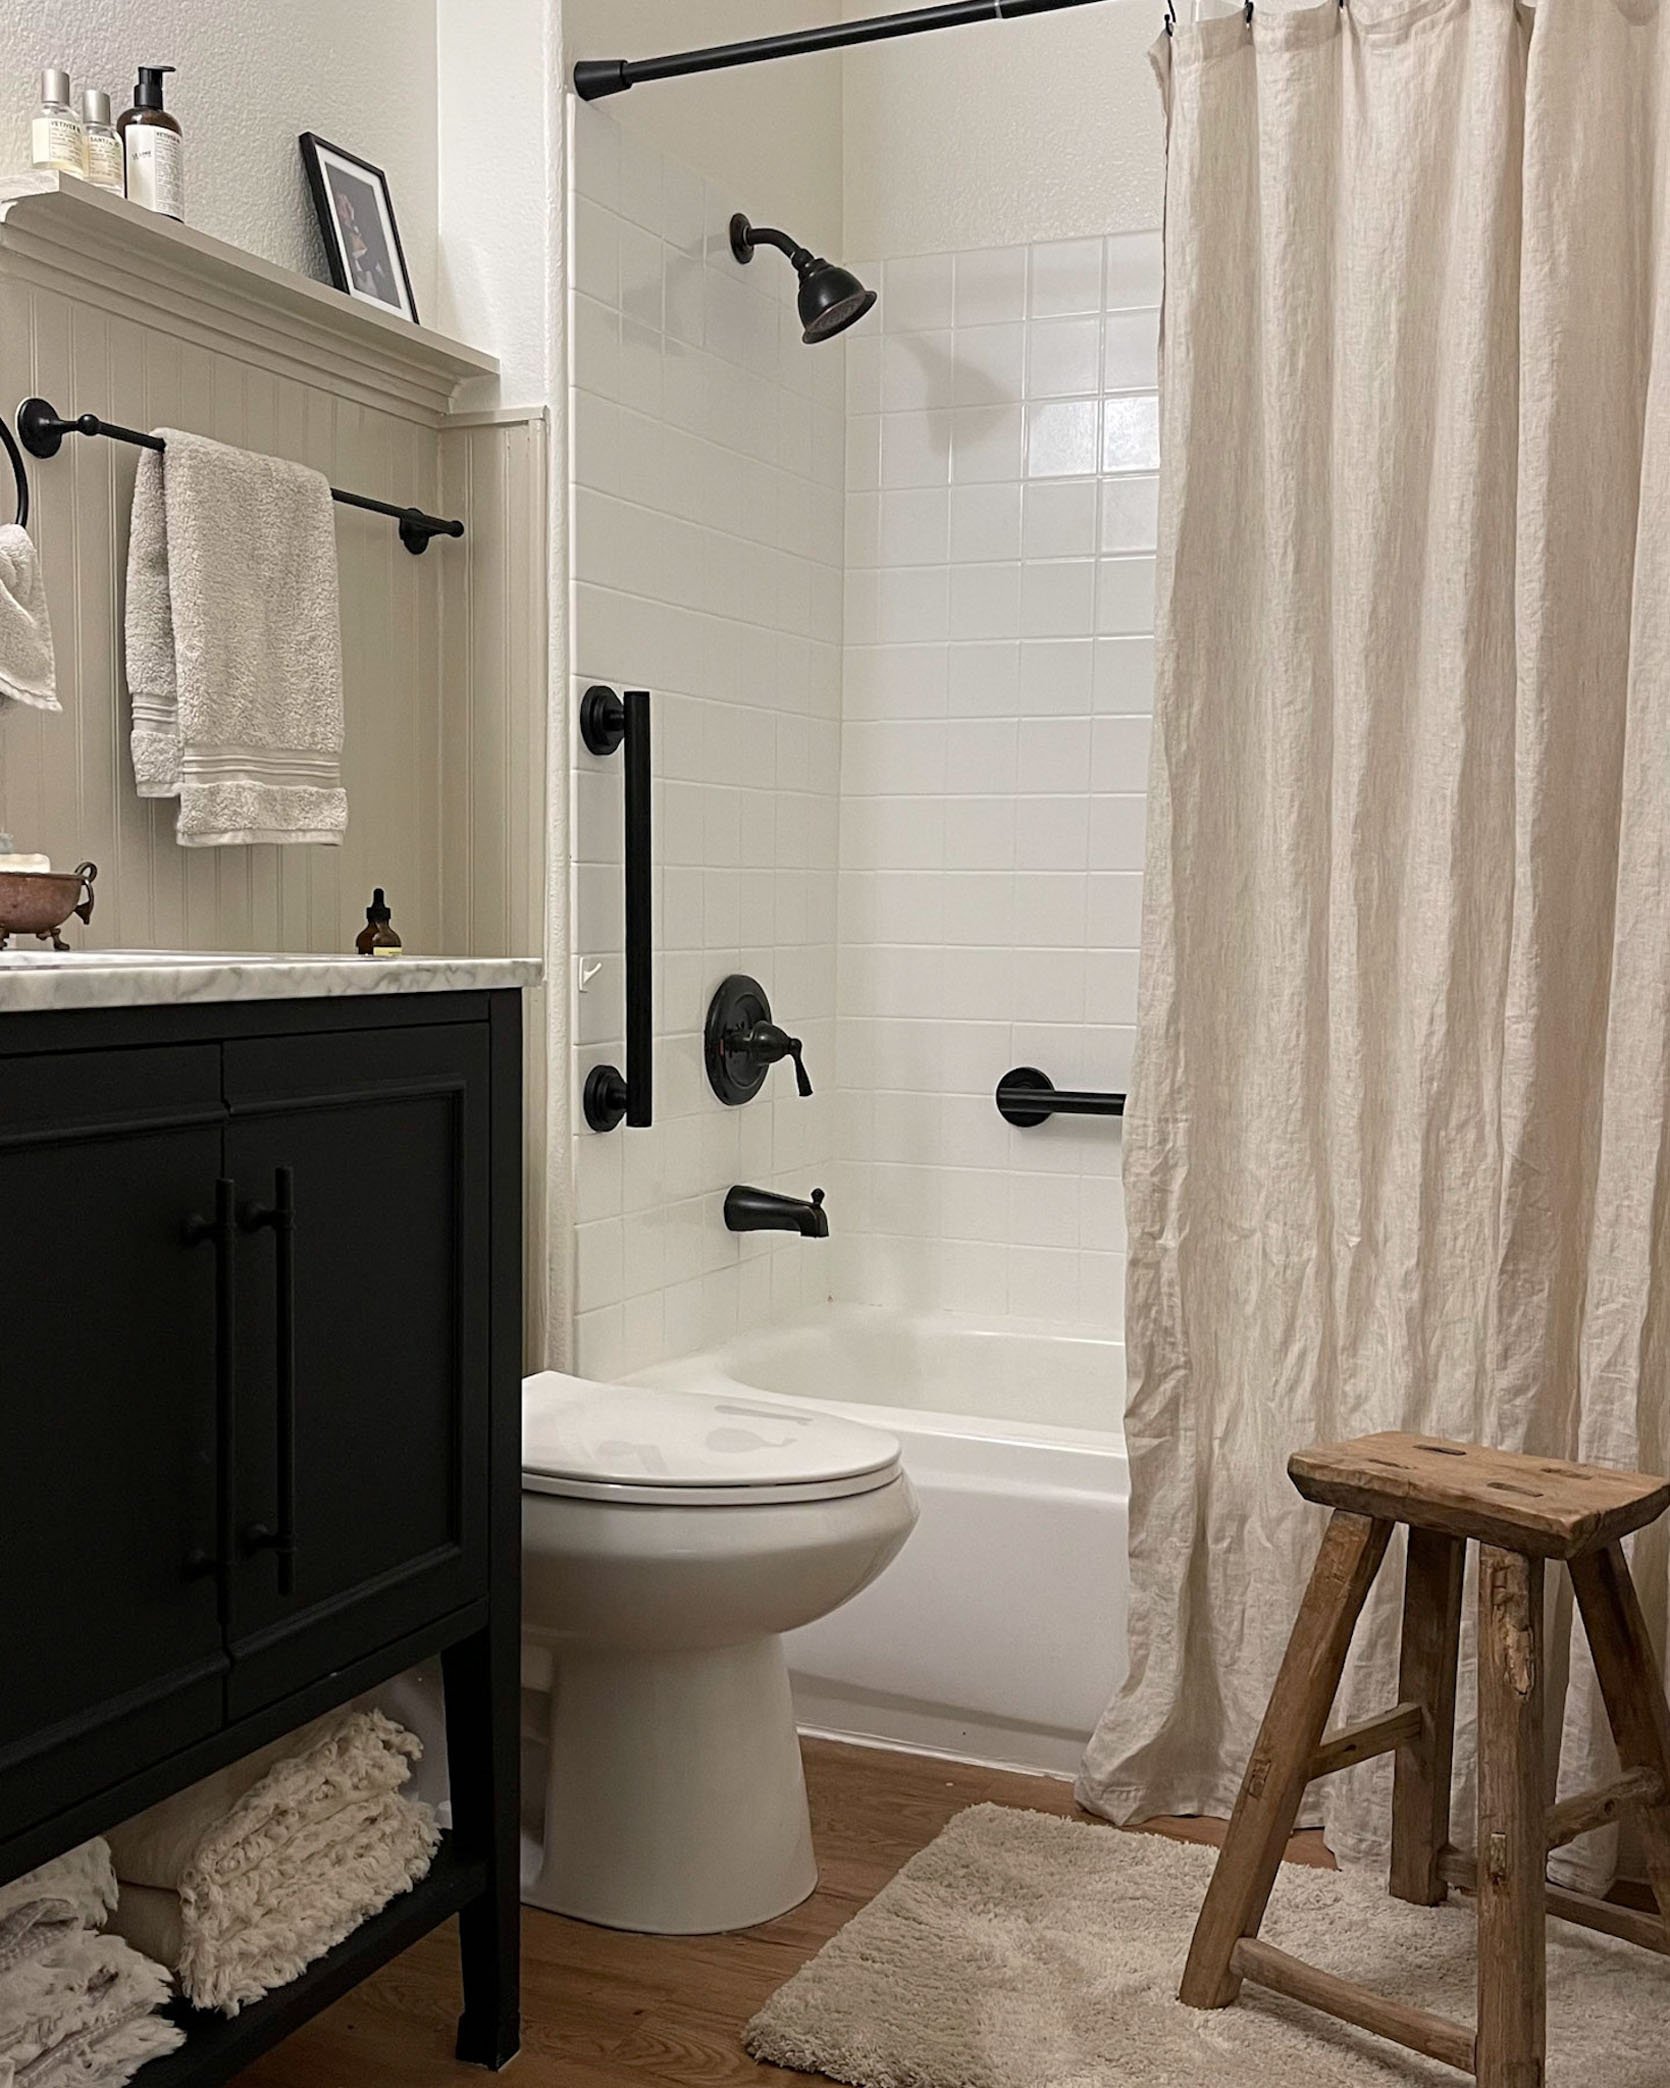
Matte Black Bathroom Accessories | Shower Curtain | Wood Stool
I learned early that reglazing bathtubs can be an effective and inexpensive option for a landlord. When I moved into my very first apartment, it had the most disgusting bathtub I’ve ever encountered. I wasn’t even comfortable standing in it to take a shower, so I reached out to the management company asking for them to replace the tub. You can imagine how that went over, so I sought out an inexpensive resolution that both the landlord and I would find accommodating. I interviewed a few tub reglazing companies near me, asked about the process, and chose the best one. They came in, stripped the tub of its grossness, and applied the new layers of glaze. I stayed with my parents for a few days, allowing the bathroom to air out, and then returned to a brand new tub (figuratively speaking). I lived in that condo for a couple of years and the tub never gave me any issues. Back then the reglaze only cost around $100, so of course the landlord was on board for this.
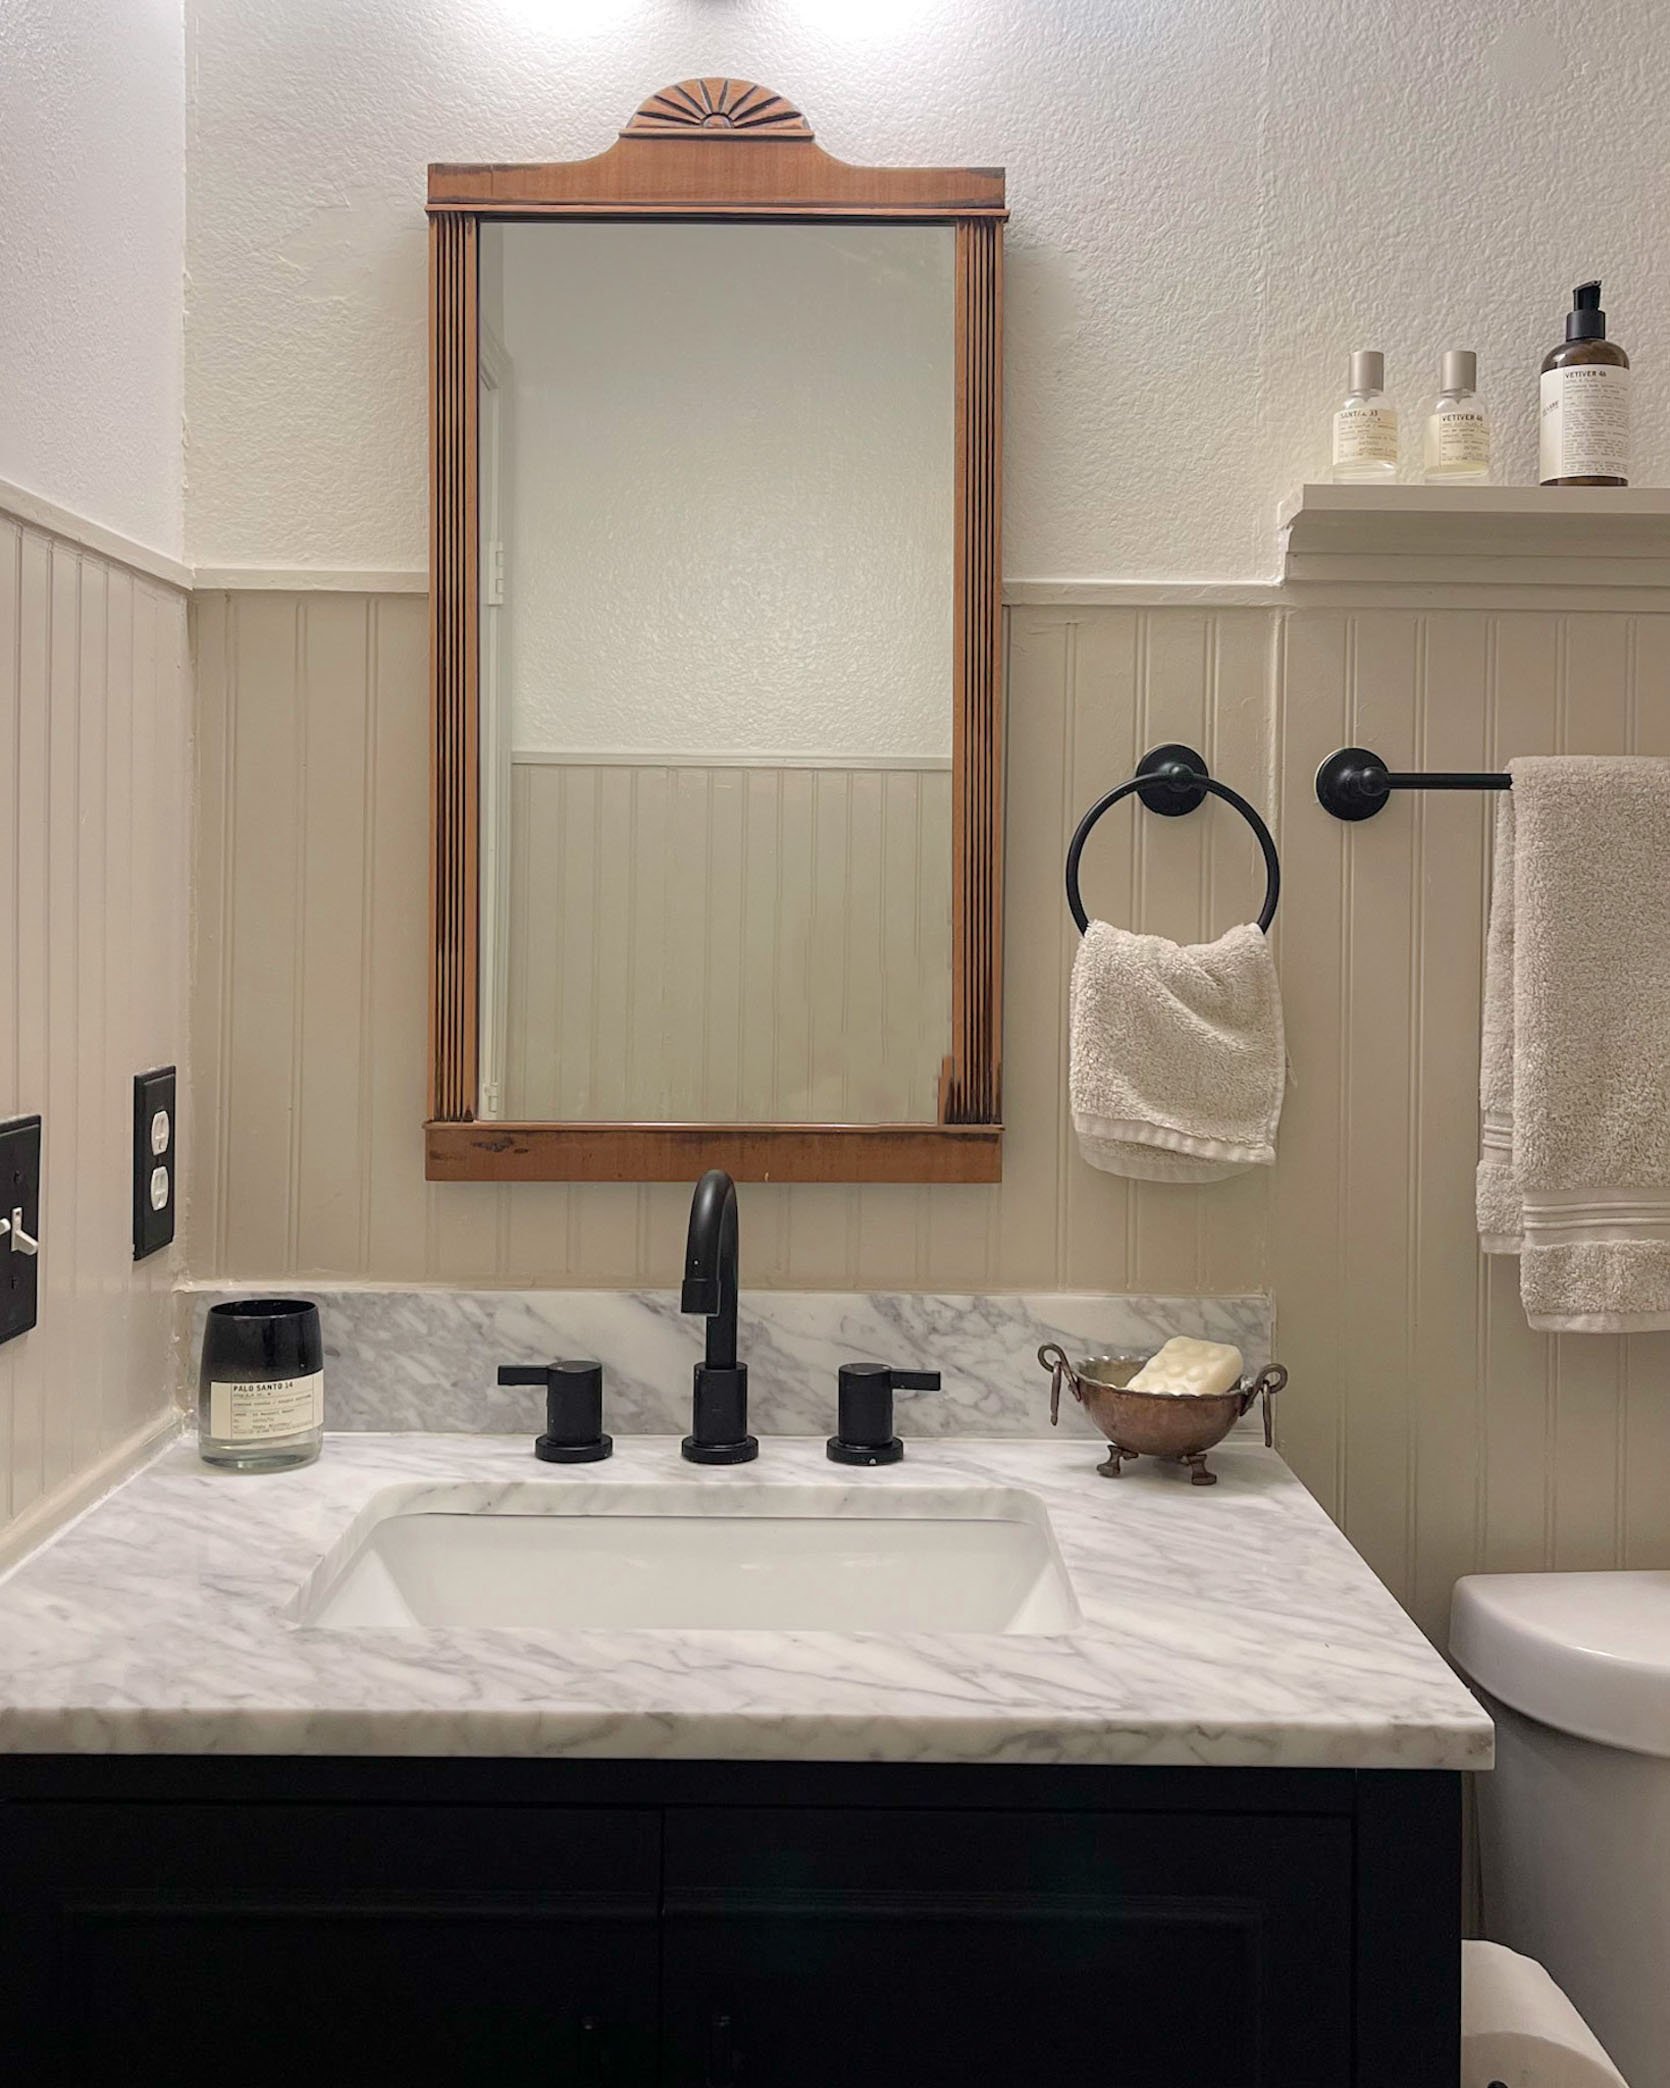
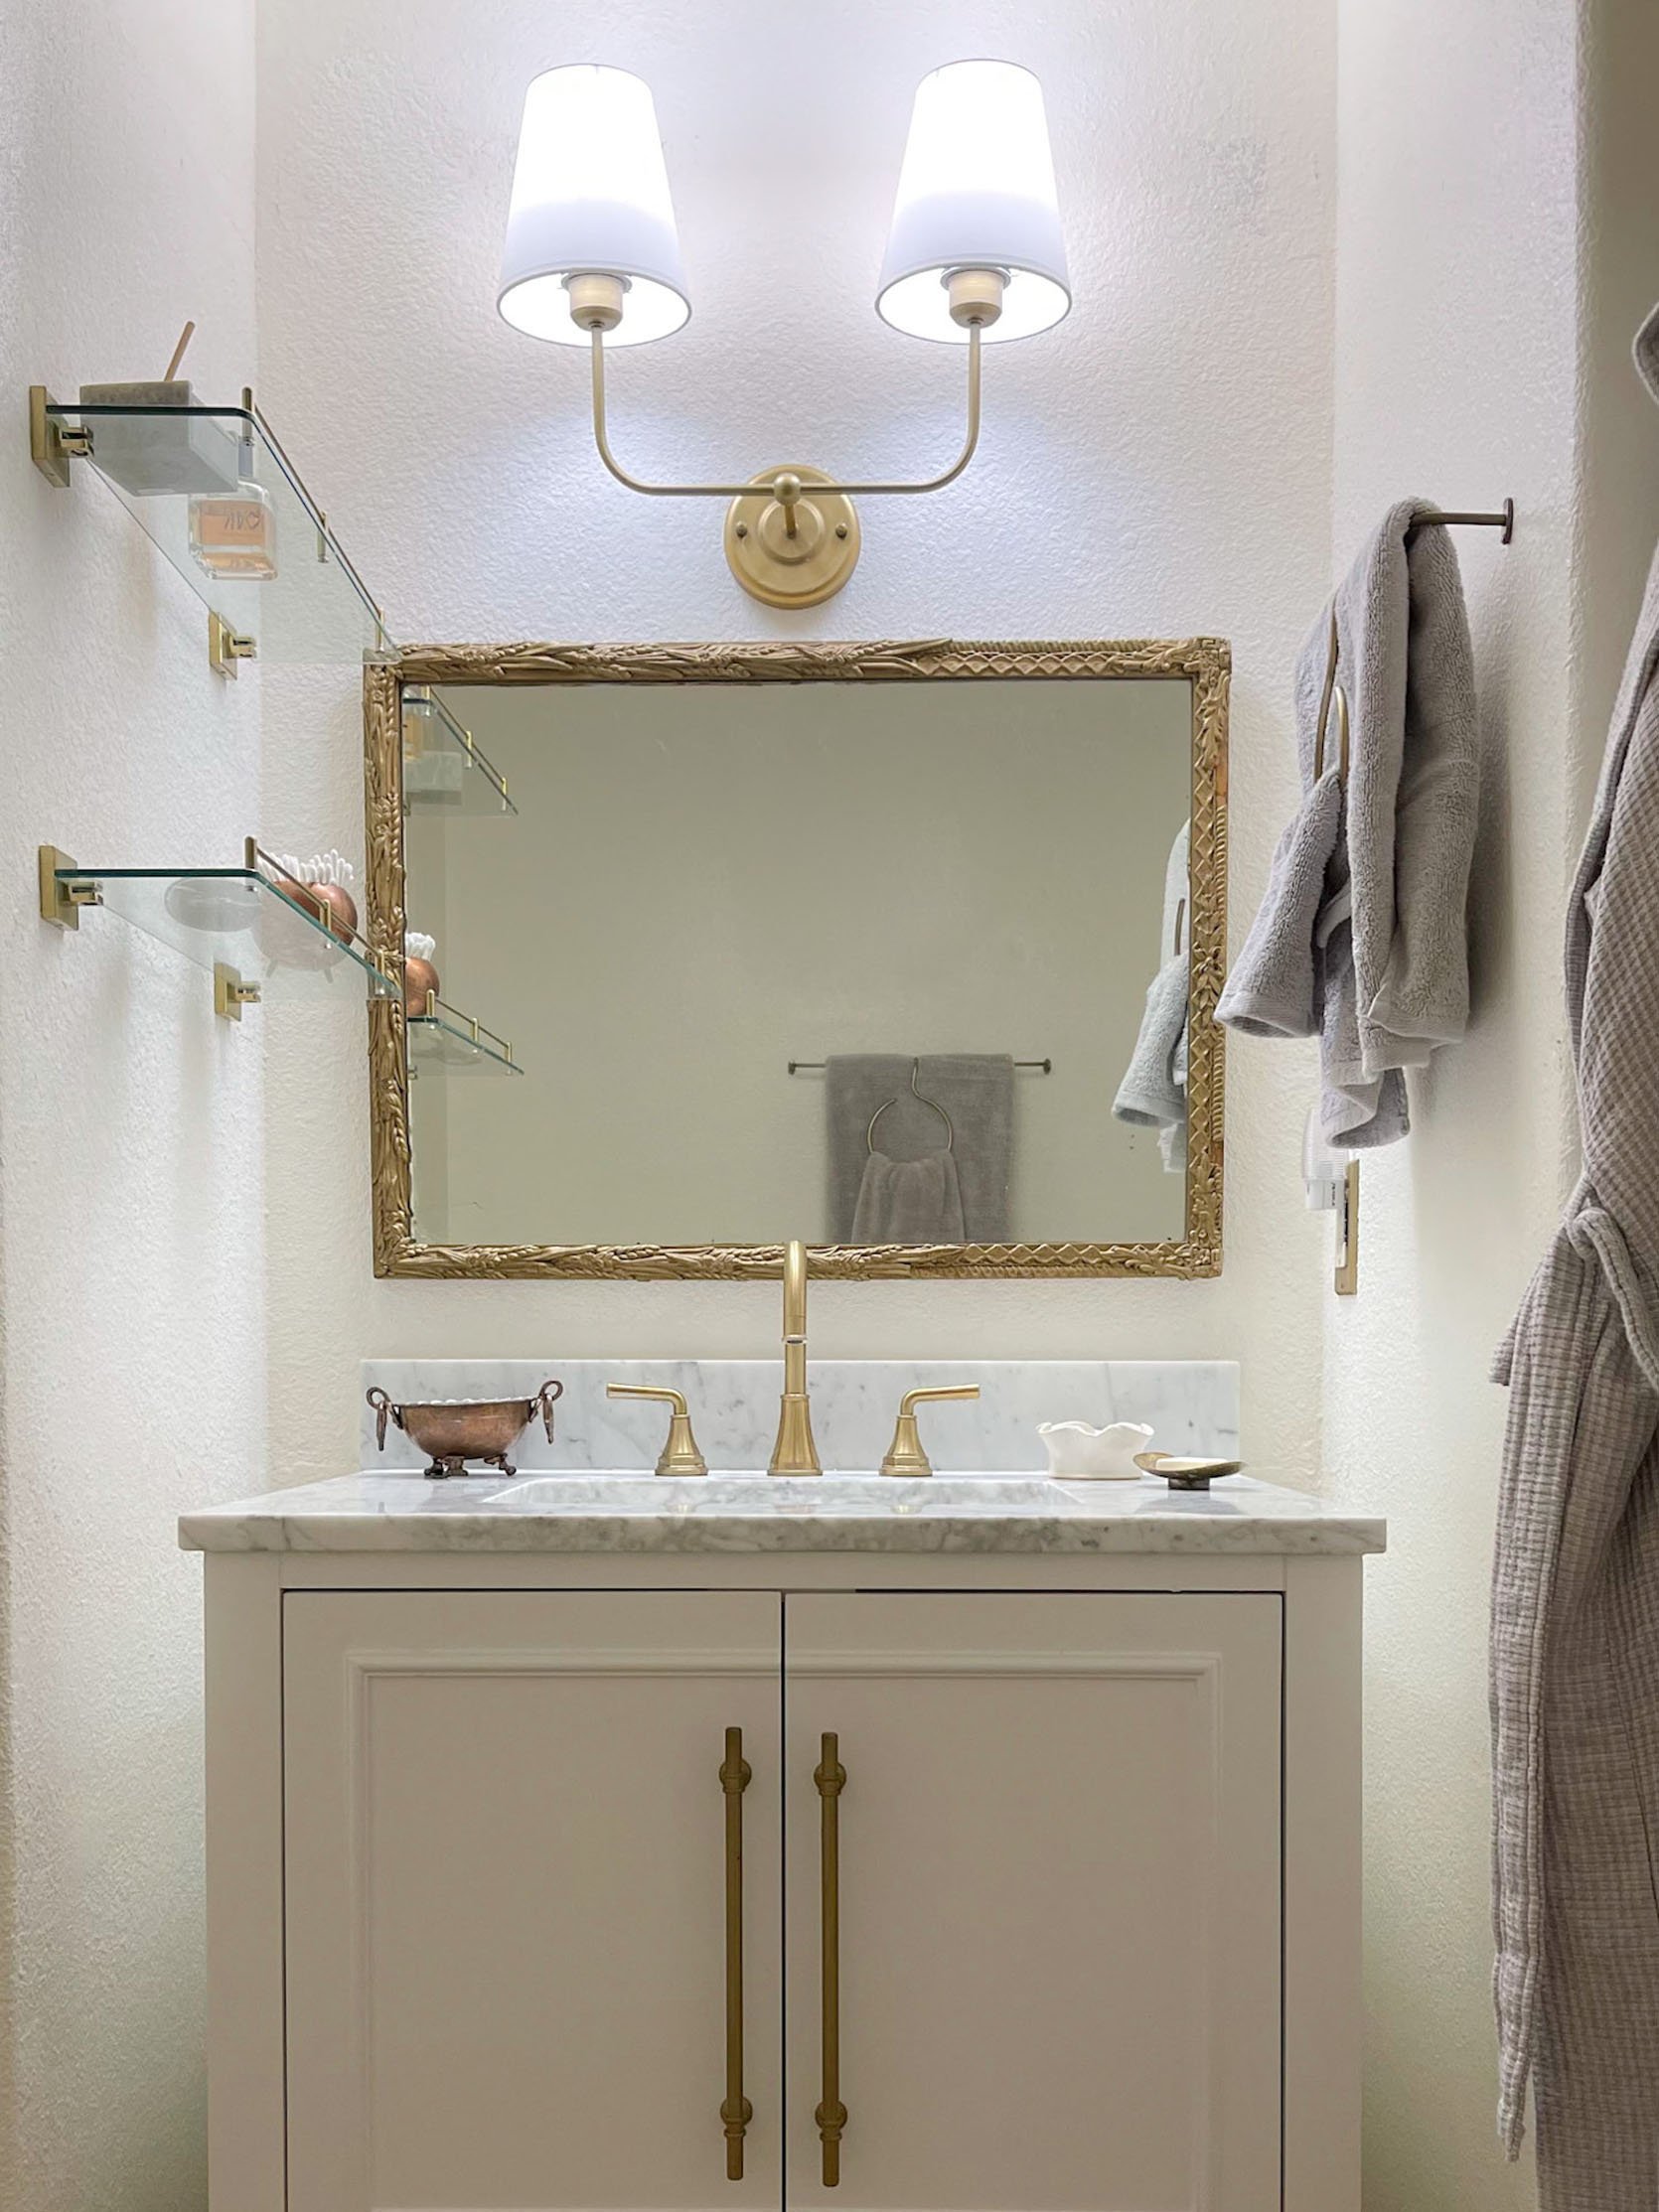
Wall Color | Sconce | Glass Shelves | Gold Mirror (vintage) | Antiqued Brass Outlet Covers | Faucet (similar) | Tissue Holder |
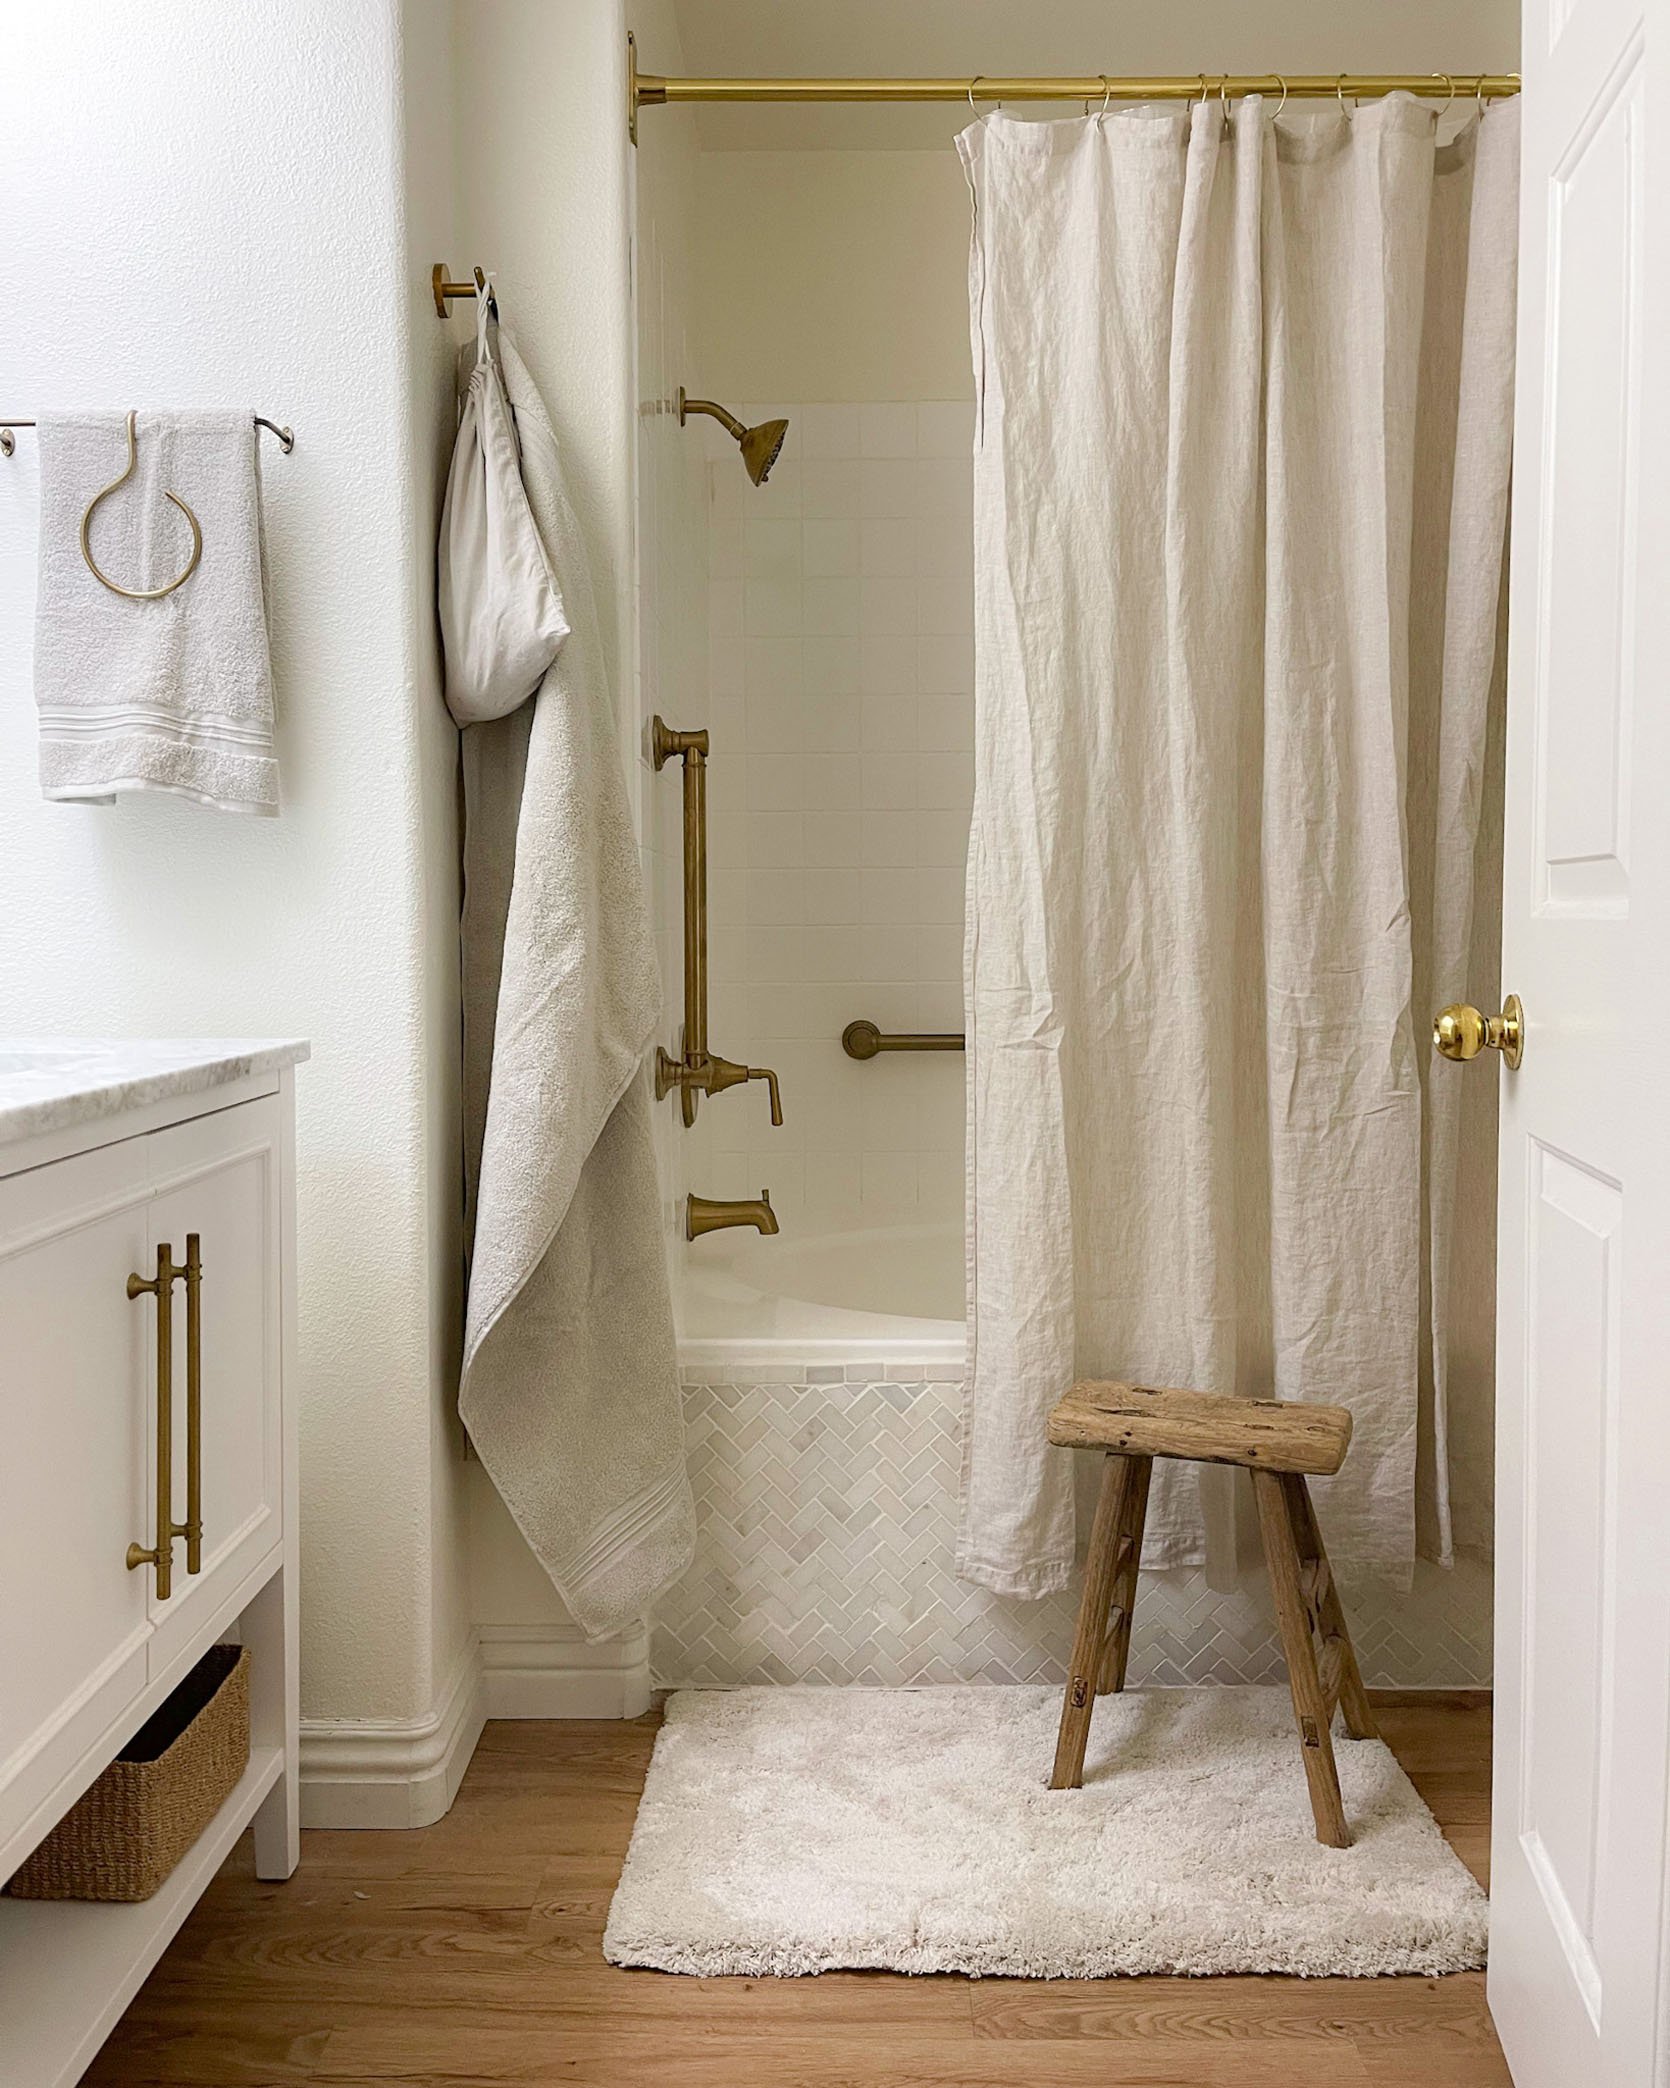
Gold Shower Rings | Towel Bar (unavailable) | Towel Ring (unavailable) | Shower Kit (similar) | 36″ Shower Grab Bar | 18″ Shower Grab Bar | Shower Curtain Rod | 30″ Shower Curtain Rod Ceiling Support | Herringbone Tile Sheets | Tile Grout | Wooden Stool
Fast forward to our condo and its bathtubs – they were in poor condition, and we wanted to avoid replacing both tubs entirely. We remembered our first apartment and decided to go the reglazing route. We had both bathtubs reglazed and swapped out the hardware. We researched and contacted a nearby bathtub reglazing expert and a plumber. The reglazing expert was able to reglaze both bathtubs within a couple of days and once he was done, the tubs looked brand new. The price of reglazing is a fraction of the cost you can expect for replacing a bathtub, but will leave you feeling like you have a new tub to soak in. Once the bathtubs had been reglazed we had the hardware in both baths swapped out by our plumber and put up new curtain rods. This transformed the two bathrooms into spaces we wouldn’t mind spending time in. Keeping a tenant in mind, we understand the value of having a clean place to bathe and our tenant to live in a place with bathrooms they feel comfortable using and relaxing in. This was yet another viral design update/video. I had no idea people would react this way to such a simple update. People loved the idea and shared with me that they’d be reaching out to their landlords requesting a bathtub reglaze. That said, we were able to get both bathtubs reglazed with just $300.
Upgraded/Replaced All Appliances

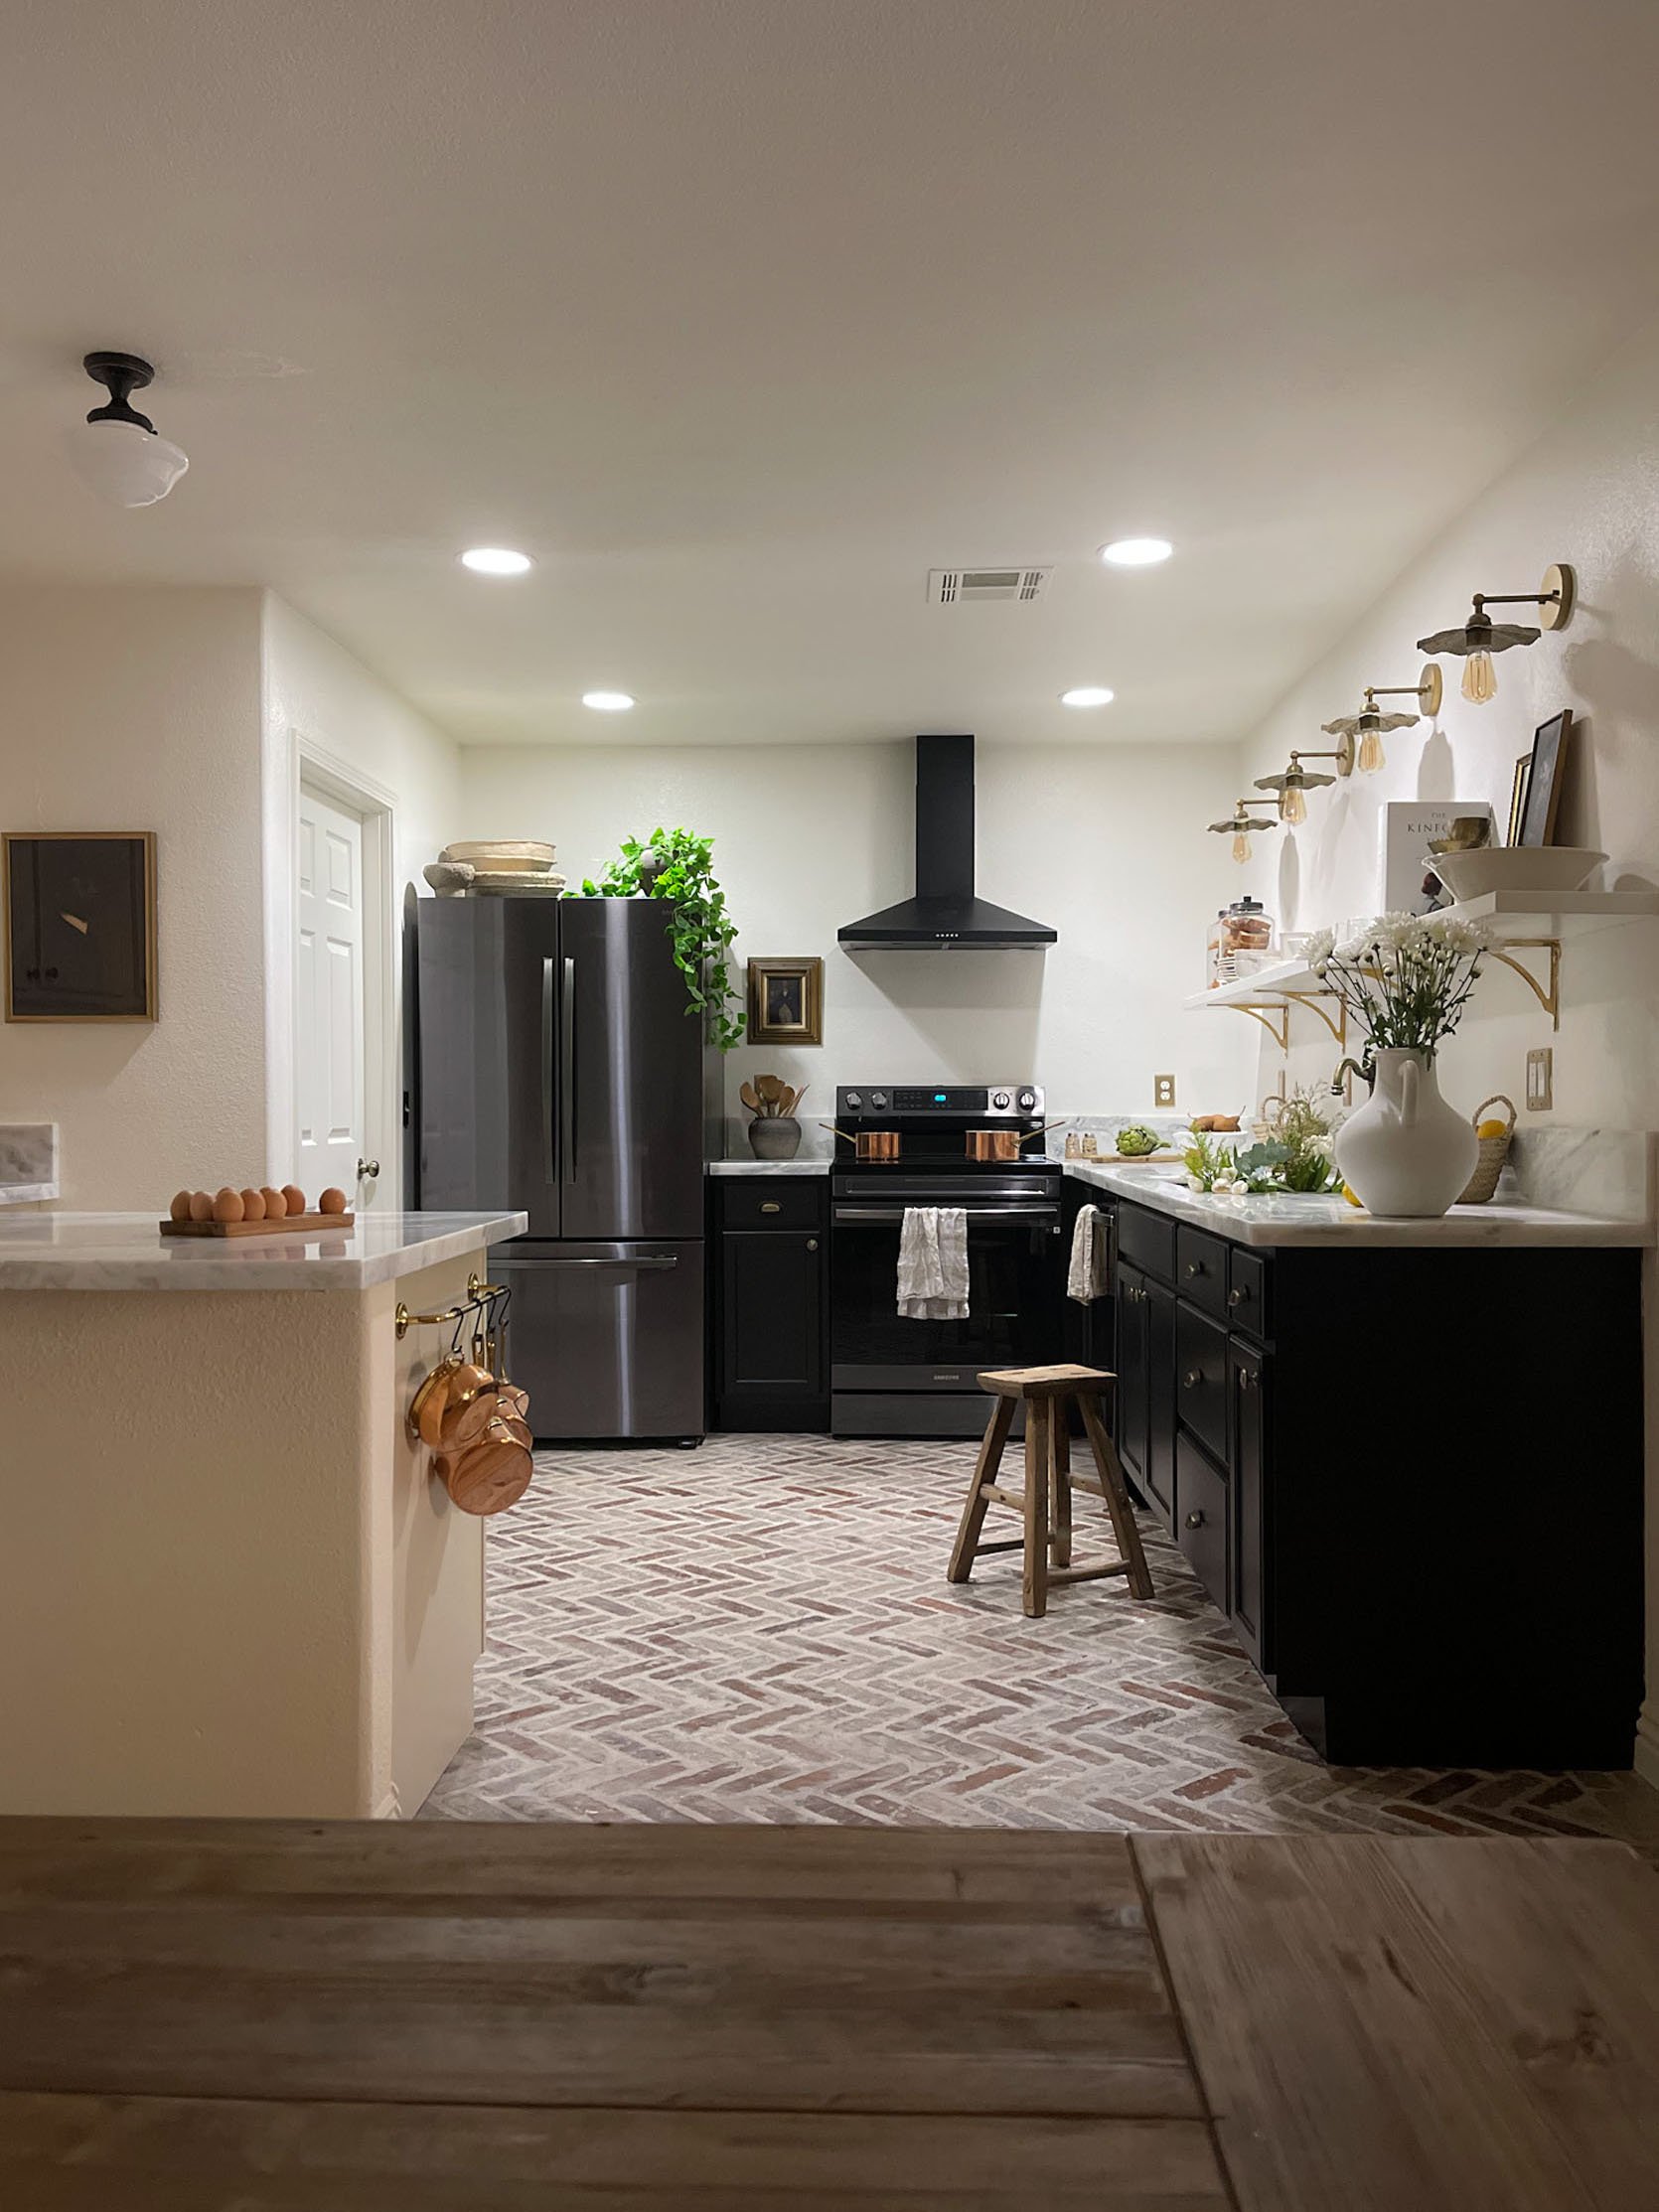
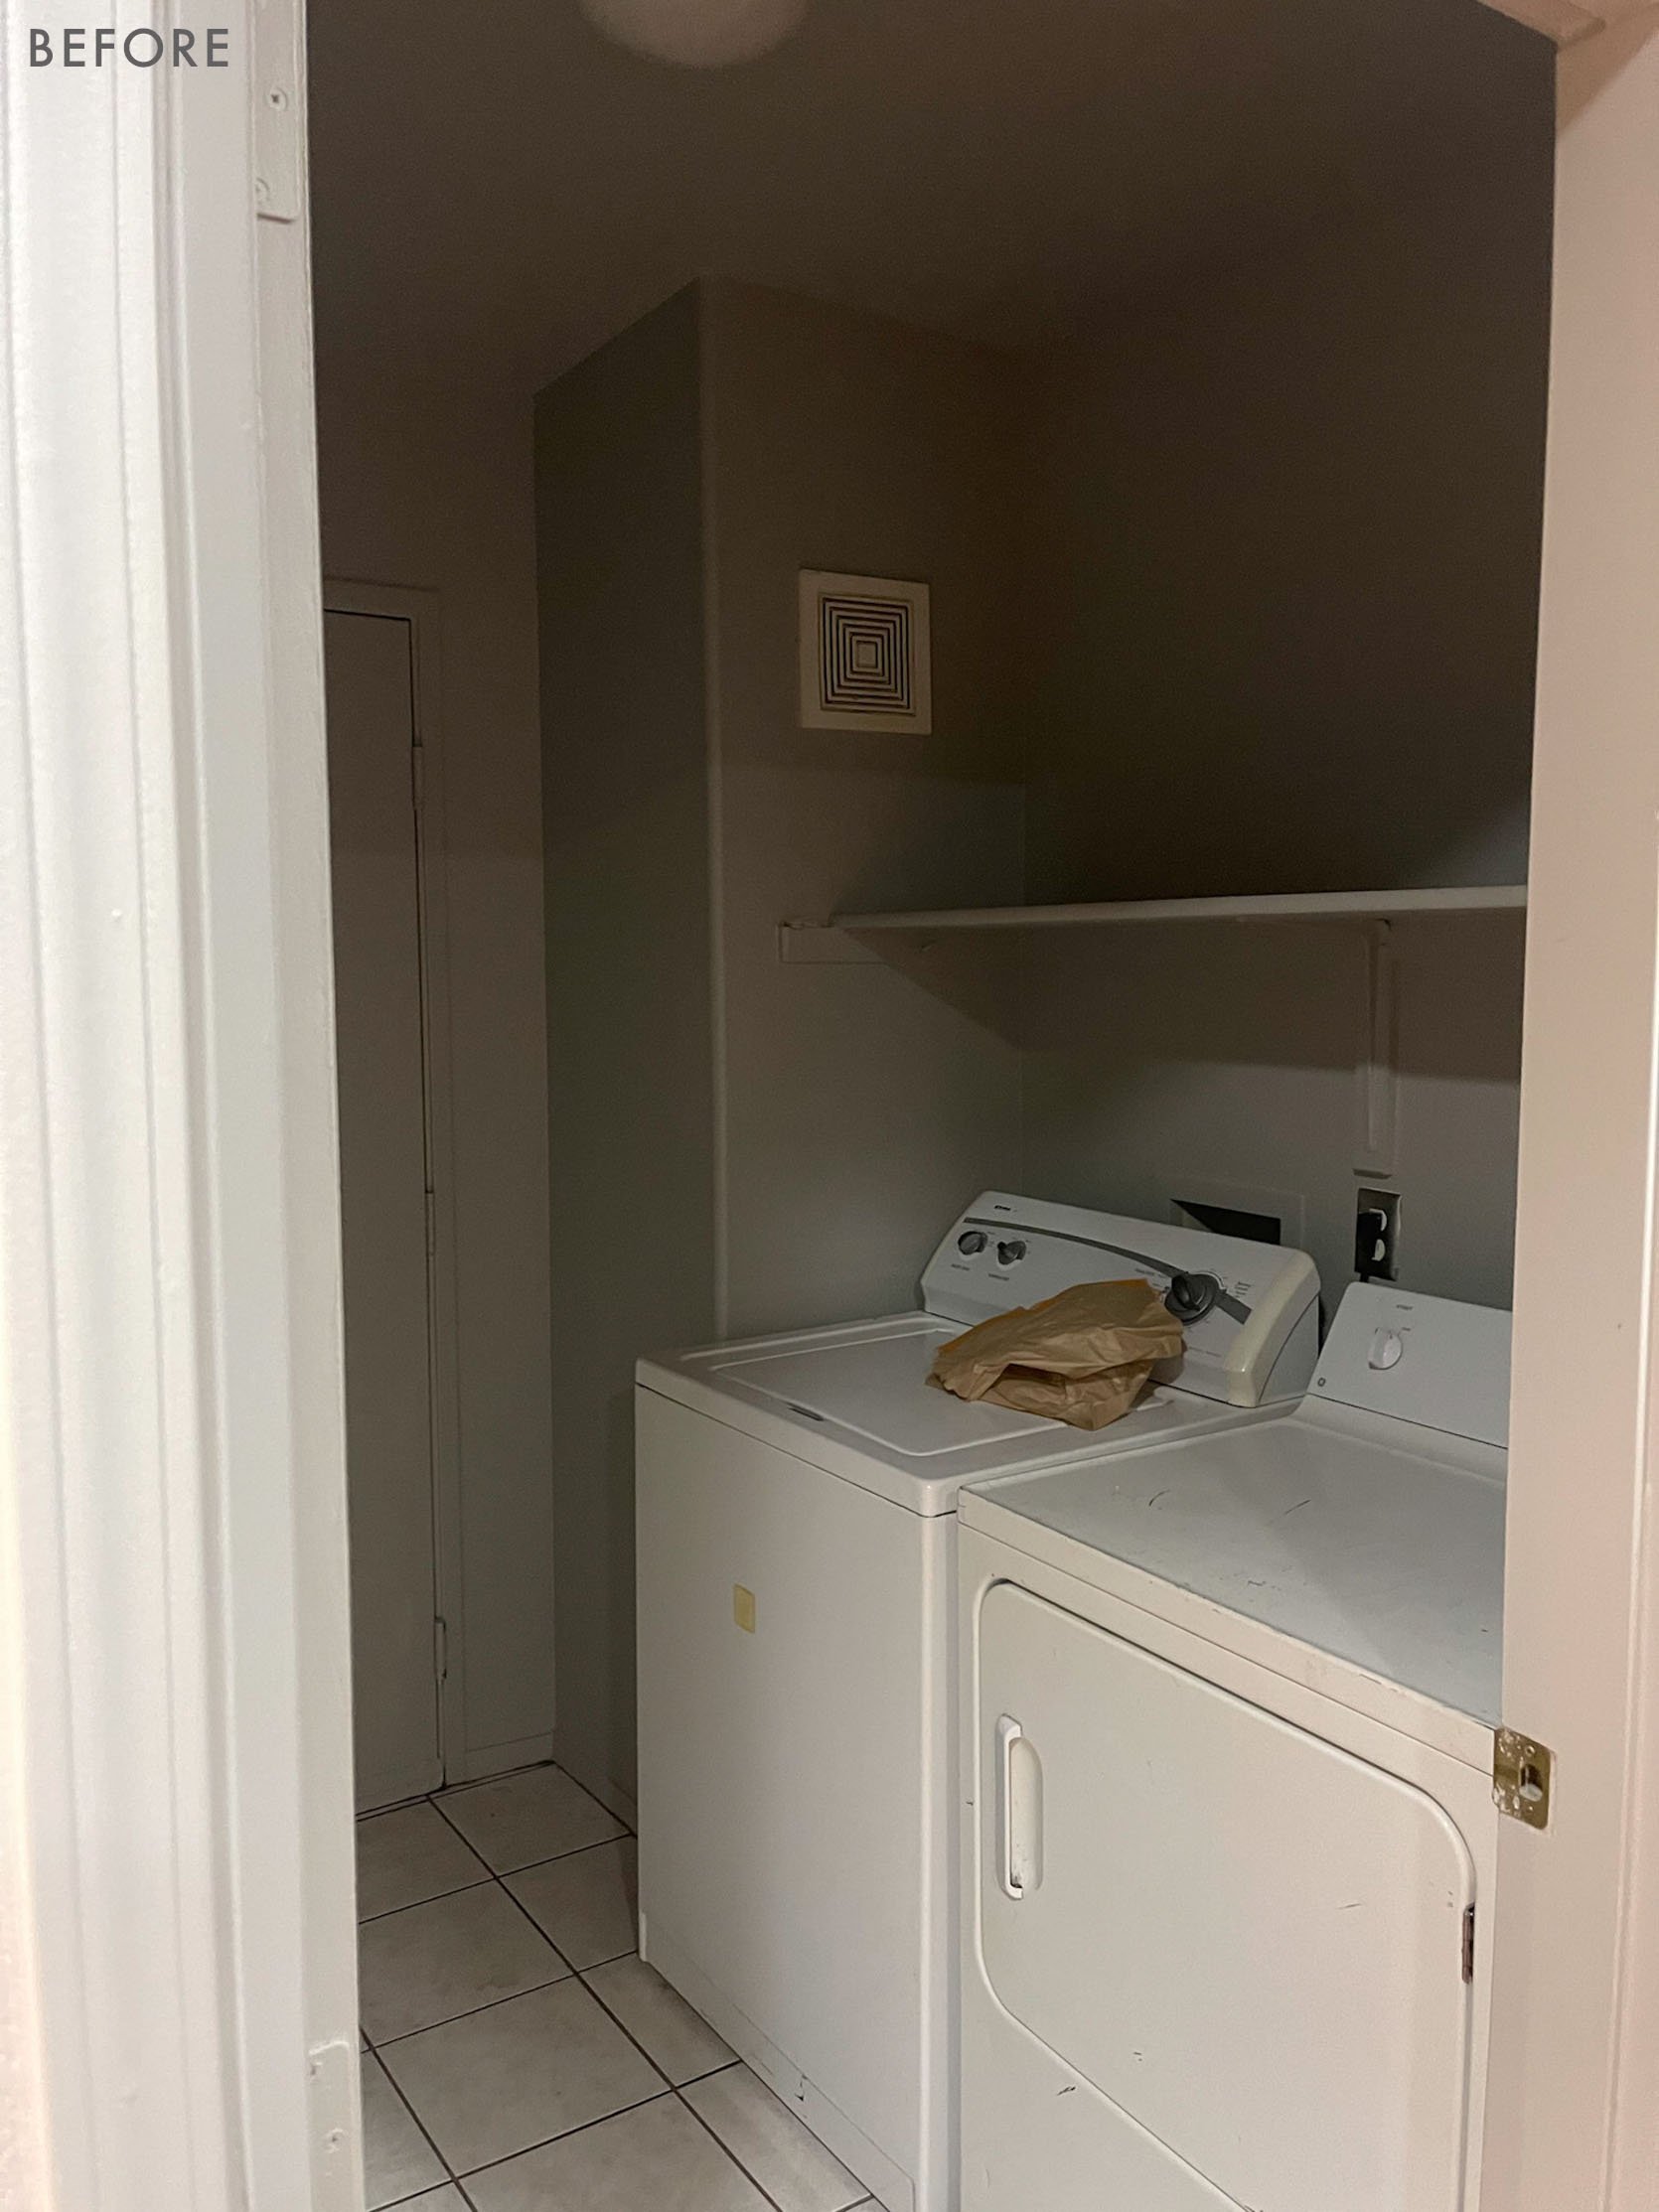
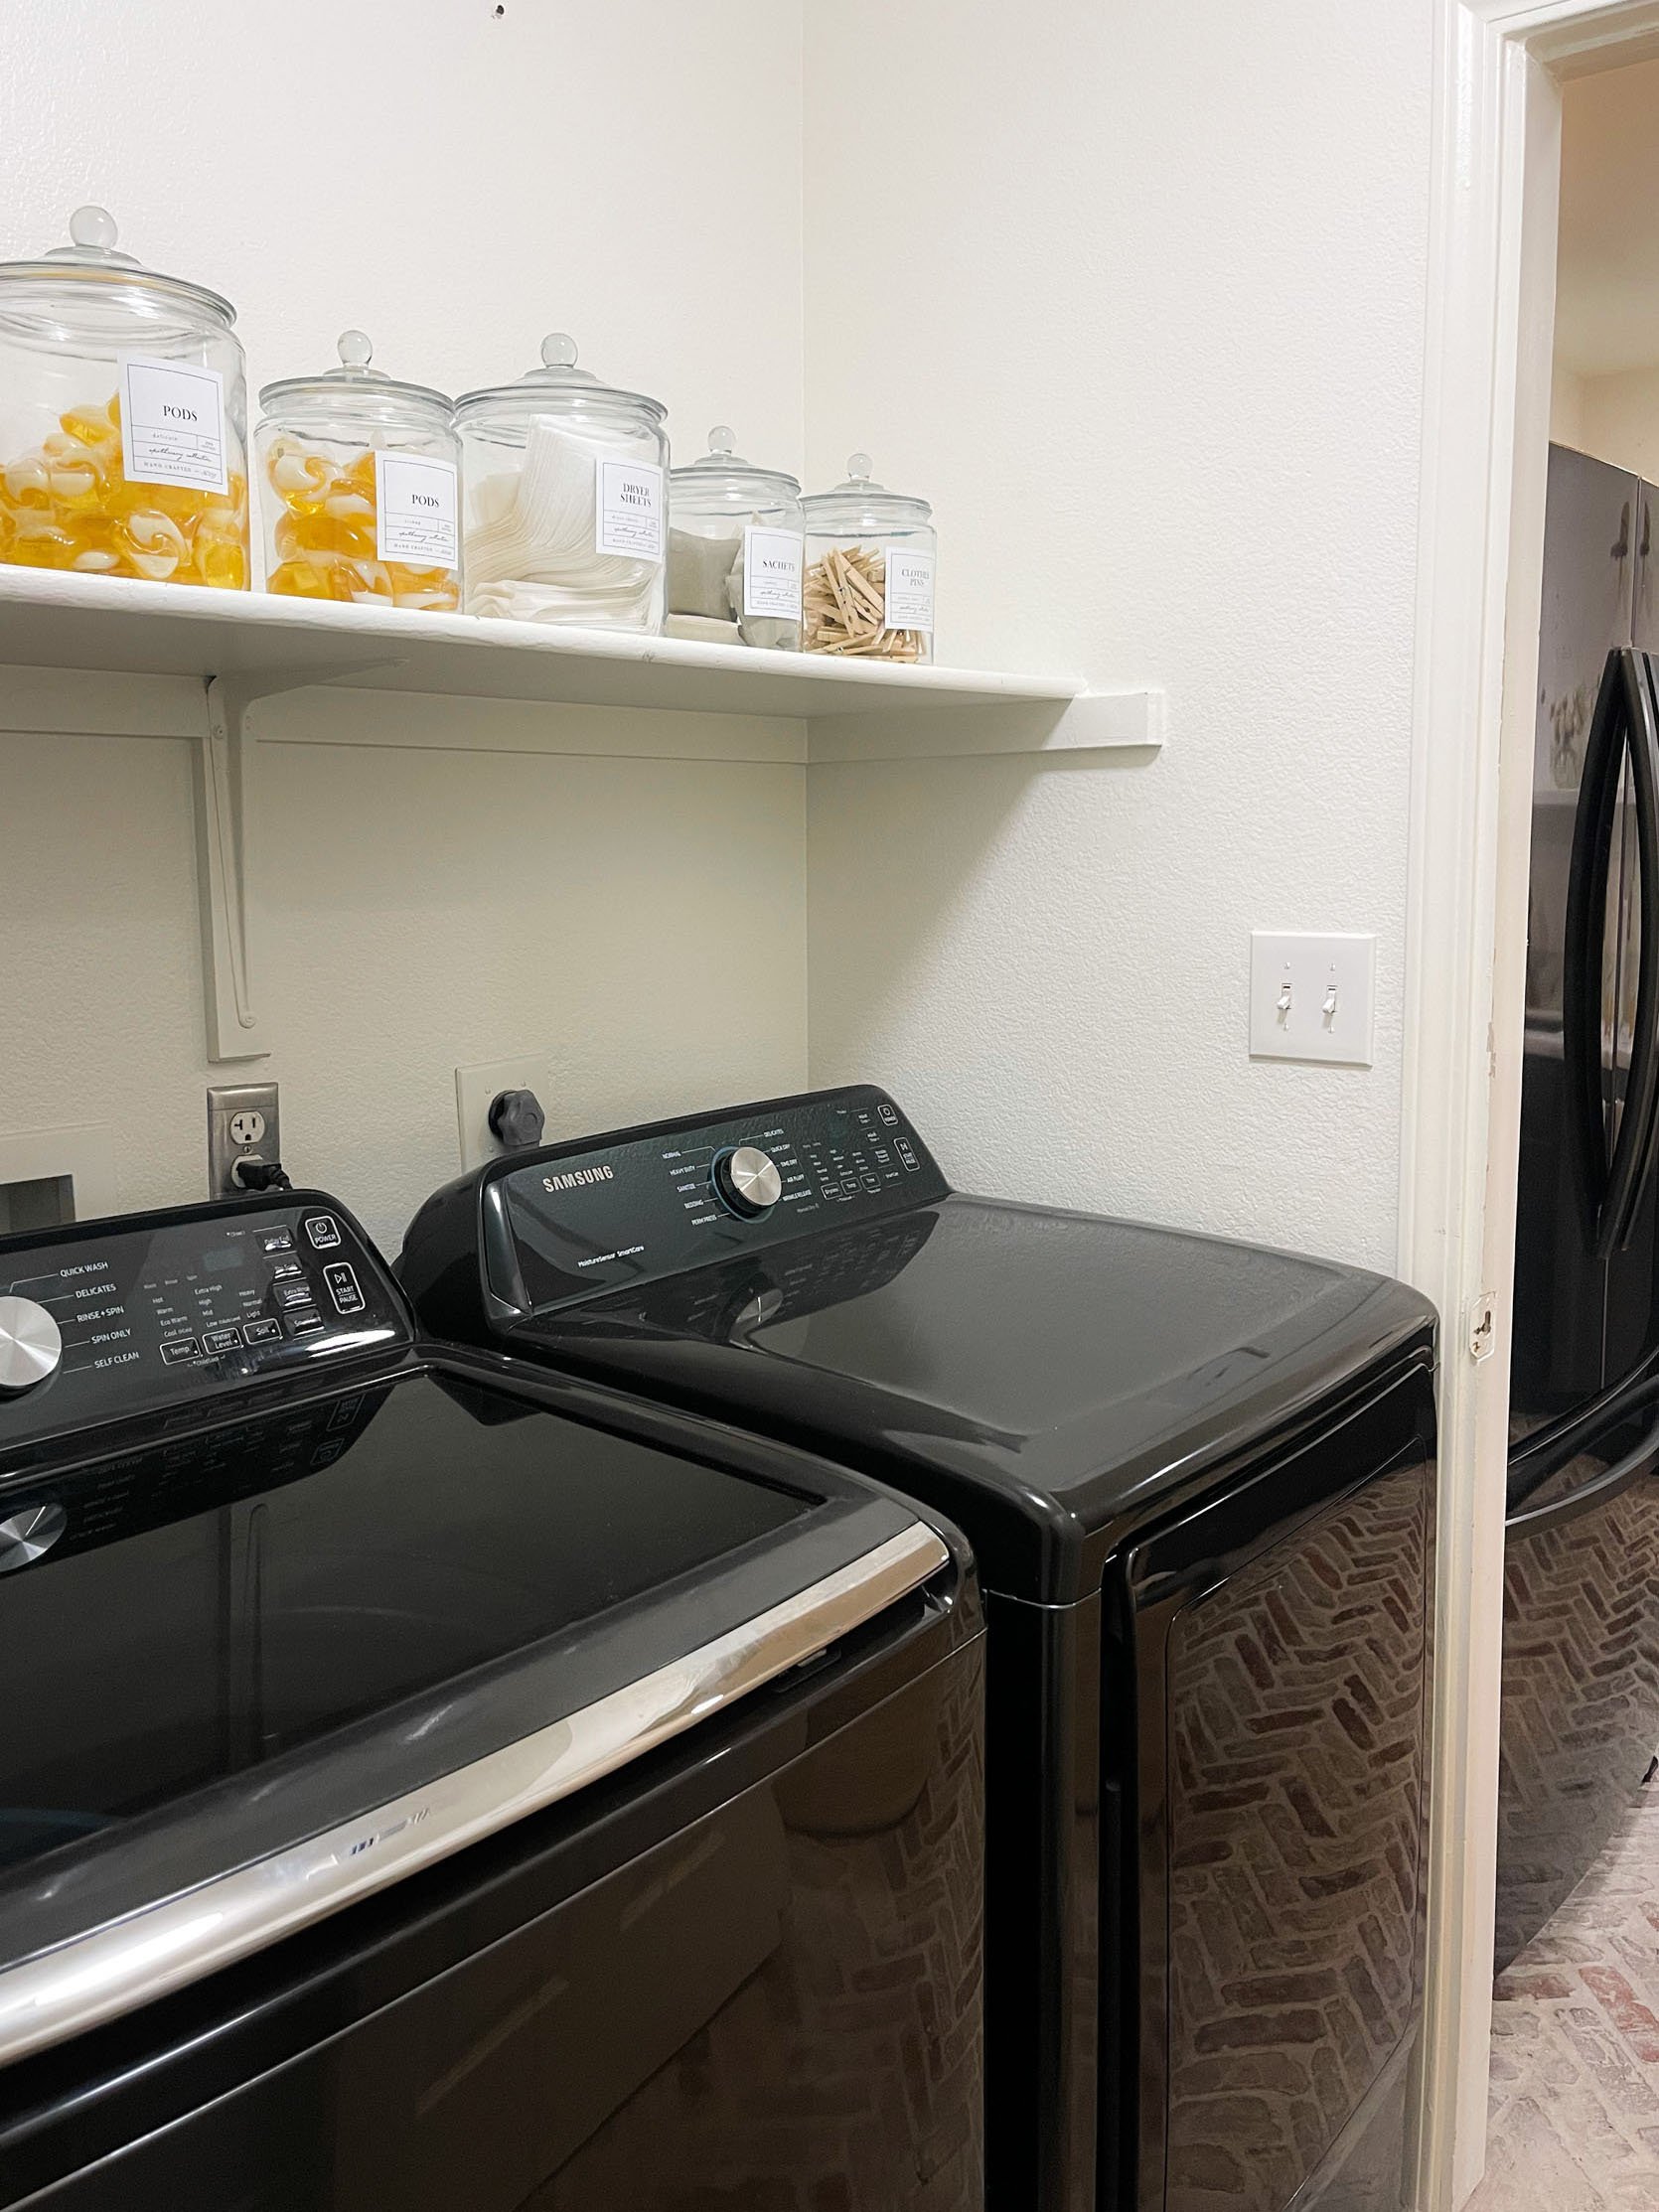
There were several reasons why we didn’t simply replace the appliances but upgraded them as well. We’ve lived in several apartments over the years and have always had the fortune of having either brand-new or moderately new/modern appliances. Having reliable appliances is something we’ve grown accustomed to and we want our tenants to experience having the same peace of mind. We decided to get a black and cyber gray Samsung bundle that would match the aesthetic of our kitchen and that was familiar to us. Besides the reliability that we’ve experienced with these appliances, we’ve found all the apartments we’ve lived in used the same ones. For this reason, we figured our tenant would very likely be used to them. Last, but not least, we wanted to purchase new appliances so we hopefully won’t have to get any maintenance or repairs on them for a while. My husband and I learned to look for appliances with bundle deals back when we purchased our first home, and these deals have come in handy for this home as well. We saved lots on bundling these items. We haven’t had any issues with the appliances (thank the good lord) so I would absolutely recommend these choices. The last thing any landlord would want is to constantly have to replace or have maintenance done on appliances.
After spending a little over a year in Nevada working on this place, we are beginning to make our return back to Southern California. I like to think that working on this home, during this time in our lives will make it a happier place to live. The memories we have with our son here; learning to walk, run, and talk, have truly been some of the sweetest. I’ve always been a believer that a home maintains the energy and happiness that occur in its walls, and I know that this place will feel that much more special because of the care that went into it.
With this chapter of our lives coming to a close, the next story I plan to share will be our reemergence into the SoCal home market landscape during our hunt for our next home. Stay tuned friends, and please wish us luck!
*Design and Photos by Ajai Guyot
THIS POST WAS ORIGINALLY PUBLISHED HERE.
