We made it almost to the end without big hiccups, but here we are and we get to learn (and share) some new things to avoid during your remodel. After talking to all the designer friends in my life I can tell you that no remodeling project goes perfectly. However, the good news is that every single project creates invaluable lessons, especially things to avoid that you can add to your remodeling experience. No grad program can help you avoid all the nuances that come with a remodel. So while learning on the job is painful, it’s just the way it works (easy for me to say as I’m not the homeowner this time – truly the more painful role to have).
The “Too Big” Hole For Wall-Mounted Faucets
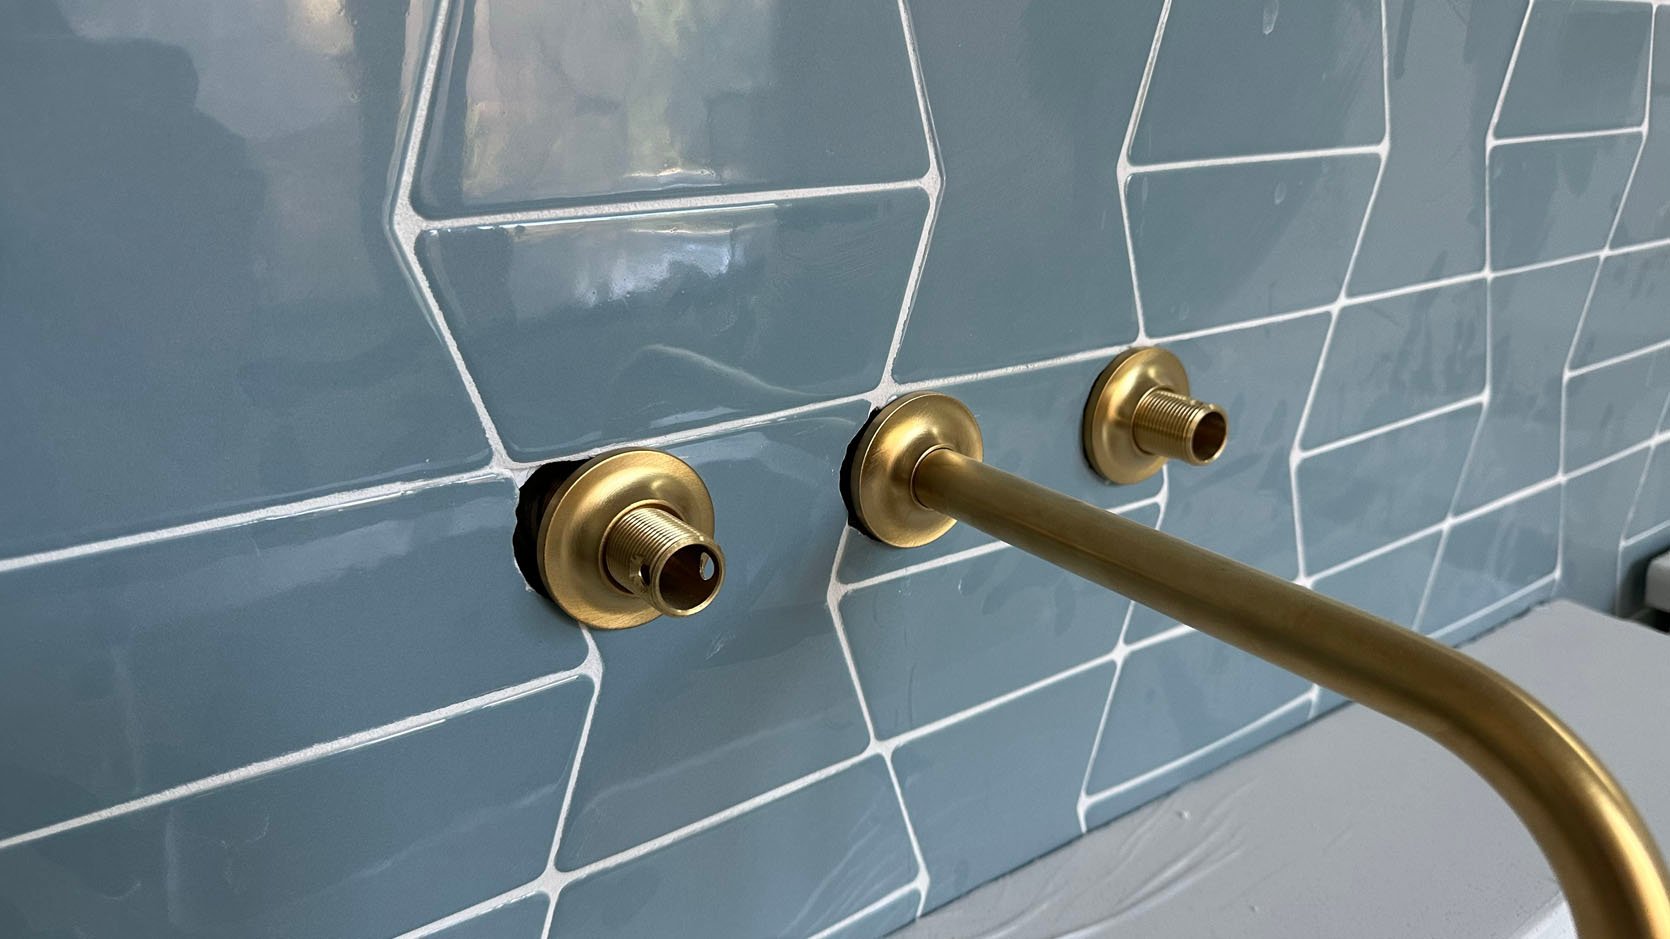
This is the first time this has happened to us. I’m not sure if the tile setter or the plumber drilled these holes. So while the holes are standard, the flanges to cover the holes of our faucets are much smaller. This is similar to the “too big J Box” hole issue that I’ve been spouting off about. Yes, a lot of wall mount faucets (and lighting) are “standard” which is what the plumber or tiler will assume, but triple-check the specs of the product before you make the hole, y’all. This is totally fixable but annoying as the tile installer has to pop off the tile, retile, re-grout, and hope that it looks seamless. Then the plumber can come back in and install the fixtures over top of the smaller hole.
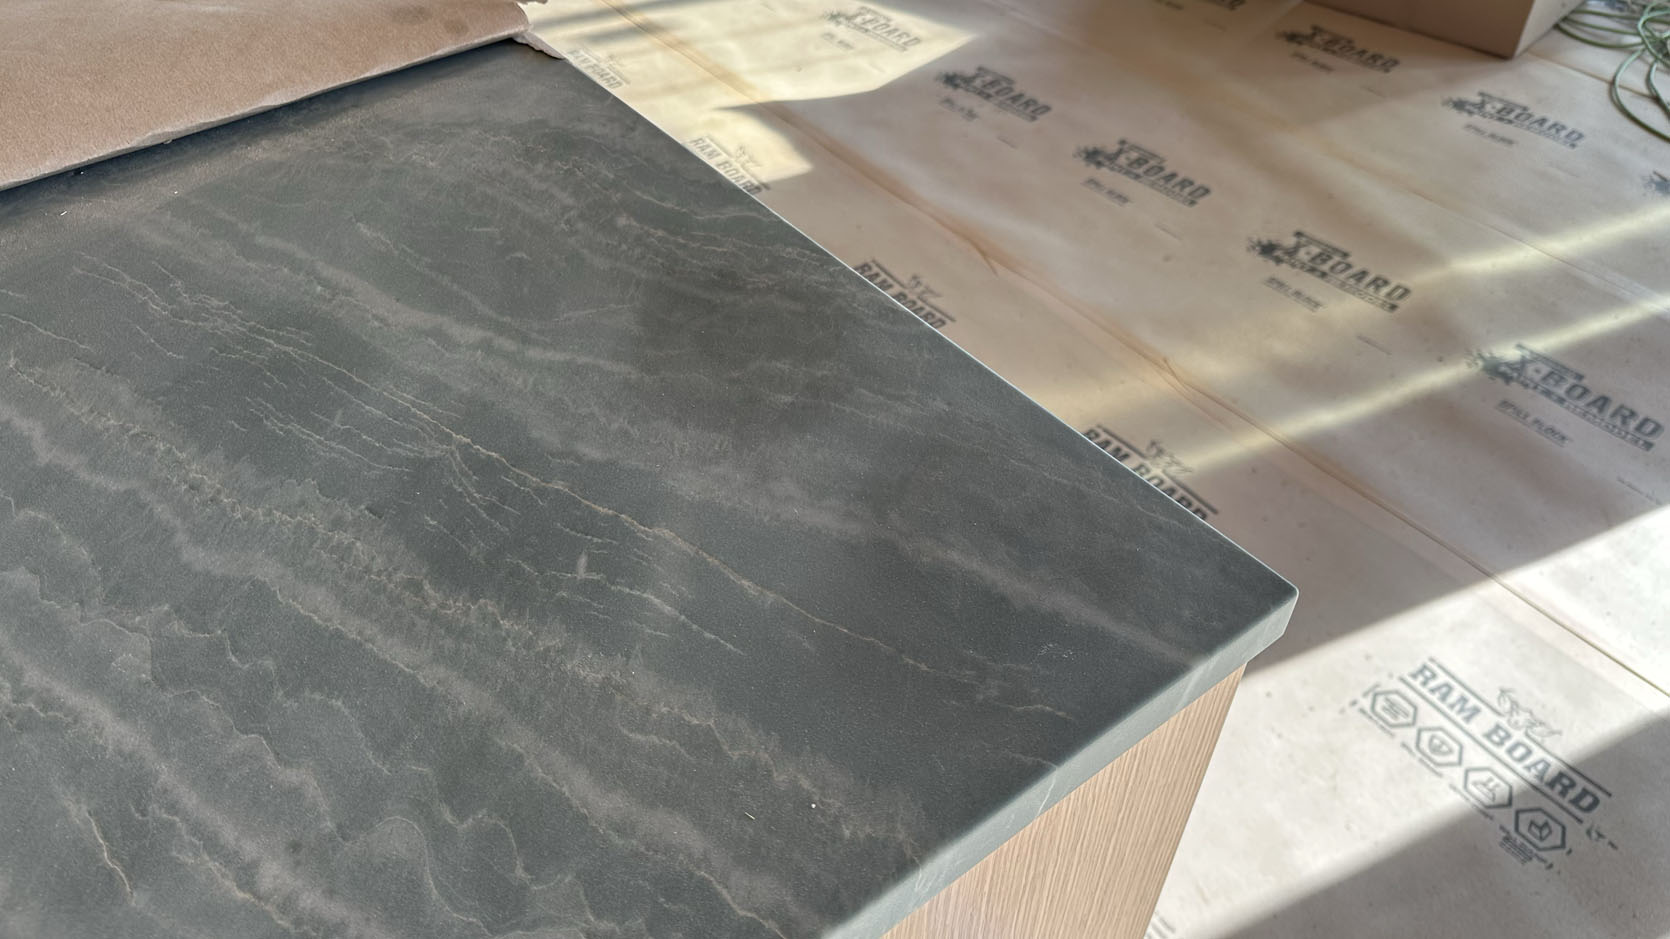
A Very Bad Stain On The Natural Stone Island Top
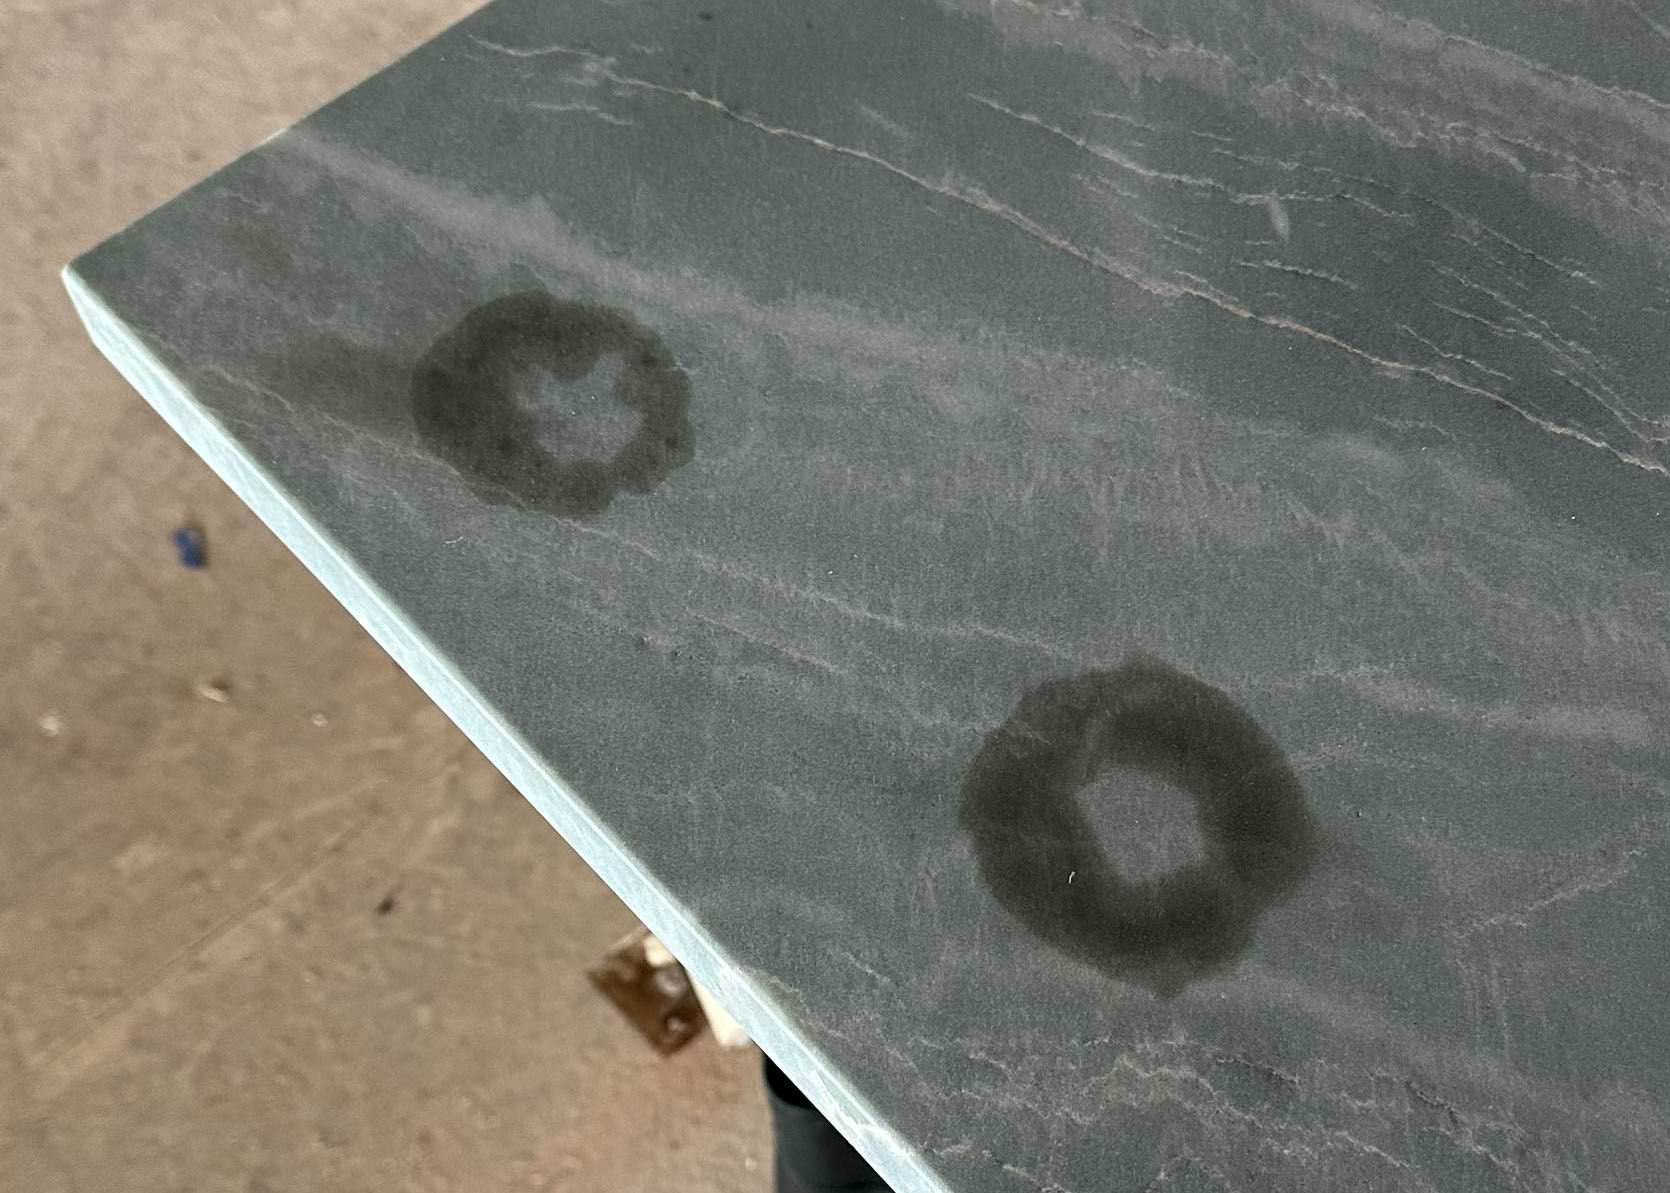
OOF. I convinced my brother to buy beautiful slabs of natural stone for the kitchen instead of using engineered stone. “It will be almost as durable!” she said. We found this incredible green quartzite. Quartzite is historically much less porous than marble (more similar to granite). We were told that leathering it would be the most durable and ensure that you’d never see a stain, etch, etc (no guarantees, but it was their opinion based on experience). GREAT! And then they installed the stone, it looked stunning. Well, that Friday someone put two cups of something on it, and whatever it was bled into the stone over the weekend. And y’all the rings were INTENSE – two huge circles. We assumed they were sealed so then I was panicking that they were in fact sealed and just extremely porous and easy to stain regardless. Ken/Katie were very adamant that they couldn’t live with stone that stained or etched easily. And no one could confirm if the stone was sealed or not. So Ken got a small slab scrap from them that was 1/2 sealed, 1/2 unsealed and he sampled many basic condiments on it to see how the stone would react.
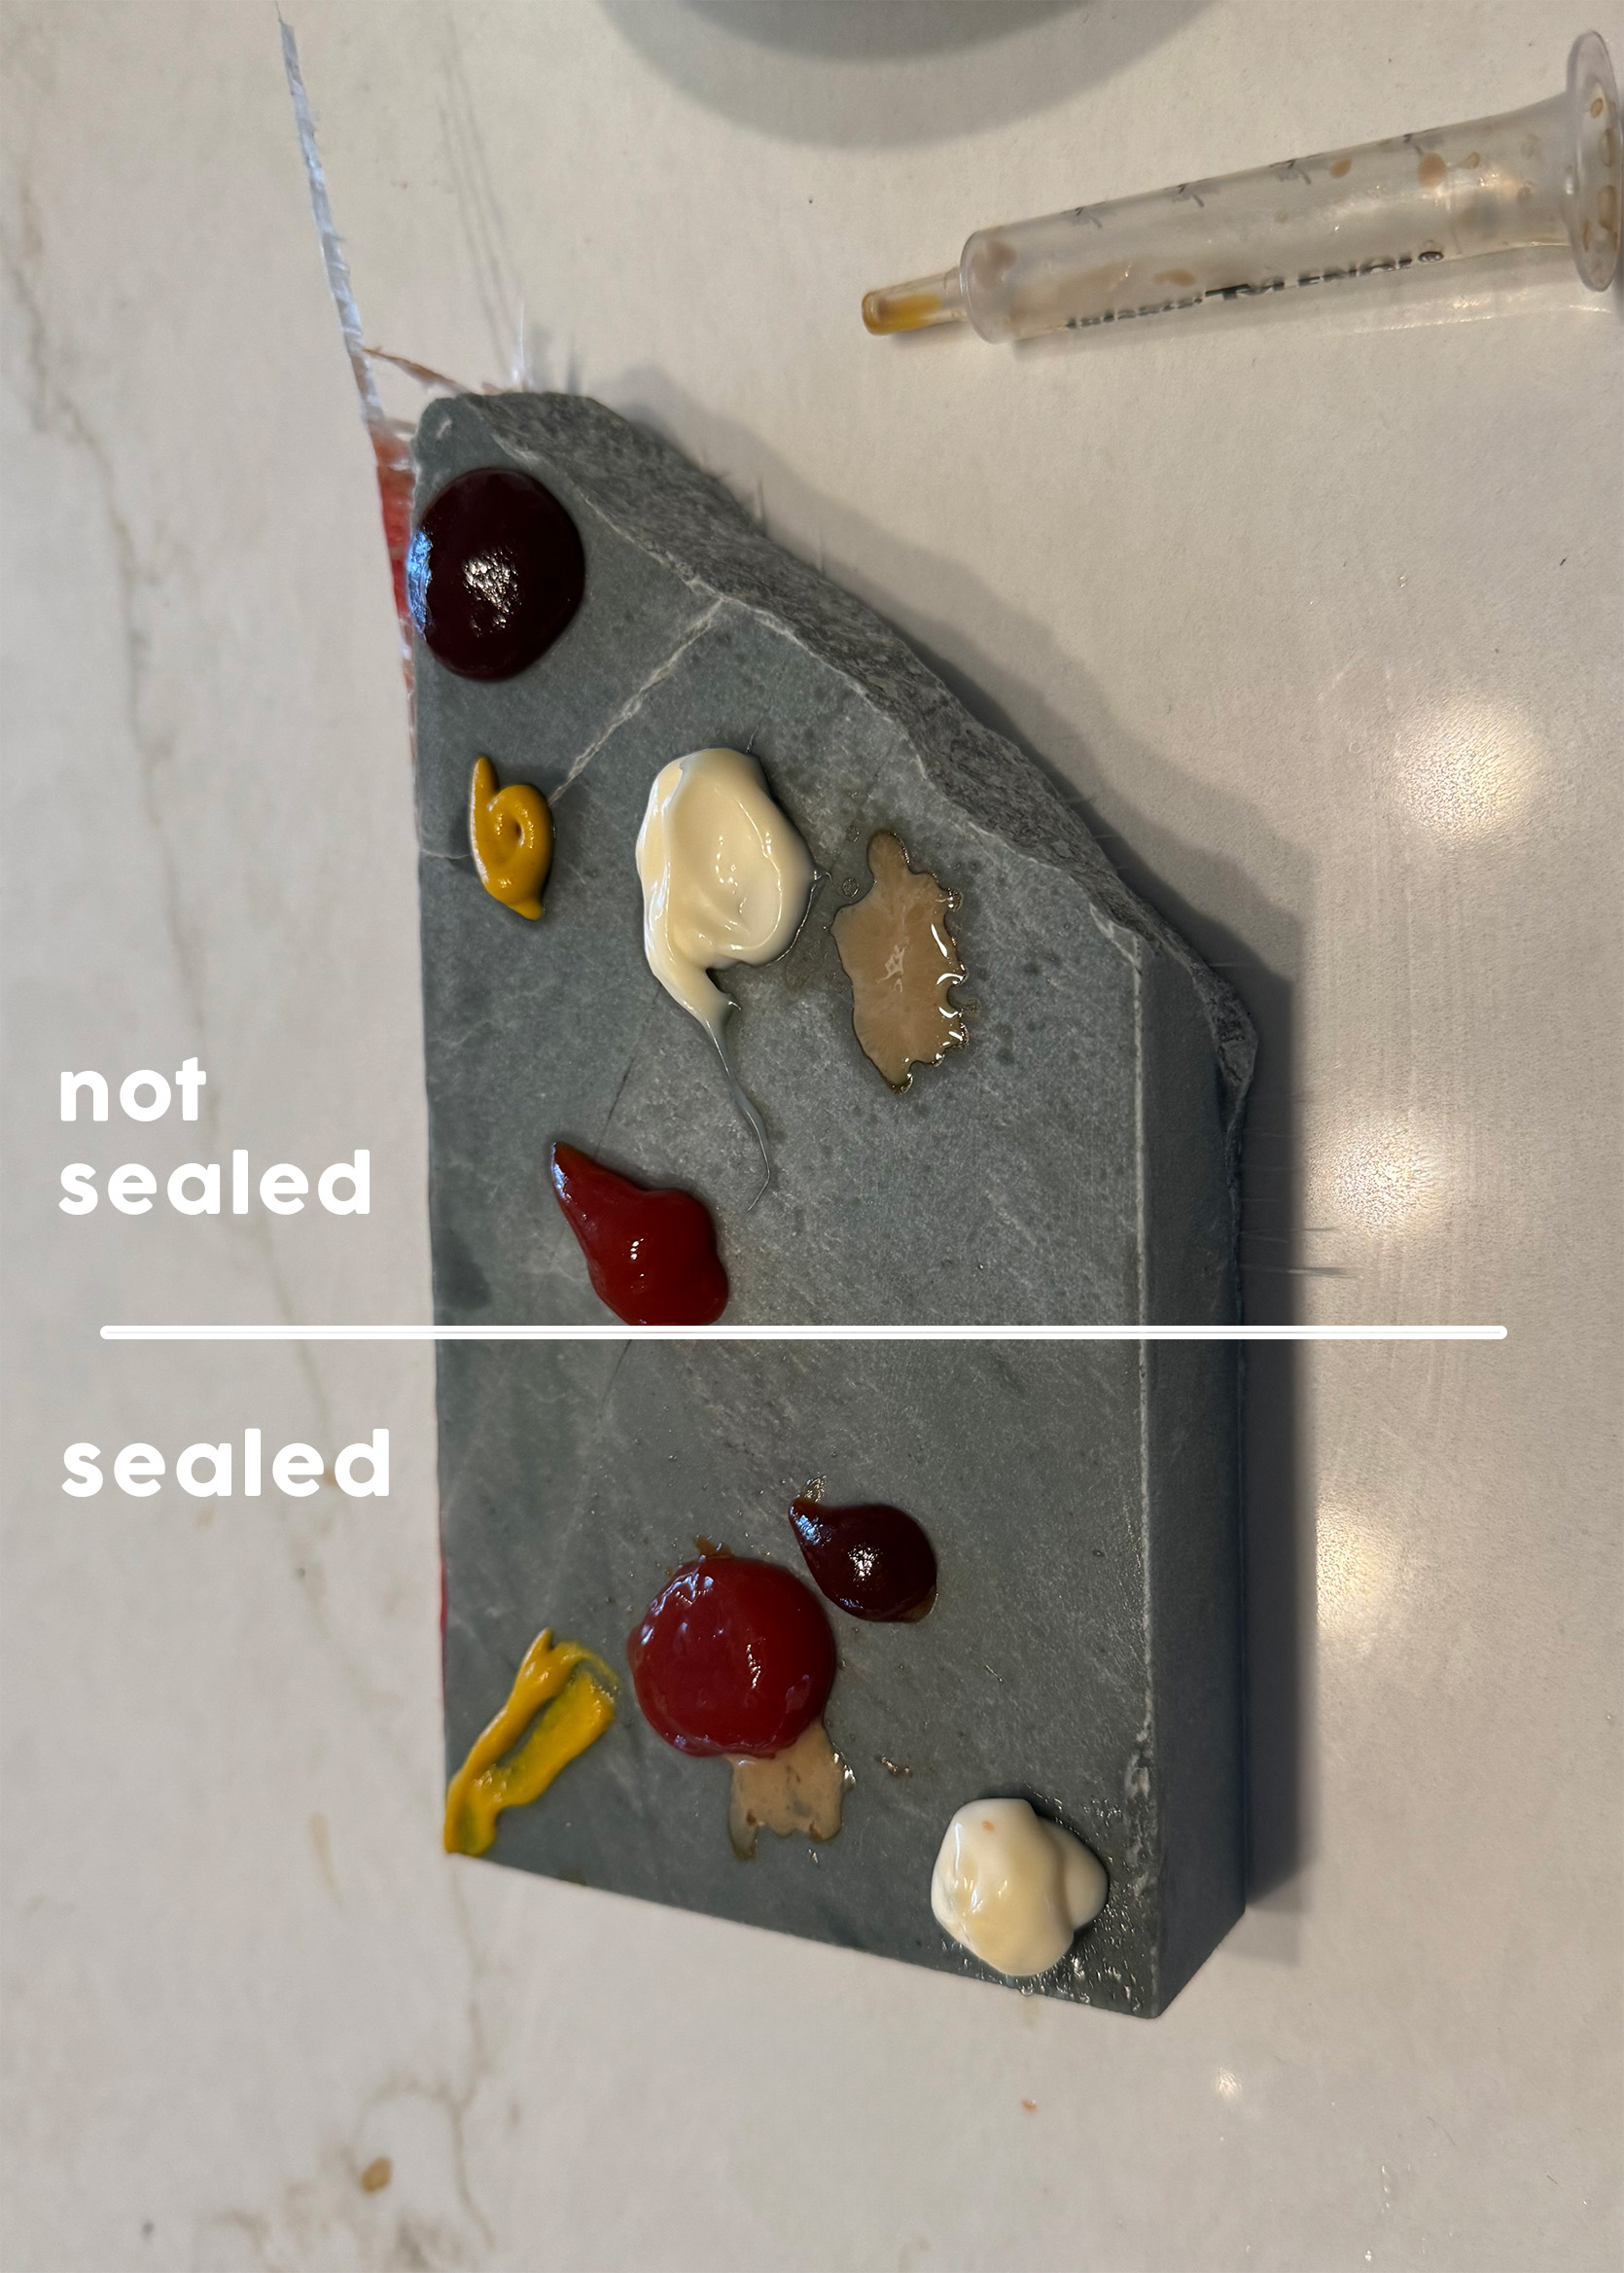
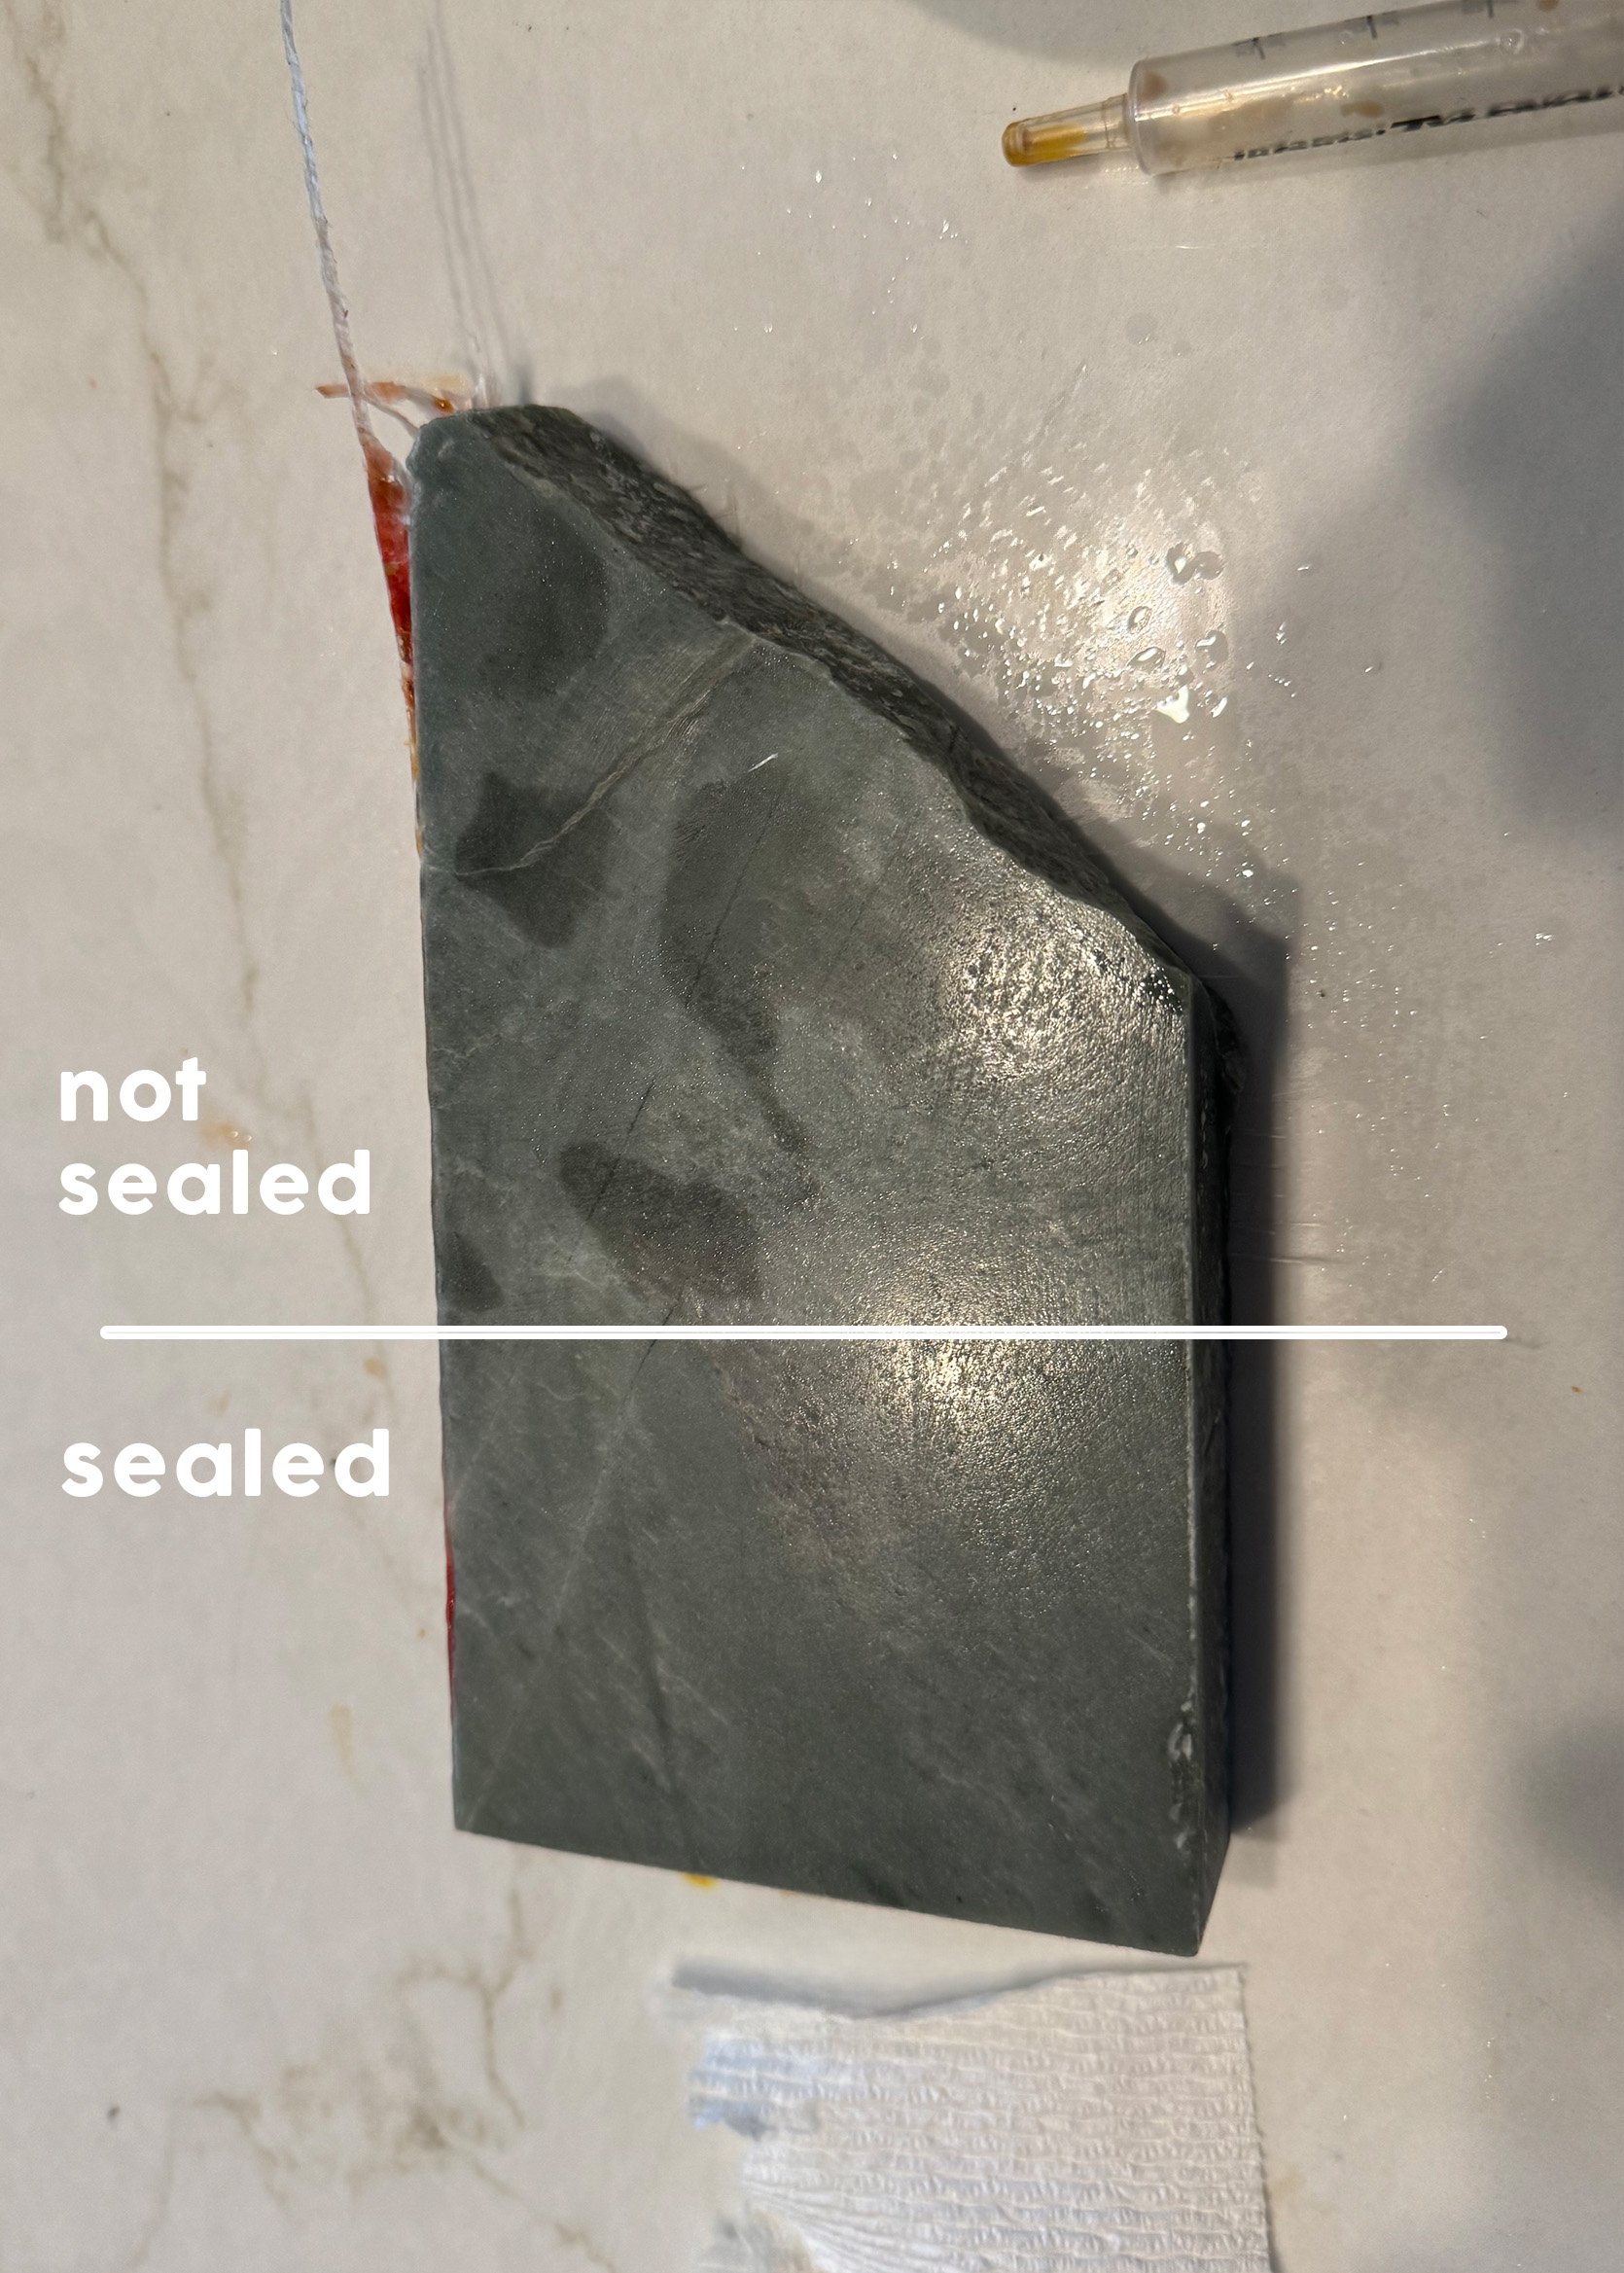
He waited 40 minutes before wiping it off. It all came off on the sealed side (all stained on the non-sealed side). THANK GOD. Worst case scenario was that the stone, which I made them pick, is actually super porous and if so we’d have to essentially rip it all out and replace with one that wasn’t. So once we realized that the sealed part of it really was highly effective at not being porous we were relieved. We had the rest of the countertops (the perimeter) sealed so that no one could accidentally set anything on it.
I hate playing the blame game and generally try not to but this could have been a real expensive problem to fix. Our stone fabricators came out and tried to suck out the stain with some sort of vacuum and we are currently in the process of getting it out (thank god). Everyone feels hopeful (they need to come back one more time), but meanwhile, we have a backup slab on hold and are really hoping not to have to fabricate another island countertop. But the point is – make sure that they seal BEFORE leaving the fabricators, seal immediately, or cover. And yes, we think we know who set the drinks on it, but no one is fessing up so we just have to move forward, hope that the stain gets out, and never ever allow another unsealed stone into a house project …
Not Specifying Drawer Cabinet Function
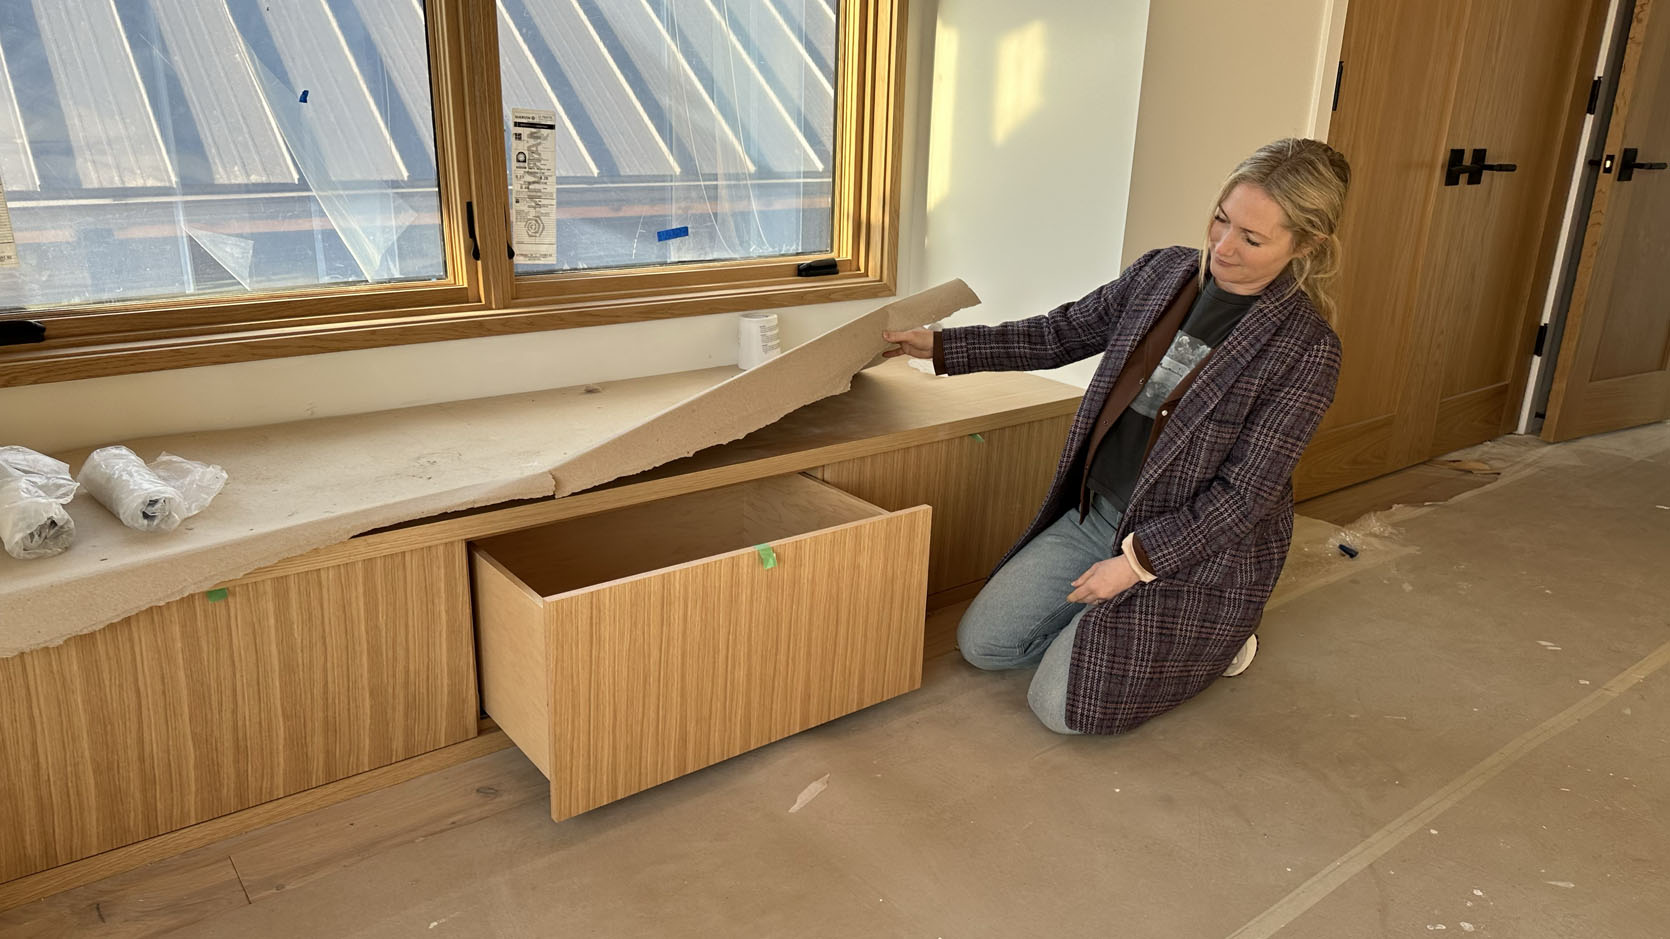
This house has a TON of benches, all with drawer storage (it’s comical how much storage this house has TBH). But we didn’t want hardware on them – we wanted them to look more streamlined and seamless (so they looked more like wooden benches, and less like functional storage. But that didn’t get clearly translated to the cabinet maker, at least not in any writing that I could find (again, not sure whose responsibility it was to do this – Architect? Interior designers? Contractor? Homeowner?). So all the drawers were installed and when we mentioned this to the cabinet guy he said he could come on site and switch them out to be the type of drawers to push and it pops out but it would take him about 30 minutes per drawer and they have about 18 drawers (so essentially 2 days). We aren’t sure what he’s going to charge for it. At one point when we were talking about it, we were given the impression that this was an easy switch because it was super easy to do for cabinets, but drawers are more of a thing and they would need to know the no-hardware mechanism ideally before leaving the shop.
The funny thing is that sometimes even putting everything in writing doesn’t work. I think it’s the nature of house building. I have found that so many contractors and subs are working so fast to get stuff done on a million projects that even if it’s clearly written somewhere, digitally, they might miss it. It’s not always a lack of communication, but there is so much happening that it’s hard to keep things straight and none of these guys work on computers a lot and finding old text threads is hard. The best you can do (which we have this whole time) is a walk-through with the subs, then a labeling of things on site, taping up drawings with notes, etc.
Happy remodeling and hope these will save some of you some future headaches:) xx
Opening Image Credits: Photo by Kaitlin Green
THIS POST WAS ORIGINALLY PUBLISHED HERE.
